Mounts Bay
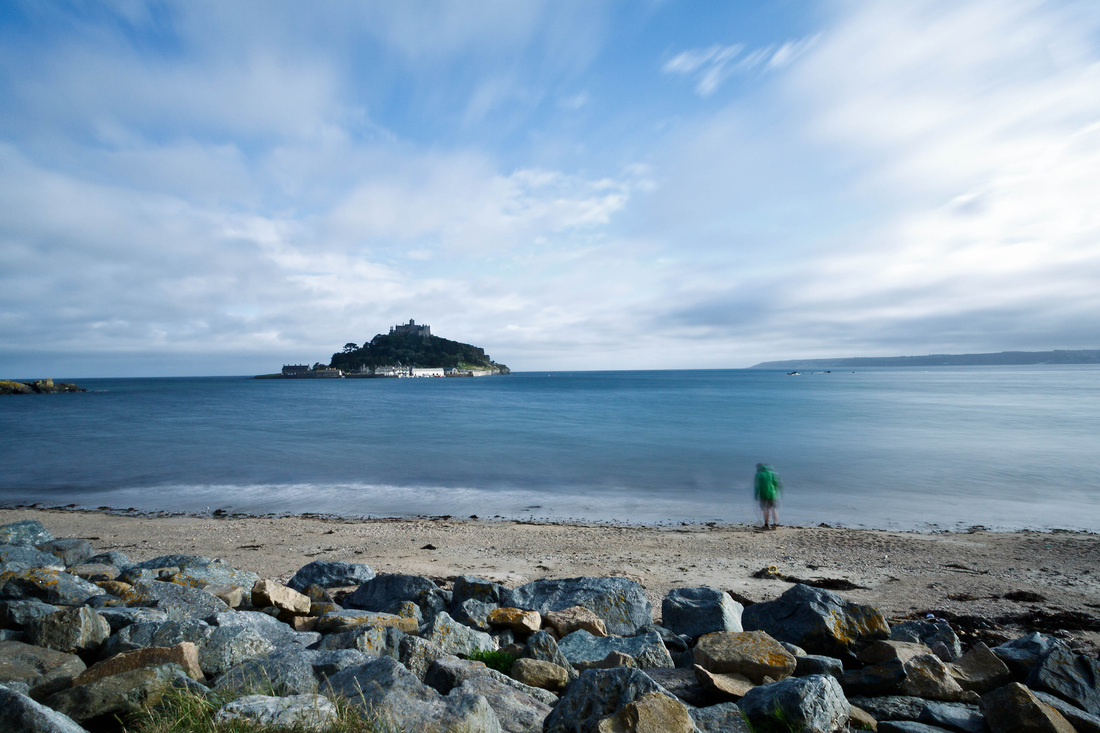
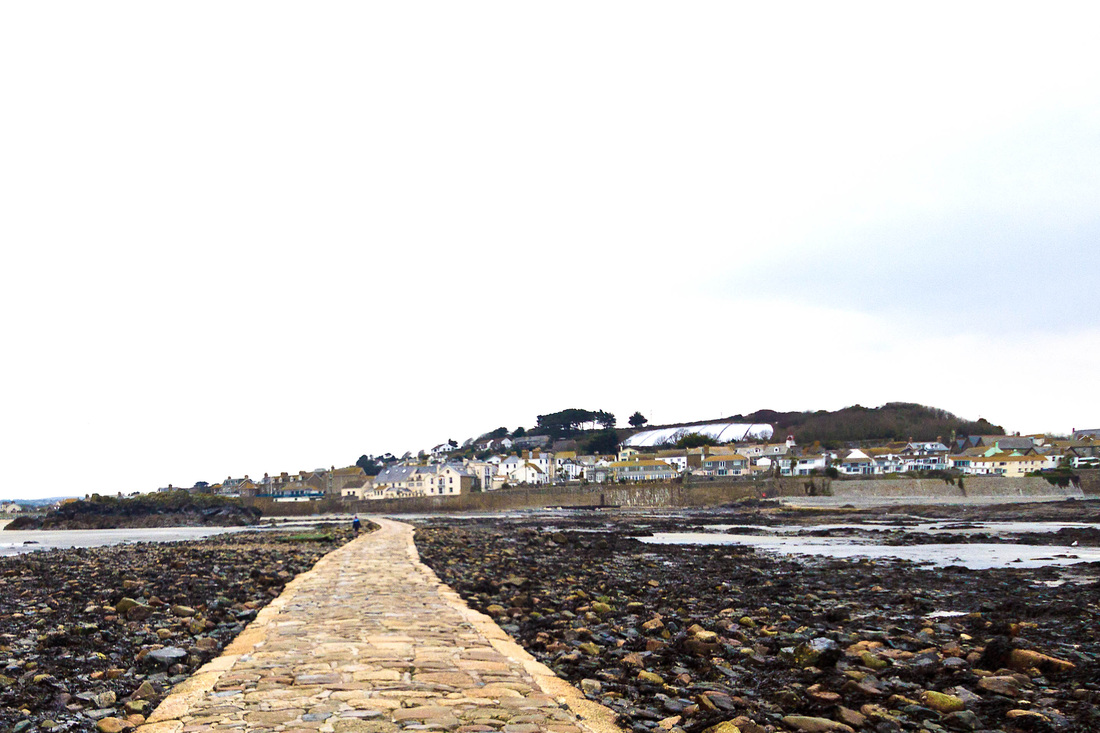
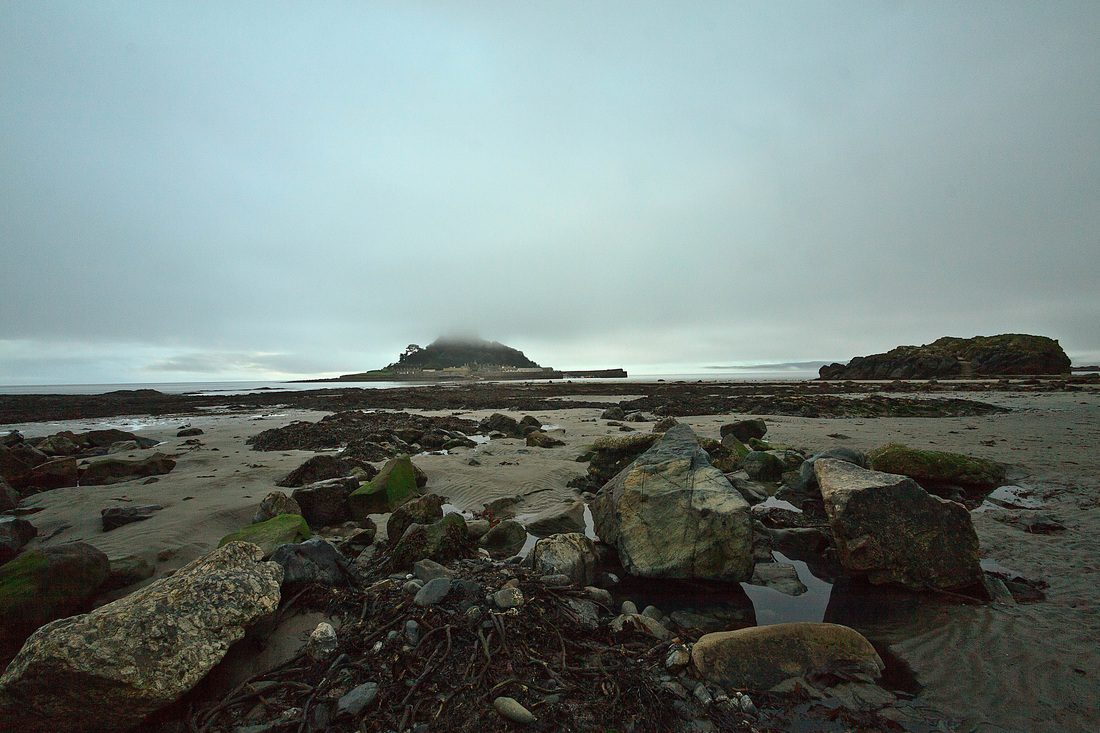
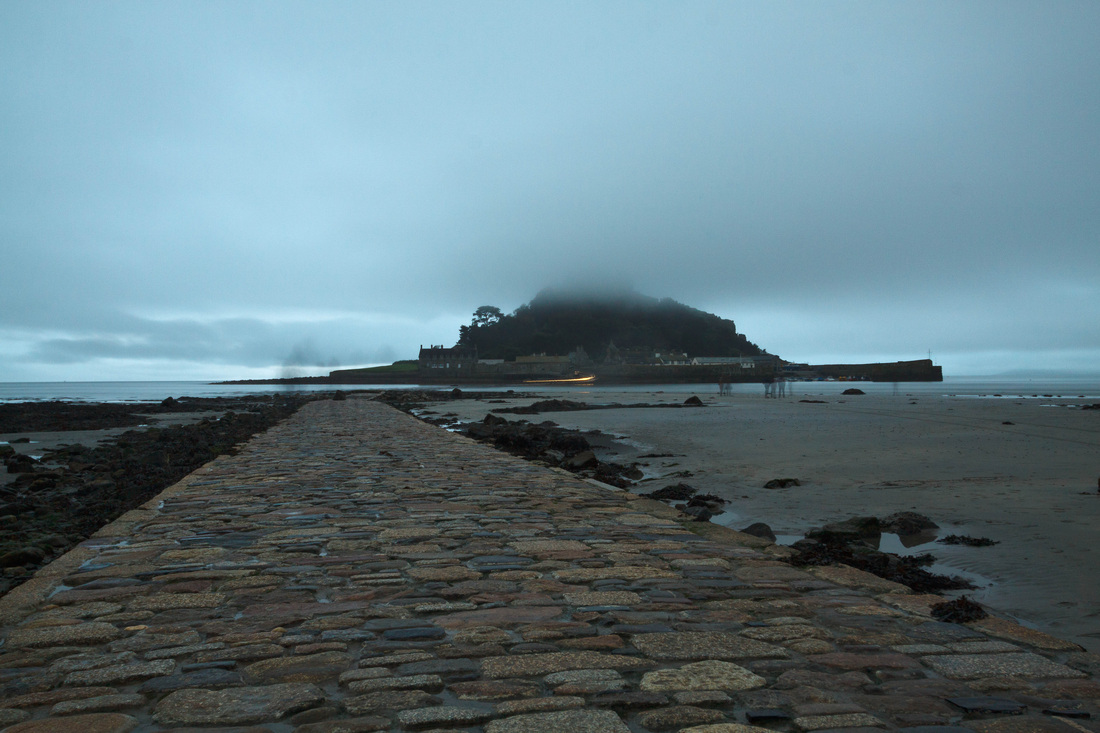
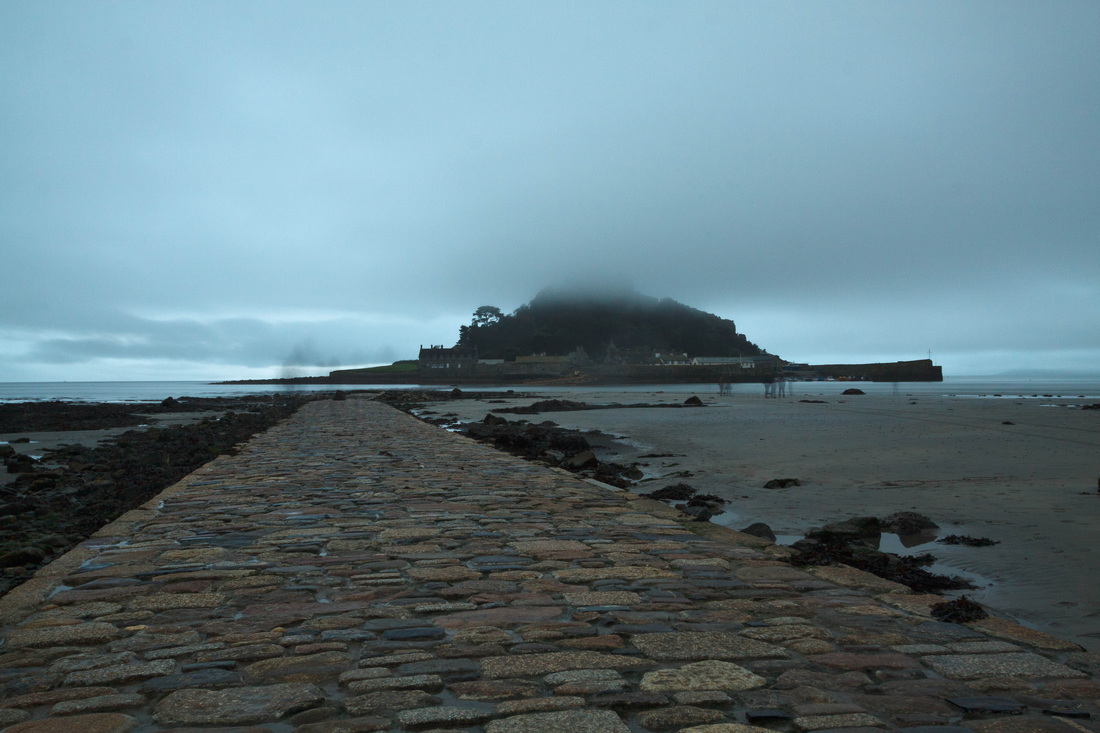
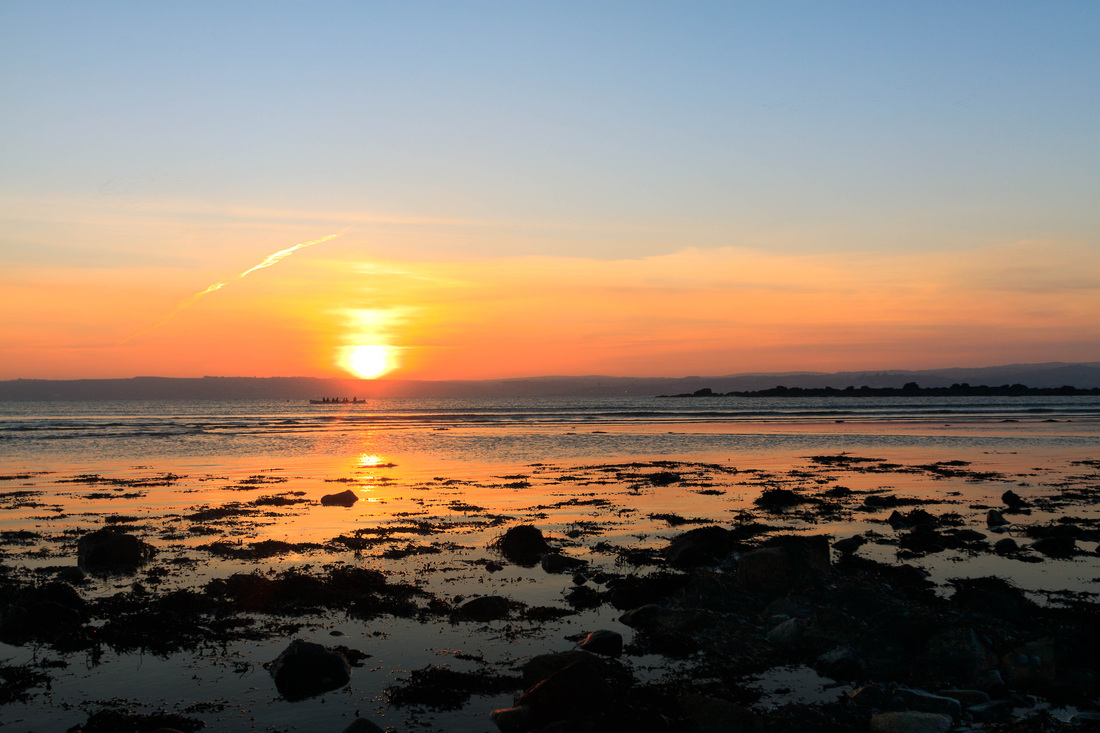
For my final assignment I have chosen to submit images taken over a 12-month period of the small bay area surrounding St Michael’s Mount, Marazion, Cornwall. This area covers perhaps less than a mile but I love the changing mood throughout the seasons. I am aware this locality is a very popular tourist destination and as such is a much-photographed place. However I feel to truly capture the spirit of a place involves frequent visits and a willingness to simply wait, watch, and observe before pressing the shutter.
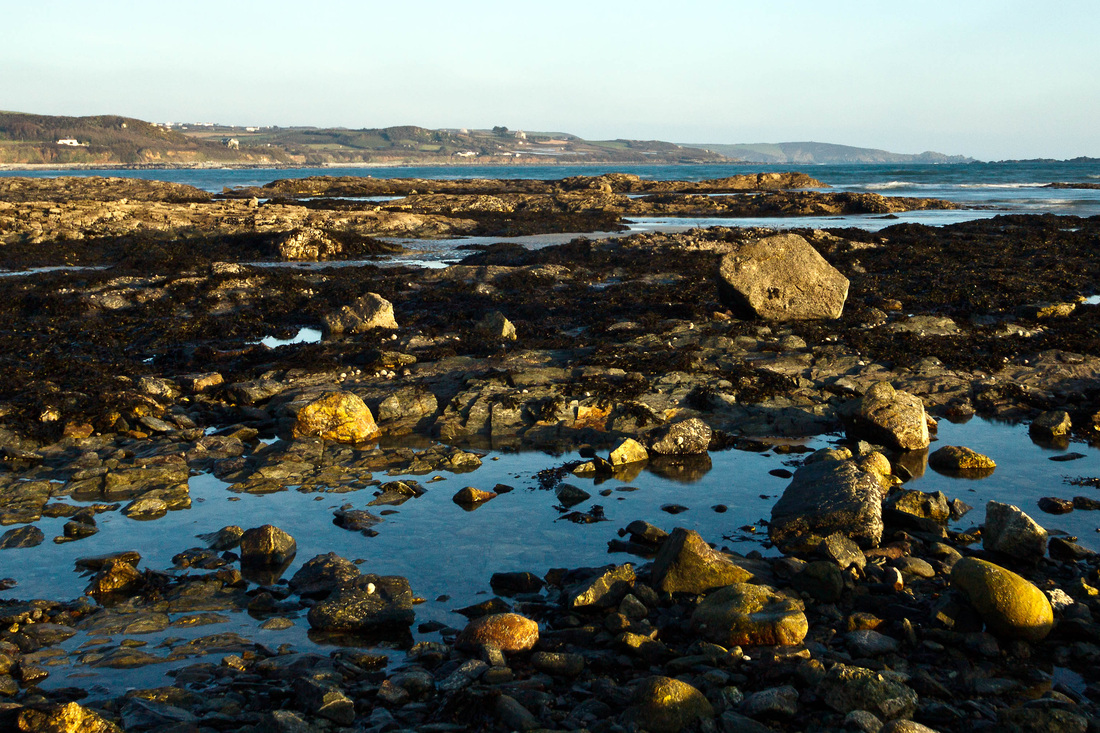
Photographing here has been, and will remain, an ongoing passion of mine, one I talked about and included images from as part of my second assignment. I remember happy childhood visits with my Mum and Dad staying with my spinster Great Aunt Carrie who still lived in my Dad’s childhood home just across the road from the beach. I am more than happy to spend hours by myself on the beach, just as I did when a child with my bucket and spade, but this time with my camera. I love solitude and bleakness (something many visitors probably hope to avoid) as much as blue skies and sun. I find cheerlessness as visually appealing as a beautiful sunset, which is just as well with the unpredictable British weather. An obstacle of shooting at the seaside is being at the mercy of the tides. At times certain areas of the bay were not accessible. However for each visit I was lucky to be staying literally across the road so was able to plan my morning or evening sessions around the tide times. A great benefit of staying so close also meant being able to take advantage of the often quickly changing weather conditions.
I must be completely honest; I had not initially considered using my photography of this area as part of my final assignment. It was simply personal work that I happened to incorporate into my college work. However without the coursework to guide me my photography of this area would have had little structure. The assignment brief is to apply all I have learnt to build a collection of between 10 and 12 final images hence my personal work has evolved naturally into my final project. I considered presenting the final project in black and white but felt the changing seasons were better represented in colour.
Colour can be used creatively to suggest meaning and mood. Additionally “colour allows habitual contexts to be seen afresh” pg. 228. Ian Jeffrey Photography A Concise History, Thames and Hudson Ltd, London, 1981. Although I would love to include some mono work I do not think it would contribute in making this a cohesive set of images. Furthermore when I took the majority of my final chosen images I was not thinking in black and white, colours and hues drew me. Joel Meyerowitz was a primary supporter of colour photography at a time “most serious photographers had regarded colour photography as vulgar” pg. 143 Gerry Badger “ The Genius of Photography How photography changed our lives” Quadrille Publishing Limited London, 2007. His study of Cape Cod not only captures the relaxed pace of life there but investigates the shifting colour of light. His photography of this area exemplifies how best to use light and its resulting hues harmoniously. Shooting at different times of the day and year I too also aim to explore the relationship between colour and light.
I have grown to love trying to capture the ever-shifting transformation that occurs throughout the year, continuance and change, ostensibly opposites. I have never been a particularly keen landscape photographer and as such have not studied the genre in great detail, however I really enjoyed an exhibition in Cornwall last year of hand printed cibachrome images by Susanna Heron. Taken over a period of 4 years, within the confines of her mother’s garden in Penwith, they record the inevitable change that takes place through the seasons, she notes “ a garden is a complex thing, it exists within a period of time and is neither finite nor static” Pg. 7 Susanna Heron Shima: Island and Garden The Pale Green Press, London, 1992. That is precisely what draws me to continue with my photography of the Bay, the unpredictable and perpetual change. I can fully understand how Susanna’s project continued over a period of 48 months; I could spend a lifetime here and never become unmotivated.
Photographer Mark Hirsch spent a year making a photo-diary of a tree he passed on his way to work every day. That Tree http://thattree.net
What motivated him and kept him going? “ It made me a way better photographer. I just really had to change my way of thinking, and my way of looking at the world. “ The Guardian Saturday 25th May 2013 pg. 40. In order to grow and evolve as a photographer means learning to observe, deliberate, and not just simply gaze without truly seeing. His images, which are quite diverse, capture perfectly the changing colours of the season within the confines of just a tiny geographical area. I find them inspiring and beautiful to look at. Interestingly the images were all shot using an iPhone, “ but photography has never been all about equipment, but it always has been and always will be all about the image.” Furthermore “its still the combination of light and photographic craft which permits us to make, rather than take, images” pg. 5 Chris Coe “ Travel Photographer of the Year Journey Three” Travel Photographer of the Year, Suffolk, 2010. Like Meyerowitz Mark Hirsch has used his knowledge of light to create an eclectic collection of images.
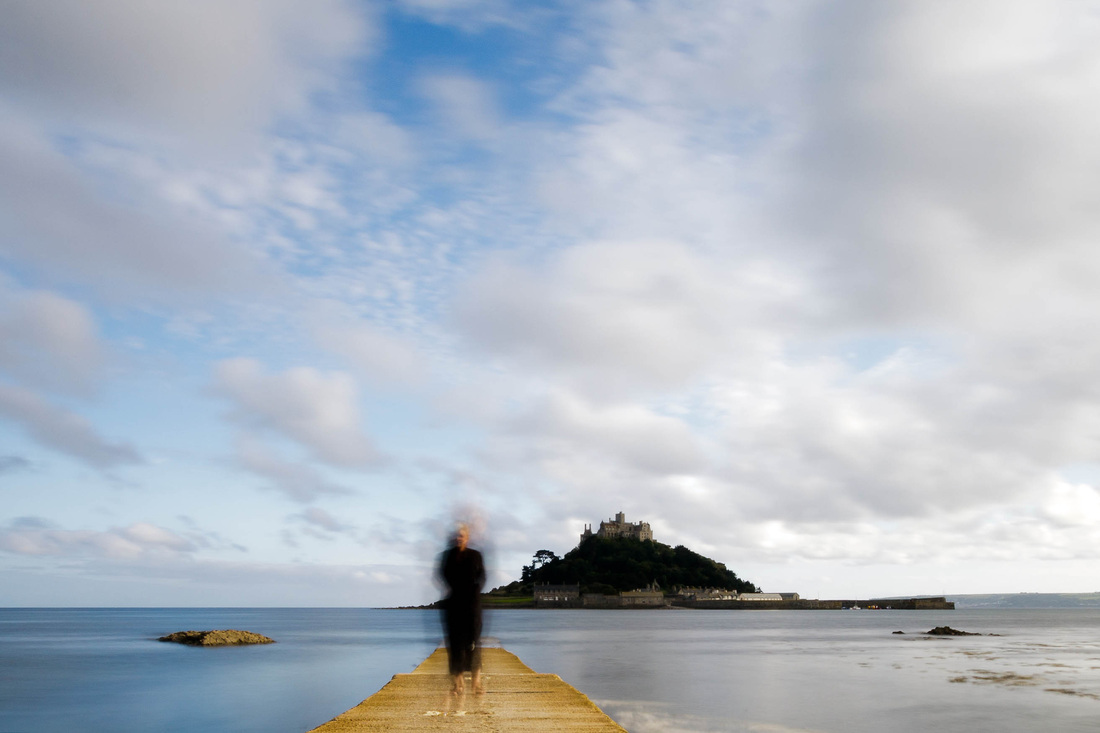
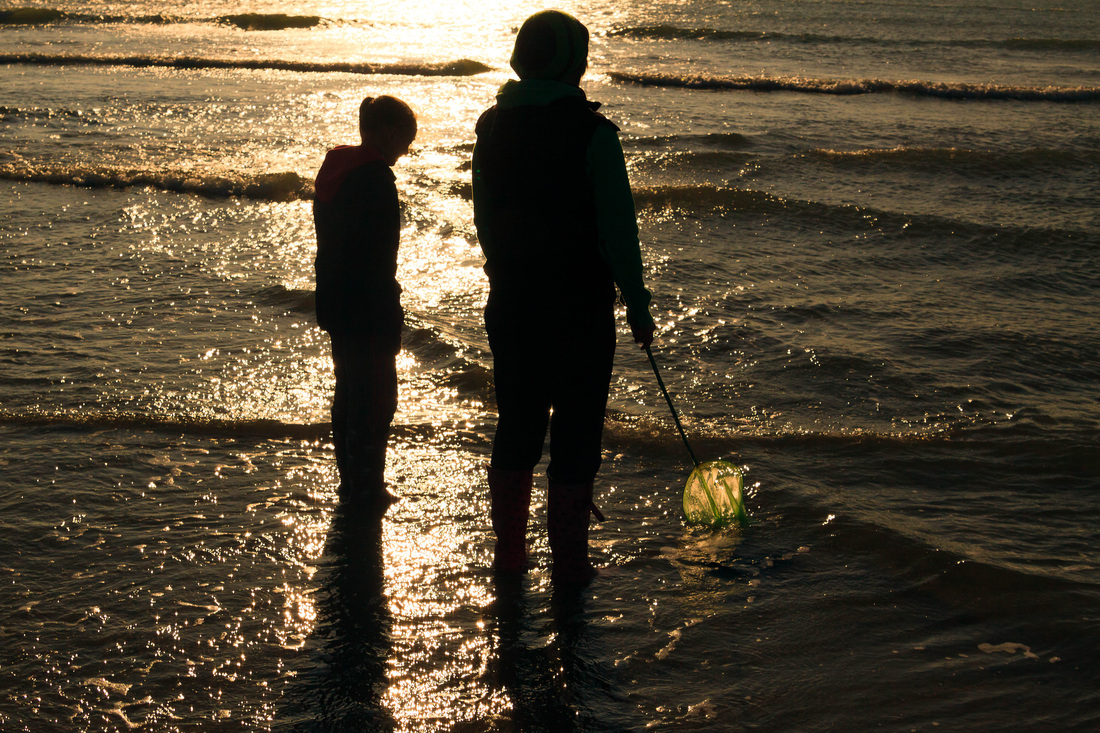
Paradoxically I also enjoyed and found monochrome imagery inspirational. There is a set of black and white reproductions of old photographs displayed at one of the cafés on the Mount, both landscape and people, I love to look at. The Bay appears seemingly timeless, only people change and move on. I also love a series of photographs by Deborah Parkin: September is the Cruellest Month. The images were shot with a large format camera using black and white instant film. The evocative images of her children, some by the sea, are intended to prompt remembrance and feeling. My children and grandchildren sometimes accompany me on my visits and I want them to love and remember the place as much as I do. Consequently I often incorporate them into my landscape work, suspending them in time, because “time passes and is never re-captured – we are only left with memories and photographs” Deborah Parkin Pg.18 Ag Spring 2011 Number 63 Picture Box Media Ltd, Surrey, 2011. Does my subjective approach make my images of the Bay any less valid as a document of land?
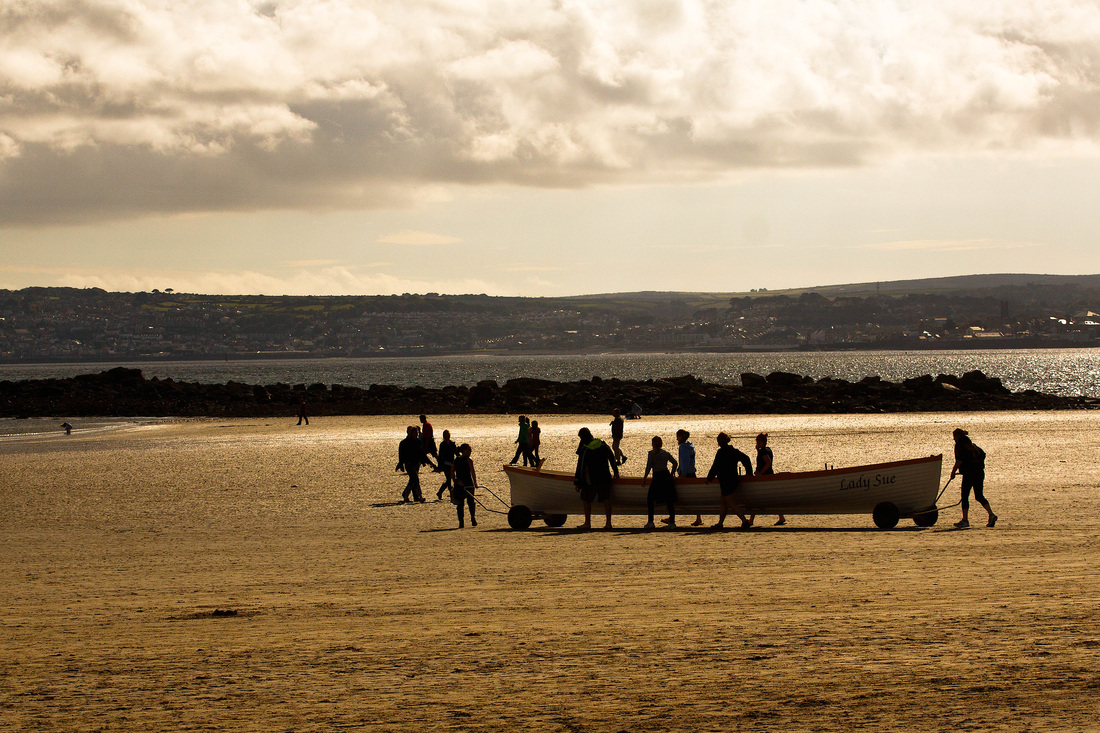
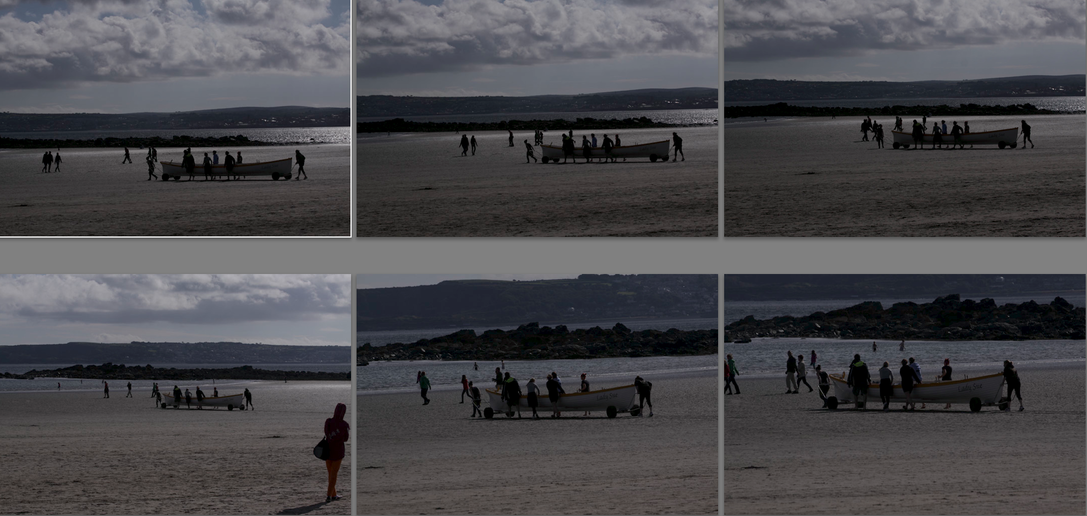
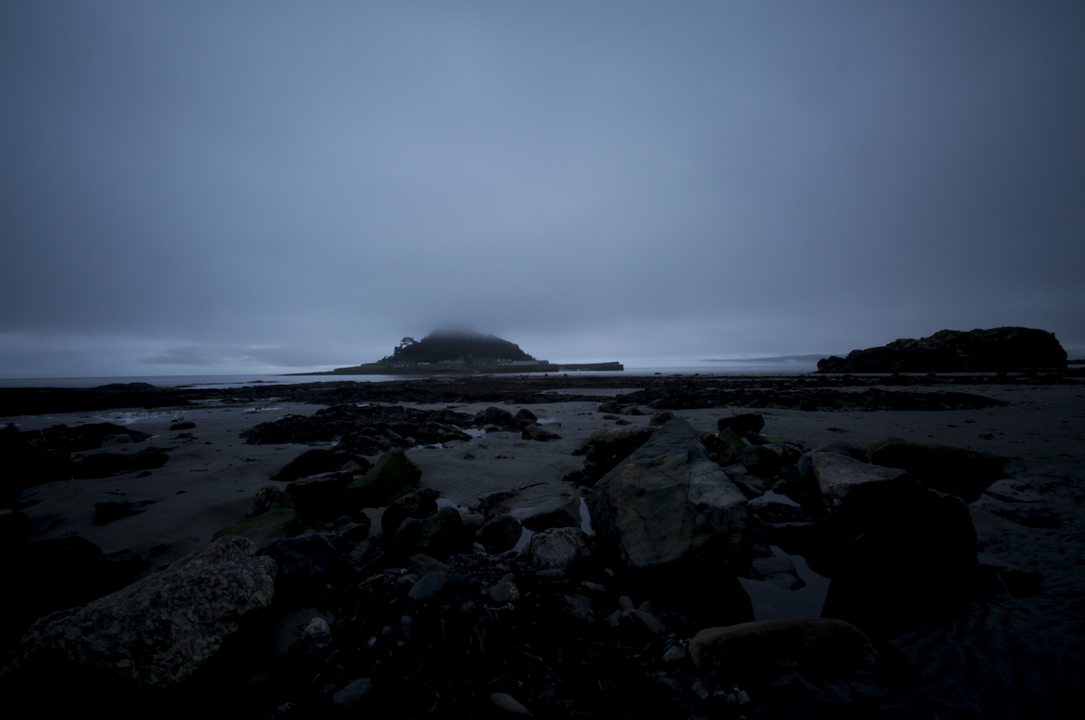
I also often wonder about the many different people who travel here, what do they see and think as St Michael’s Mount first appears on the horizon. My Mum remembers arriving by train on her first visit with my Dad to see the Mount rising out of the sea and the castle shimmering in sunlight, “ like a dream, a palace out of a storybook”. What does this place mean to me personally? My roots belong here, I feel a sense of peace that I struggle to find elsewhere, and I never tire of returning time after time. Furthermore I choose not to shoot at busy times, this is not how I want my personal haven to be represented. A different photographer might chose to concentrate on the hustle and bustle of the day time when many visitors arrive to cross the causeway by foot or boat. I prefer the quieter times, early morning, late evening and out of season. I have given each image a number but this is not necessarily the order they need to be viewed in, I hope they work as stand-alone images as well as creating a coherent set.
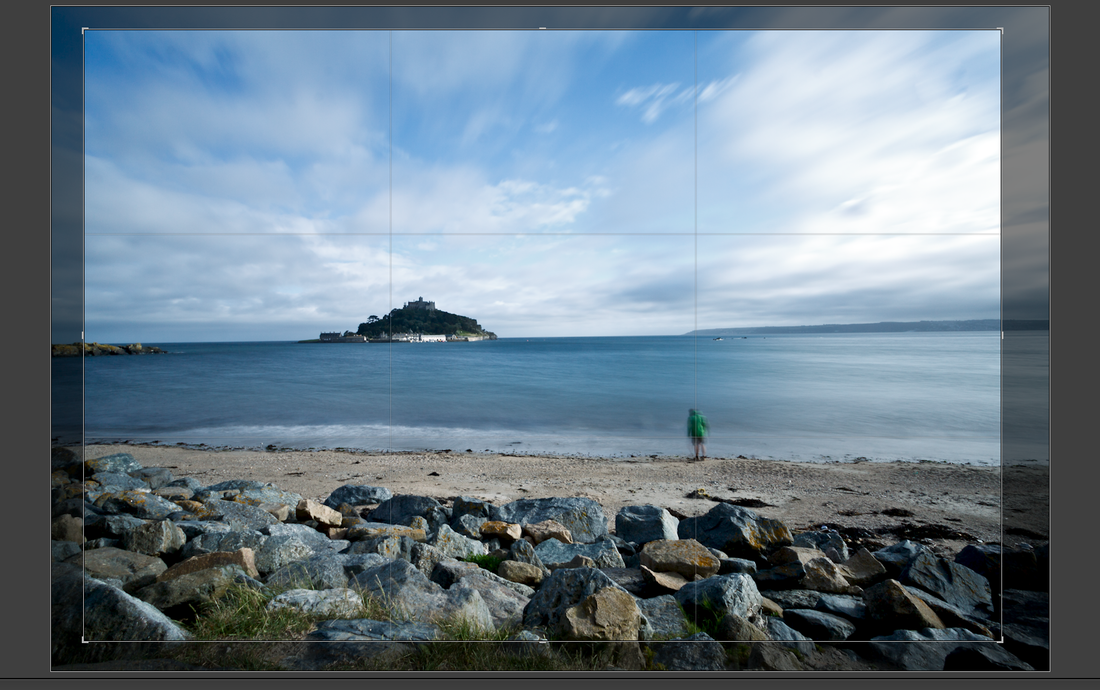
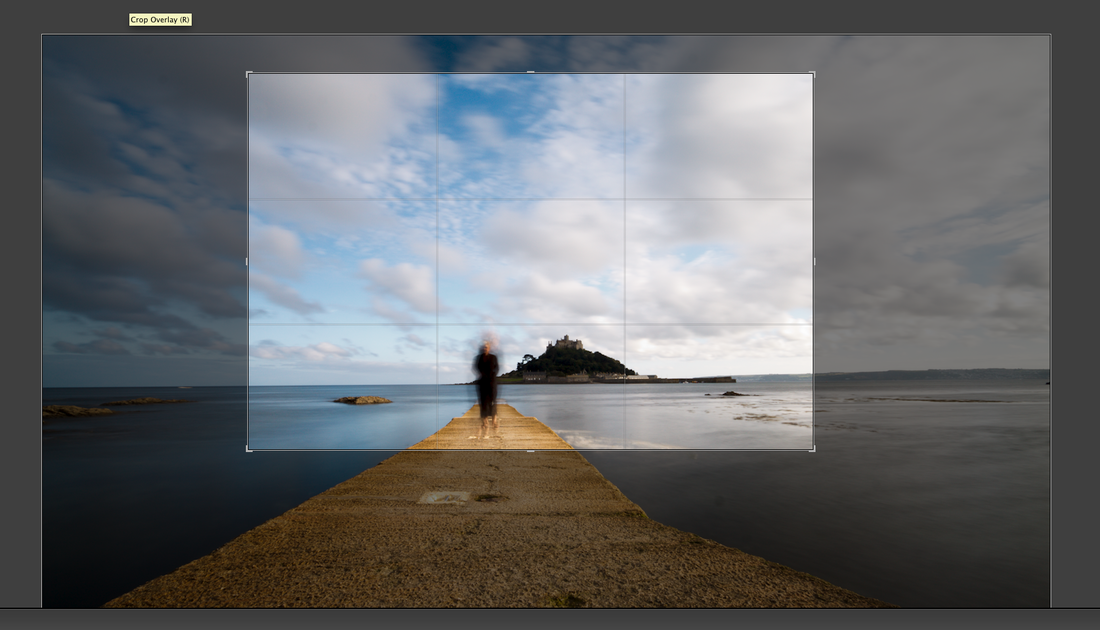
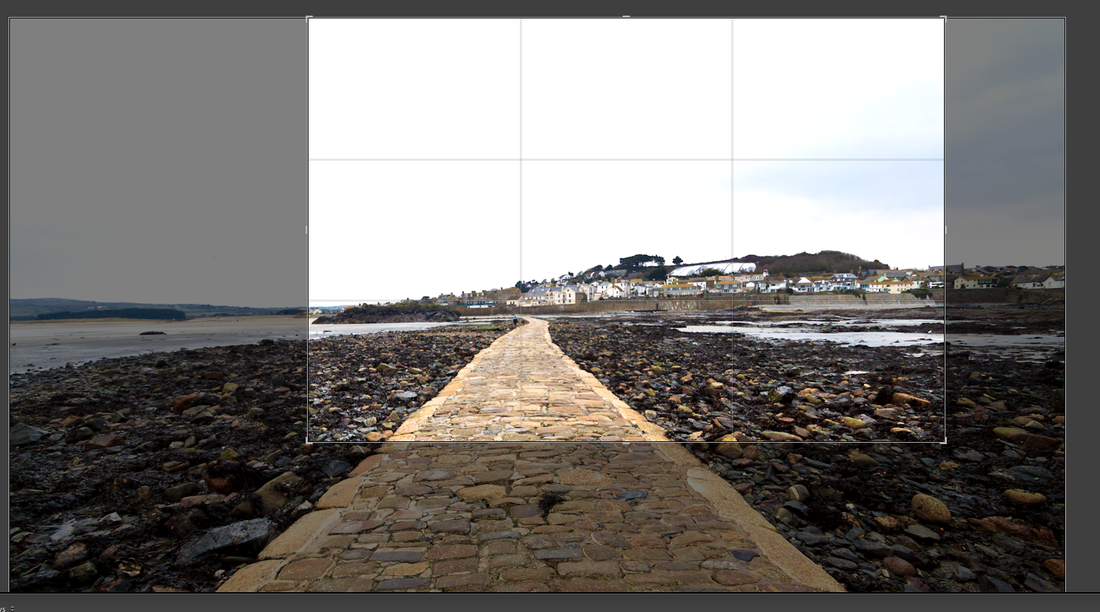
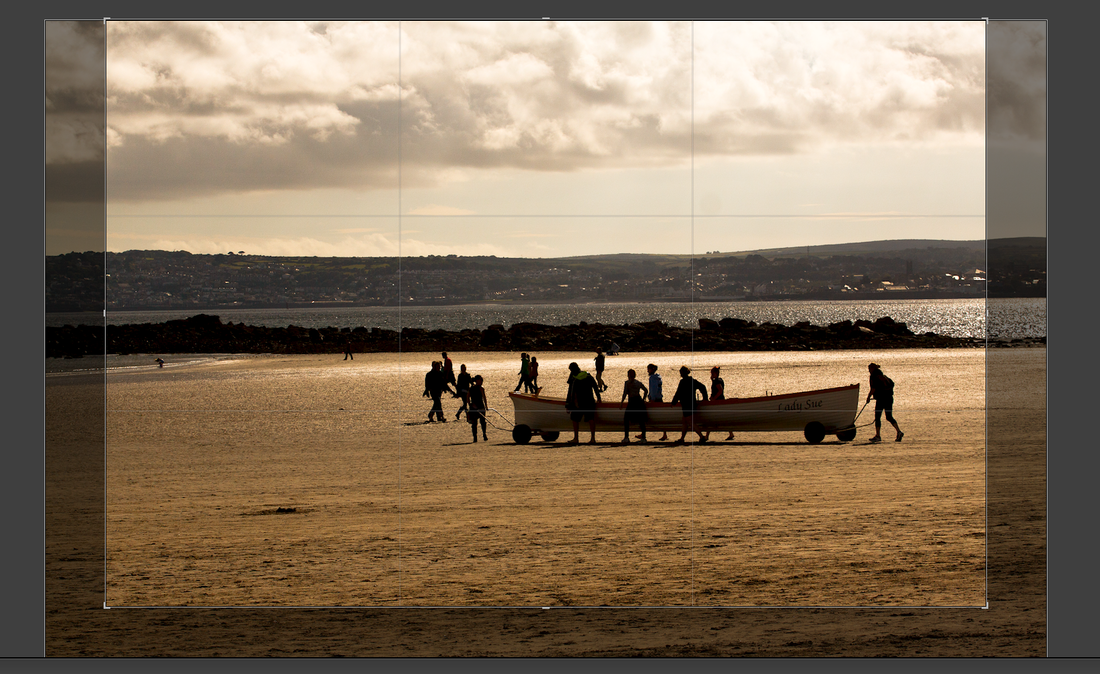
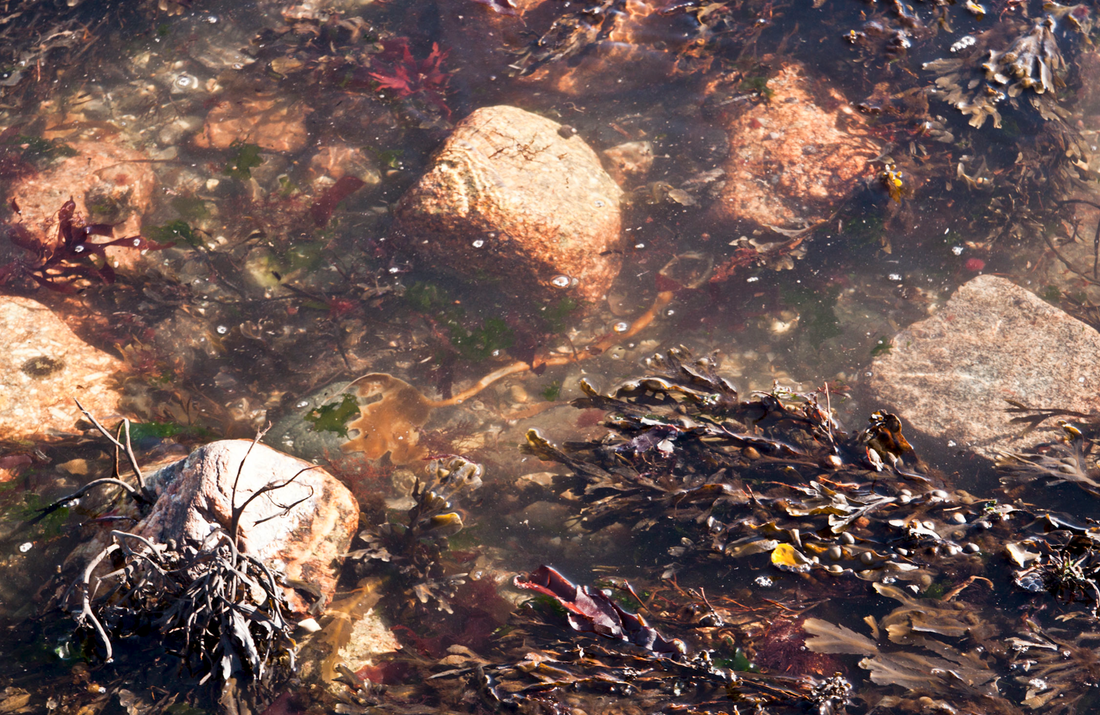
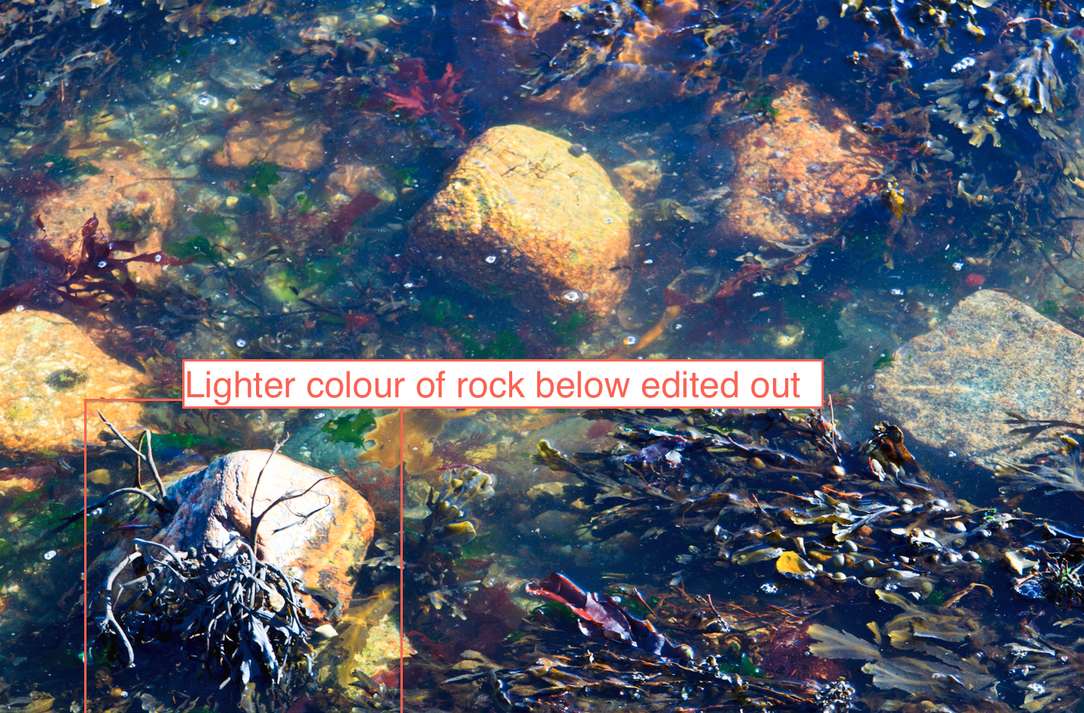
All of the images have been shot in Raw and processed in Lightroom with some further processing in Photoshop, shooting Raw enables me to have far greater control over the final outcome. At the start of the course I would have confidently stated I did little, if any, manipulation but now realise this is not the case. Framing, composition, filters, lens choice etc. can all alter how an image is perceived, a form of manipulation, and this made me consider for the first time that even landscape photography can be highly subjective. I have additionally learned that at each step of the digital workflow manipulative selections are made that alter the final image, some subtle some not, but I want the choice of how each of my images look to be made by me not the camera.
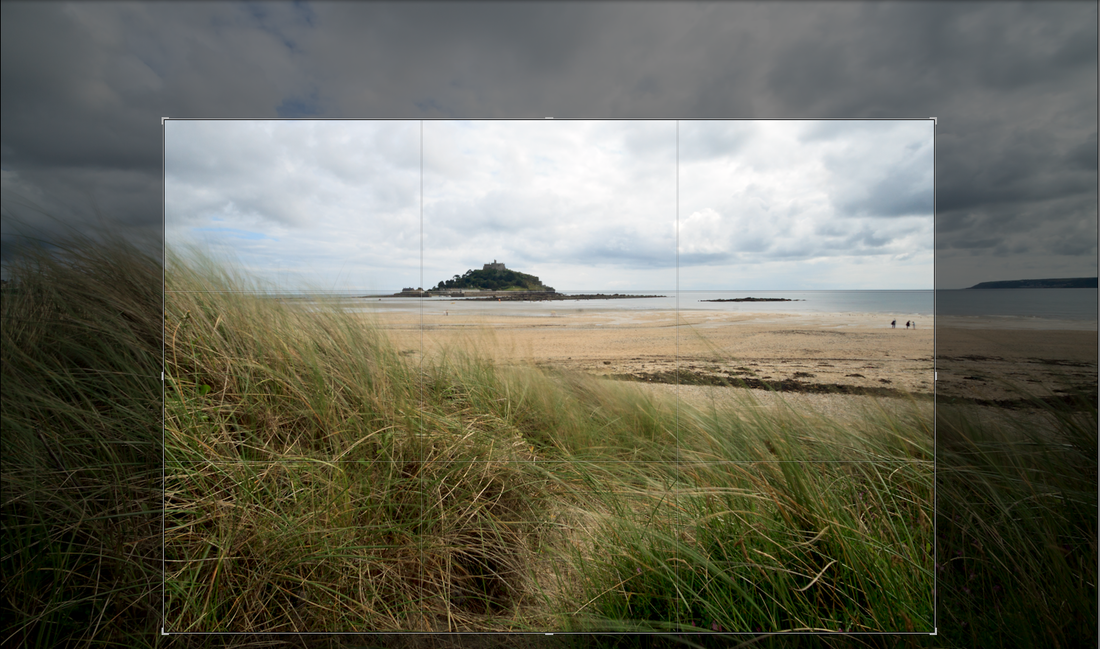
As these are predominantly landscape scenes I have tried to keep my post-shoot processing realistic. The images have been sharpened using the Unsharp mask in Photoshop saved as Tiff files with further sharpening applied when printed. I had a few disasters when I over- sharpened and needed to re-assess and re-print but I found a setting of Amount 100 Radius 1.0 Threshold 6 worked well for most of the prints. I calibrate my screen each month, use an Epson R2880 printer and Perma Jet Classic Fine Art Fibre Base Royal 325gsm paper, and am generally satisfied with my prints. All images are backed up to an external hard-drive.
SEE SECTION BELOW FOR MORE DETAILED INFORMATION ABOUT EACH IMAGE
Photographing here has been, and will remain, an ongoing passion of mine, one I talked about and included images from as part of my second assignment. I remember happy childhood visits with my Mum and Dad staying with my spinster Great Aunt Carrie who still lived in my Dad’s childhood home just across the road from the beach. I am more than happy to spend hours by myself on the beach, just as I did when a child with my bucket and spade, but this time with my camera. I love solitude and bleakness (something many visitors probably hope to avoid) as much as blue skies and sun. I find cheerlessness as visually appealing as a beautiful sunset, which is just as well with the unpredictable British weather. An obstacle of shooting at the seaside is being at the mercy of the tides. At times certain areas of the bay were not accessible. However for each visit I was lucky to be staying literally across the road so was able to plan my morning or evening sessions around the tide times. A great benefit of staying so close also meant being able to take advantage of the often quickly changing weather conditions.
I must be completely honest; I had not initially considered using my photography of this area as part of my final assignment. It was simply personal work that I happened to incorporate into my college work. However without the coursework to guide me my photography of this area would have had little structure. The assignment brief is to apply all I have learnt to build a collection of between 10 and 12 final images hence my personal work has evolved naturally into my final project. I considered presenting the final project in black and white but felt the changing seasons were better represented in colour.
Colour can be used creatively to suggest meaning and mood. Additionally “colour allows habitual contexts to be seen afresh” pg. 228. Ian Jeffrey Photography A Concise History, Thames and Hudson Ltd, London, 1981. Although I would love to include some mono work I do not think it would contribute in making this a cohesive set of images. Furthermore when I took the majority of my final chosen images I was not thinking in black and white, colours and hues drew me. Joel Meyerowitz was a primary supporter of colour photography at a time “most serious photographers had regarded colour photography as vulgar” pg. 143 Gerry Badger “ The Genius of Photography How photography changed our lives” Quadrille Publishing Limited London, 2007. His study of Cape Cod not only captures the relaxed pace of life there but investigates the shifting colour of light. His photography of this area exemplifies how best to use light and its resulting hues harmoniously. Shooting at different times of the day and year I too also aim to explore the relationship between colour and light.
I have grown to love trying to capture the ever-shifting transformation that occurs throughout the year, continuance and change, ostensibly opposites. I have never been a particularly keen landscape photographer and as such have not studied the genre in great detail, however I really enjoyed an exhibition in Cornwall last year of hand printed cibachrome images by Susanna Heron. Taken over a period of 4 years, within the confines of her mother’s garden in Penwith, they record the inevitable change that takes place through the seasons, she notes “ a garden is a complex thing, it exists within a period of time and is neither finite nor static” Pg. 7 Susanna Heron Shima: Island and Garden The Pale Green Press, London, 1992. That is precisely what draws me to continue with my photography of the Bay, the unpredictable and perpetual change. I can fully understand how Susanna’s project continued over a period of 48 months; I could spend a lifetime here and never become unmotivated.
Photographer Mark Hirsch spent a year making a photo-diary of a tree he passed on his way to work every day. That Tree http://thattree.net
What motivated him and kept him going? “ It made me a way better photographer. I just really had to change my way of thinking, and my way of looking at the world. “ The Guardian Saturday 25th May 2013 pg. 40. In order to grow and evolve as a photographer means learning to observe, deliberate, and not just simply gaze without truly seeing. His images, which are quite diverse, capture perfectly the changing colours of the season within the confines of just a tiny geographical area. I find them inspiring and beautiful to look at. Interestingly the images were all shot using an iPhone, “ but photography has never been all about equipment, but it always has been and always will be all about the image.” Furthermore “its still the combination of light and photographic craft which permits us to make, rather than take, images” pg. 5 Chris Coe “ Travel Photographer of the Year Journey Three” Travel Photographer of the Year, Suffolk, 2010. Like Meyerowitz Mark Hirsch has used his knowledge of light to create an eclectic collection of images.
Paradoxically I also enjoyed and found monochrome imagery inspirational. There is a set of black and white reproductions of old photographs displayed at one of the cafés on the Mount, both landscape and people, I love to look at. The Bay appears seemingly timeless, only people change and move on. I also love a series of photographs by Deborah Parkin: September is the Cruellest Month. The images were shot with a large format camera using black and white instant film. The evocative images of her children, some by the sea, are intended to prompt remembrance and feeling. My children and grandchildren sometimes accompany me on my visits and I want them to love and remember the place as much as I do. Consequently I often incorporate them into my landscape work, suspending them in time, because “time passes and is never re-captured – we are only left with memories and photographs” Deborah Parkin Pg.18 Ag Spring 2011 Number 63 Picture Box Media Ltd, Surrey, 2011. Does my subjective approach make my images of the Bay any less valid as a document of land?
I also often wonder about the many different people who travel here, what do they see and think as St Michael’s Mount first appears on the horizon. My Mum remembers arriving by train on her first visit with my Dad to see the Mount rising out of the sea and the castle shimmering in sunlight, “ like a dream, a palace out of a storybook”. What does this place mean to me personally? My roots belong here, I feel a sense of peace that I struggle to find elsewhere, and I never tire of returning time after time. Furthermore I choose not to shoot at busy times, this is not how I want my personal haven to be represented. A different photographer might chose to concentrate on the hustle and bustle of the day time when many visitors arrive to cross the causeway by foot or boat. I prefer the quieter times, early morning, late evening and out of season. I have given each image a number but this is not necessarily the order they need to be viewed in, I hope they work as stand-alone images as well as creating a coherent set.
All of the images have been shot in Raw and processed in Lightroom with some further processing in Photoshop, shooting Raw enables me to have far greater control over the final outcome. At the start of the course I would have confidently stated I did little, if any, manipulation but now realise this is not the case. Framing, composition, filters, lens choice etc. can all alter how an image is perceived, a form of manipulation, and this made me consider for the first time that even landscape photography can be highly subjective. I have additionally learned that at each step of the digital workflow manipulative selections are made that alter the final image, some subtle some not, but I want the choice of how each of my images look to be made by me not the camera.
As these are predominantly landscape scenes I have tried to keep my post-shoot processing realistic. The images have been sharpened using the Unsharp mask in Photoshop saved as Tiff files with further sharpening applied when printed. I had a few disasters when I over- sharpened and needed to re-assess and re-print but I found a setting of Amount 100 Radius 1.0 Threshold 6 worked well for most of the prints. I calibrate my screen each month, use an Epson R2880 printer and Perma Jet Classic Fine Art Fibre Base Royal 325gsm paper, and am generally satisfied with my prints. All images are backed up to an external hard-drive.
SEE SECTION BELOW FOR MORE DETAILED INFORMATION ABOUT EACH IMAGE


 RSS Feed