Following suggestions by Russell in my initial feedback and with his agreement I have revised my assignment submission.
Some images have been omitted and others added. I was relived to get an email saying " the set of images works better"
Stupidly I had not included my research in my l notes sent to Russell . This is unlike me as I
tend to write reams , perhaps more than is strictly required. Hence an amended write-up has been sent which "is much
improved with strong evidence of research and context and this reflects much more your passion for the place and subject
matter: "
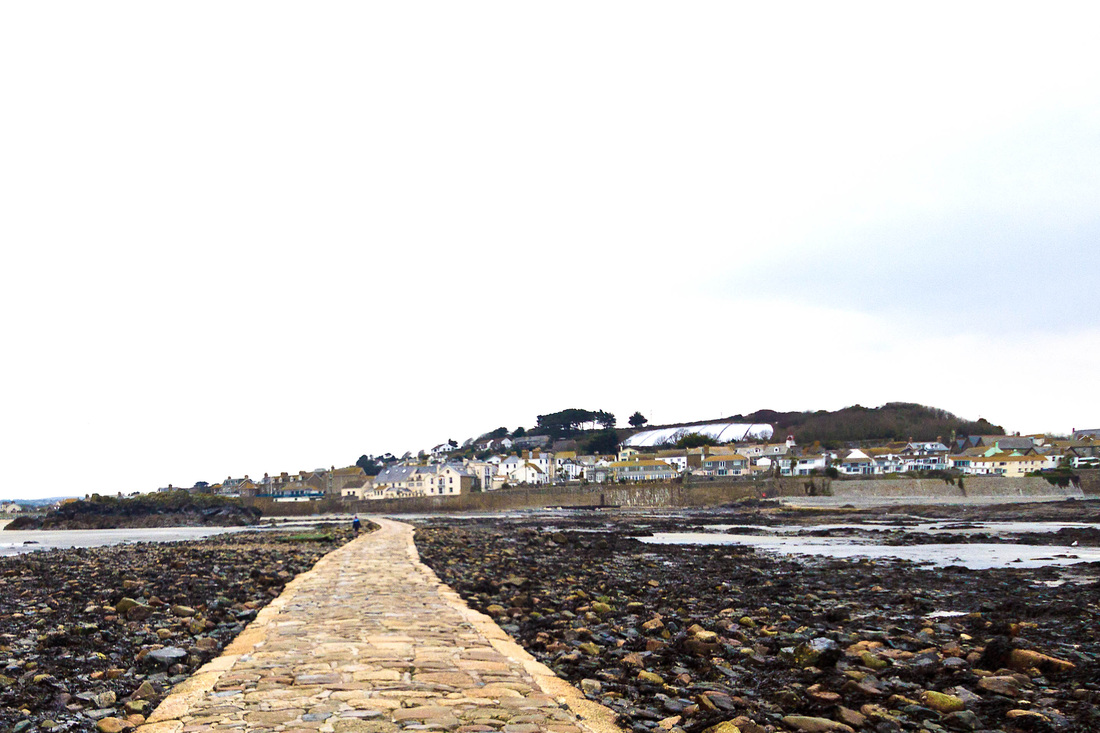
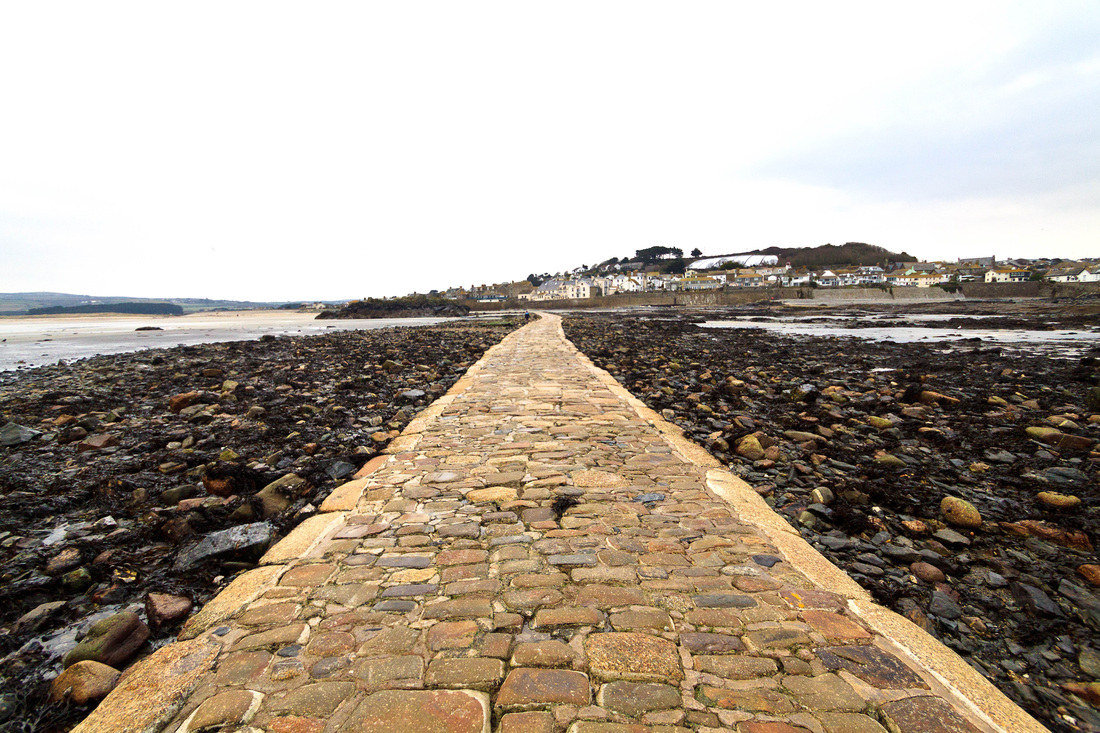
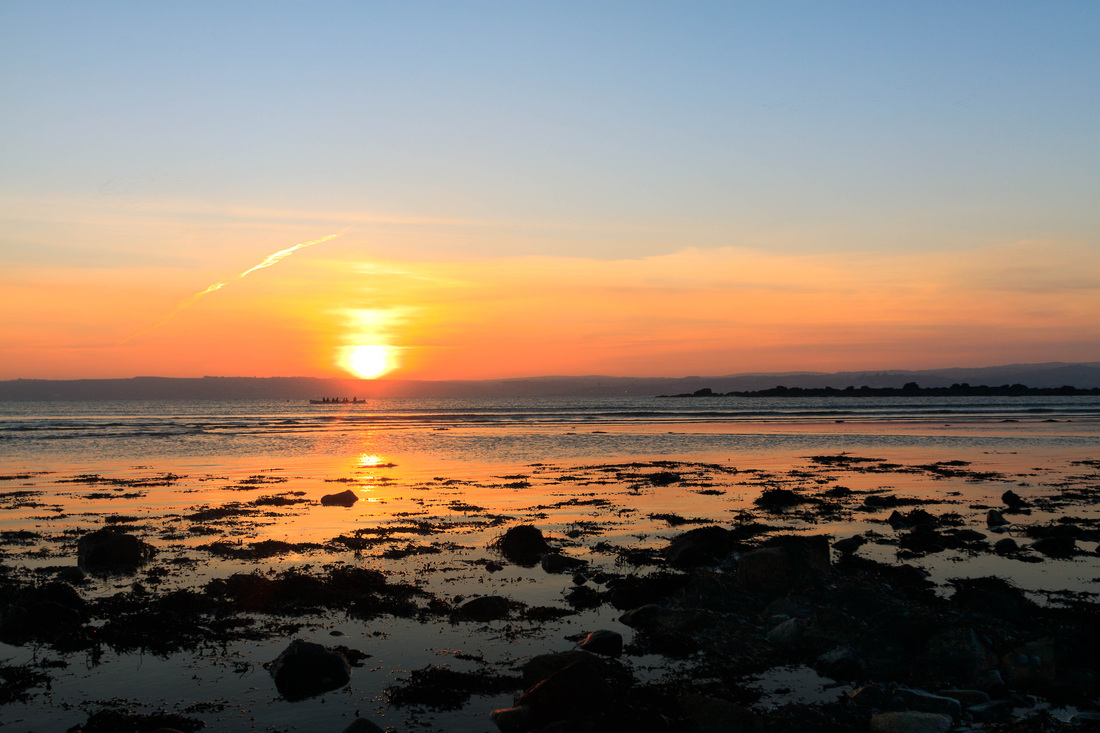
1: July. Early evening
F18 10mm ISO 100 5 Sec using 9-stop ND filter
Lightroom adjustments
Daylight WB
Tone Curve (+ 9 Lights) Clarity + 61
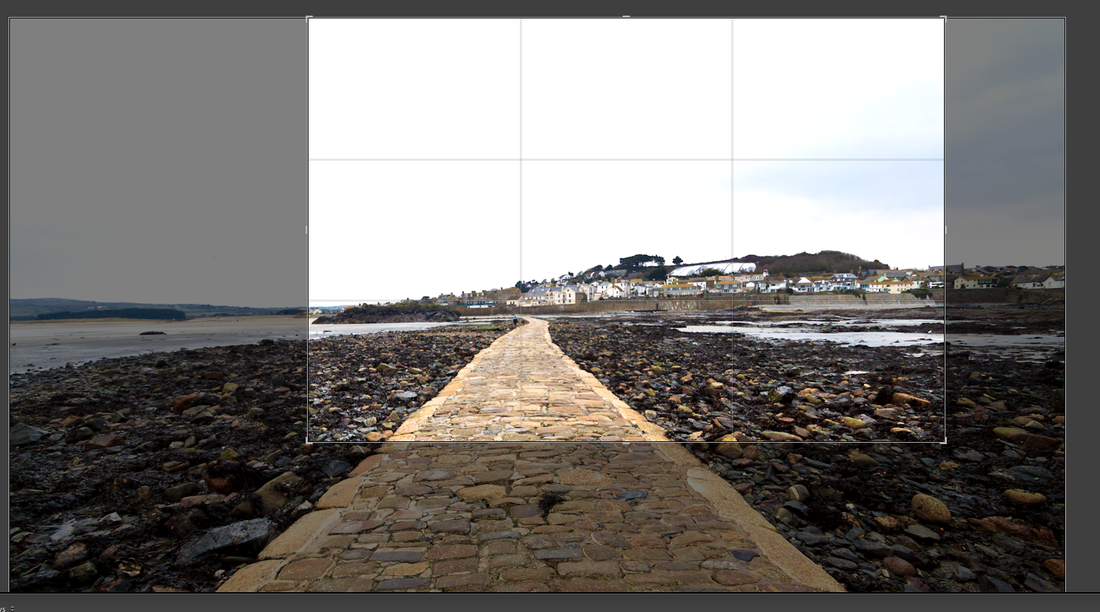
Cropped as suggested by Russell to exclude lens distortion
Camera calibration standard
Photoshop Adjustments
Levels
Unsharp mask
I took 15 images during this session, changing my viewpoint halfway through. By evening time the area is always quiet, the tourists have all gone home, the beach was practically deserted bar for this lone figure, a local, picking up litter as he strolled past. I used a 9-stop filter that I like using, especially useful to depict the slow pace of life here.
F18 10mm ISO 100 5 Sec using 9-stop ND filter
Lightroom adjustments
Daylight WB
Tone Curve (+ 9 Lights) Clarity + 61
Cropped as suggested by Russell to exclude lens distortion
Camera calibration standard
Photoshop Adjustments
Levels
Unsharp mask
I took 15 images during this session, changing my viewpoint halfway through. By evening time the area is always quiet, the tourists have all gone home, the beach was practically deserted bar for this lone figure, a local, picking up litter as he strolled past. I used a 9-stop filter that I like using, especially useful to depict the slow pace of life here.
Cropped as suggested.
2: February. Late afternoon
F11 19mm ISO 100 1/ 6 sec
Lightroom adjustments
Shade WB
Tone curve (+ 33 lights -4 darks + 2 shadows)
Clarity + 56
Vibrance + 11
Cropped
Photoshop adjustments
Levels adjustment
Unsharp mask
The light shining on the rocks created a lovely golden tone that contrasted with and complemented the blue hues of the sea and sky. I decided to crop quite aggressively to create a more dynamic composition. I really must learn to be more aware of where to place the horizon line. I was rather disappointed with the print, which lacked the luminance of the screen version.
Crop overlay

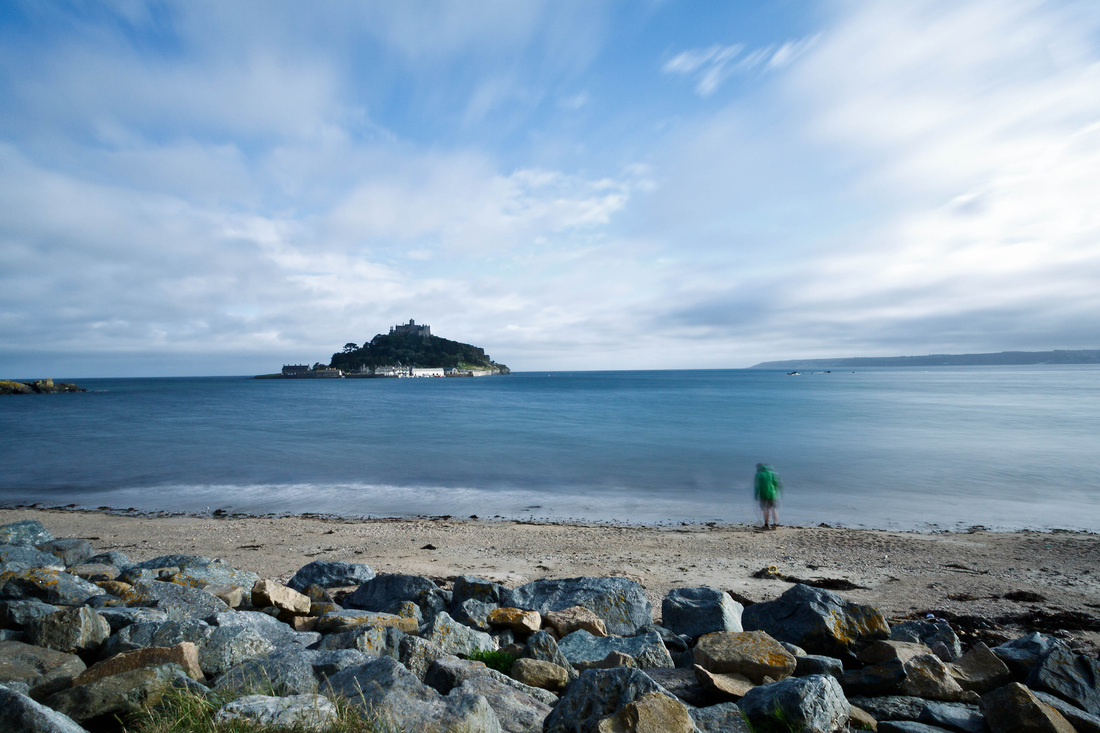
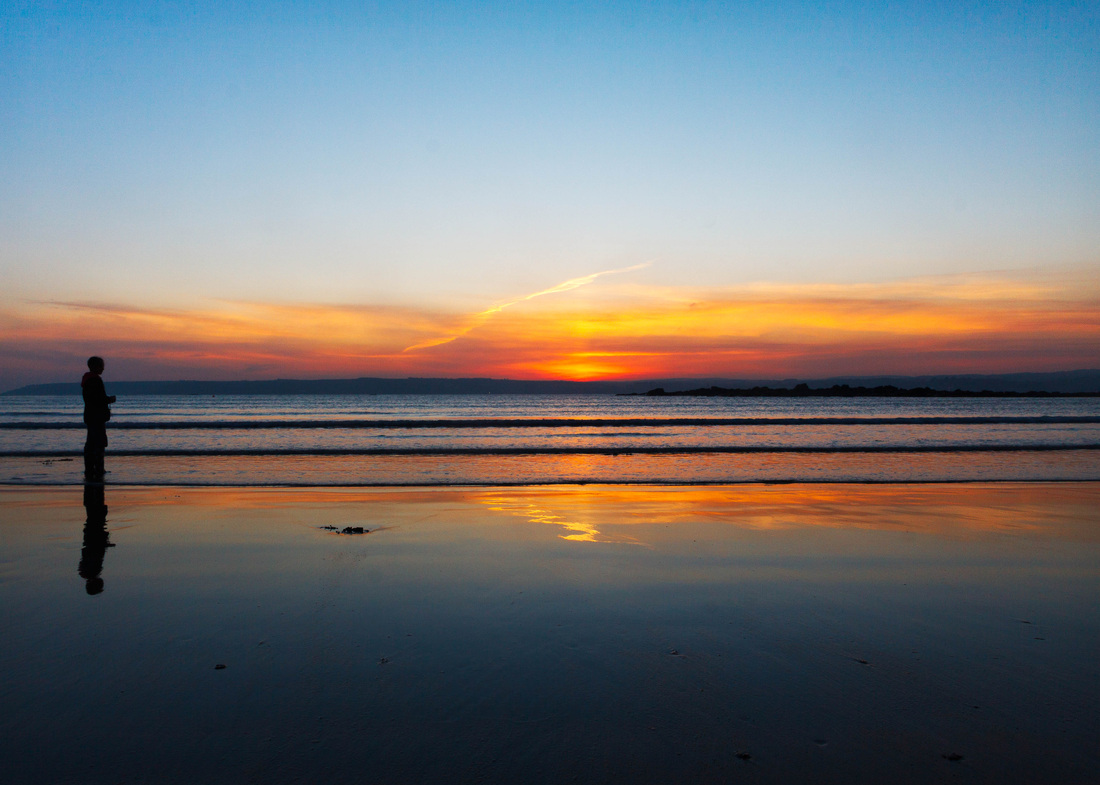
3. July: Early morning
F18 10mm ISO 100 10 Sec using a 9-stop ND filter
Lightroom adjustments
Custom WB @ K8100
Tone Curve (+12 Lights -9 Darks) Clarity-12
Cropped
Camera calibration Neutral
Photoshop adjustments
Levels Adjustment
Unsharp Mask
Self-portrait. How may times have I stood on this exact spot and how many more visits will I make? I will come and go and this image is intended to represent the fleeting passage of time in an enduring place.
At times like this there is an ethereal quality, like what my mum described, and is something I hoped to capture. Using a 9-stop ND filter I took 16 images, using my hand held meter to take an ambient light reading, it helps to bracket shots too. I needed to compose the shot before putting the filter on my camera, as it is impossible to see through the viewfinder once it is on. I find this a very fiddly task; I am pretty useless at putting screw-on filters onto the lens. I had no idea where I would be in the frame. This session was shot in shot Raw and jpeg simultaneously; one of the jpeg shots was submitted for my 2nd assignment.
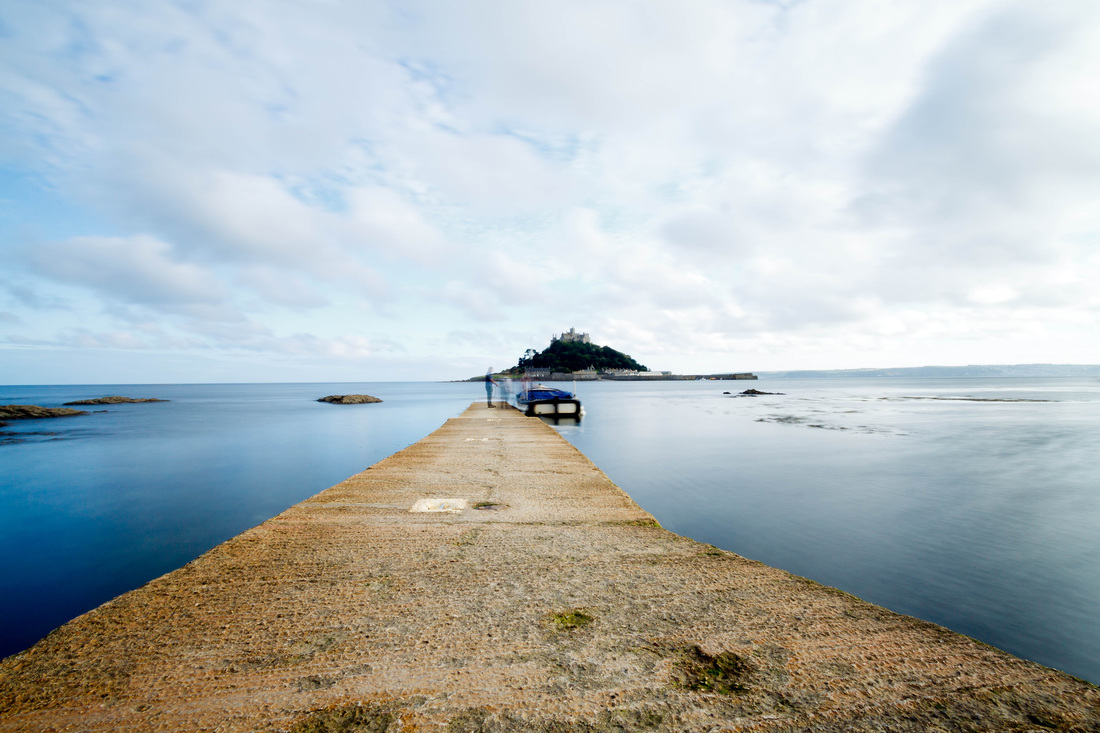
I have substituted this image in place of Image 1 from my initial submission l. Again I have cropped quite severely to alter the balance after taking into consideration Russell's comments.
F18 10mm ISO 100 10 Sec using a 9-stop ND filter
Lightroom adjustments
Custom WB @ K8100
Tone Curve (+12 Lights -9 Darks) Clarity-12
Cropped
Camera calibration Neutral
Photoshop adjustments
Levels Adjustment
Unsharp Mask
Self-portrait. How may times have I stood on this exact spot and how many more visits will I make? I will come and go and this image is intended to represent the fleeting passage of time in an enduring place.
At times like this there is an ethereal quality, like what my mum described, and is something I hoped to capture. Using a 9-stop ND filter I took 16 images, using my hand held meter to take an ambient light reading, it helps to bracket shots too. I needed to compose the shot before putting the filter on my camera, as it is impossible to see through the viewfinder once it is on. I find this a very fiddly task; I am pretty useless at putting screw-on filters onto the lens. I had no idea where I would be in the frame. This session was shot in shot Raw and jpeg simultaneously; one of the jpeg shots was submitted for my 2nd assignment.
I have substituted this image in place of Image 1 from my initial submission l. Again I have cropped quite severely to alter the balance after taking into consideration Russell's comments.
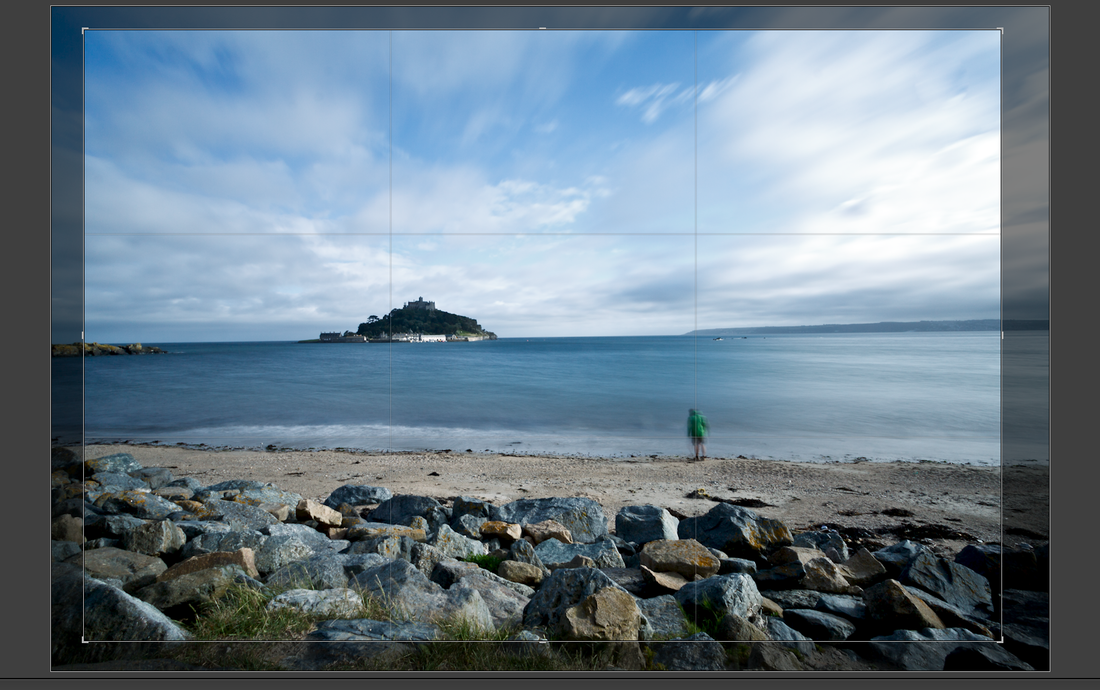
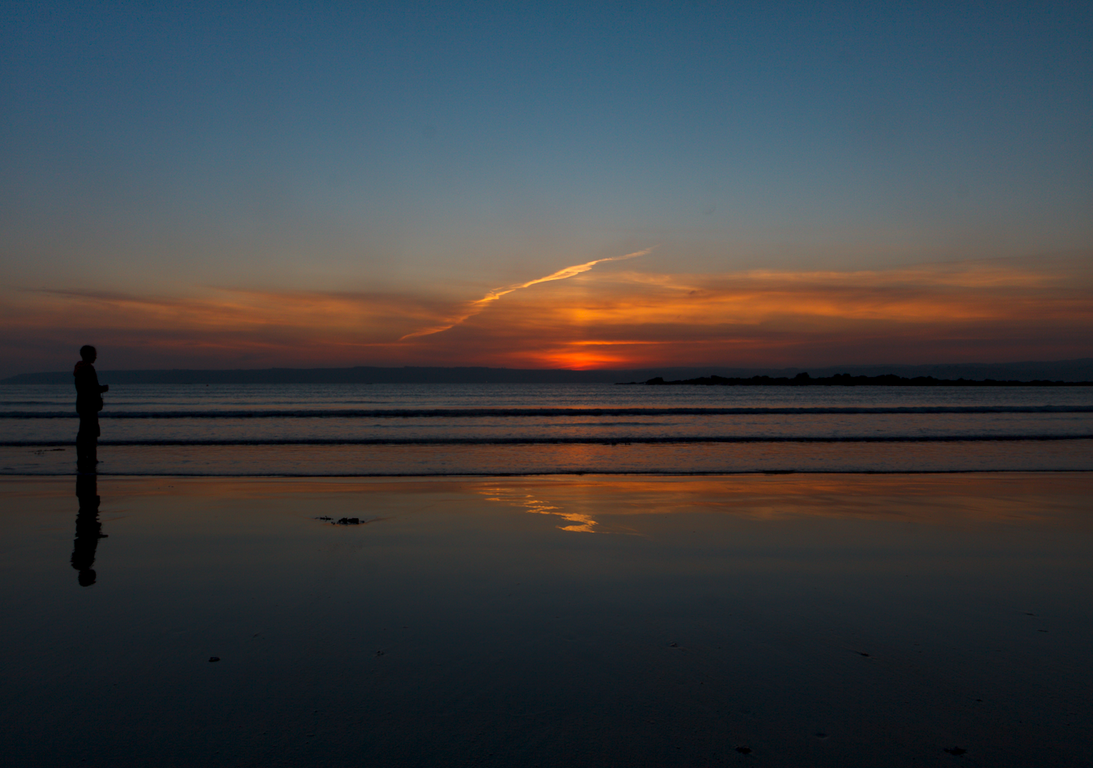
Crop overlay below
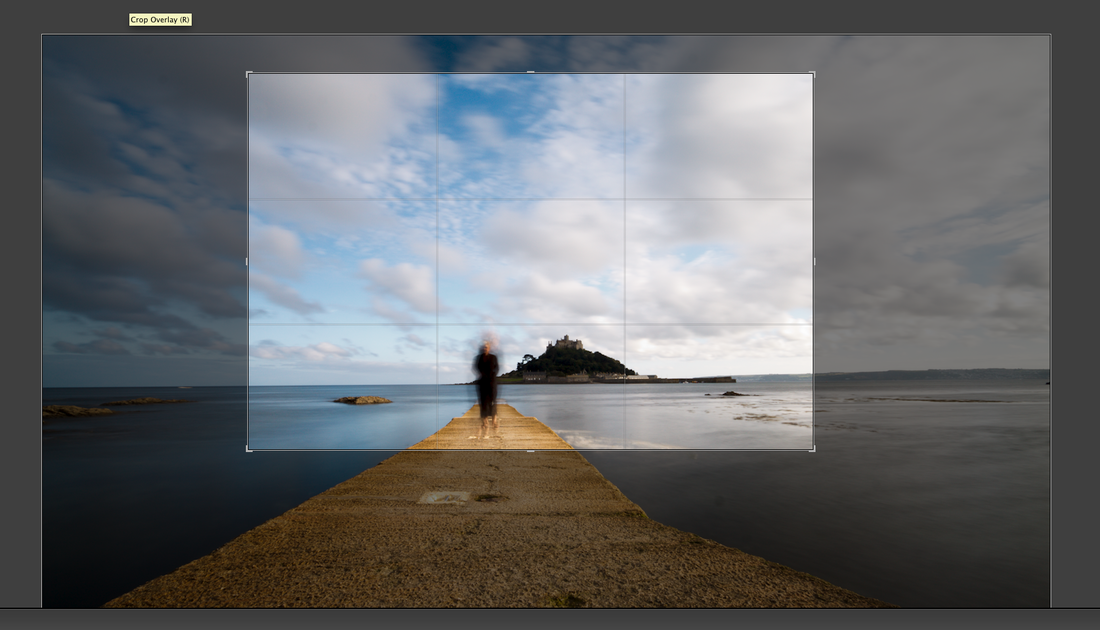
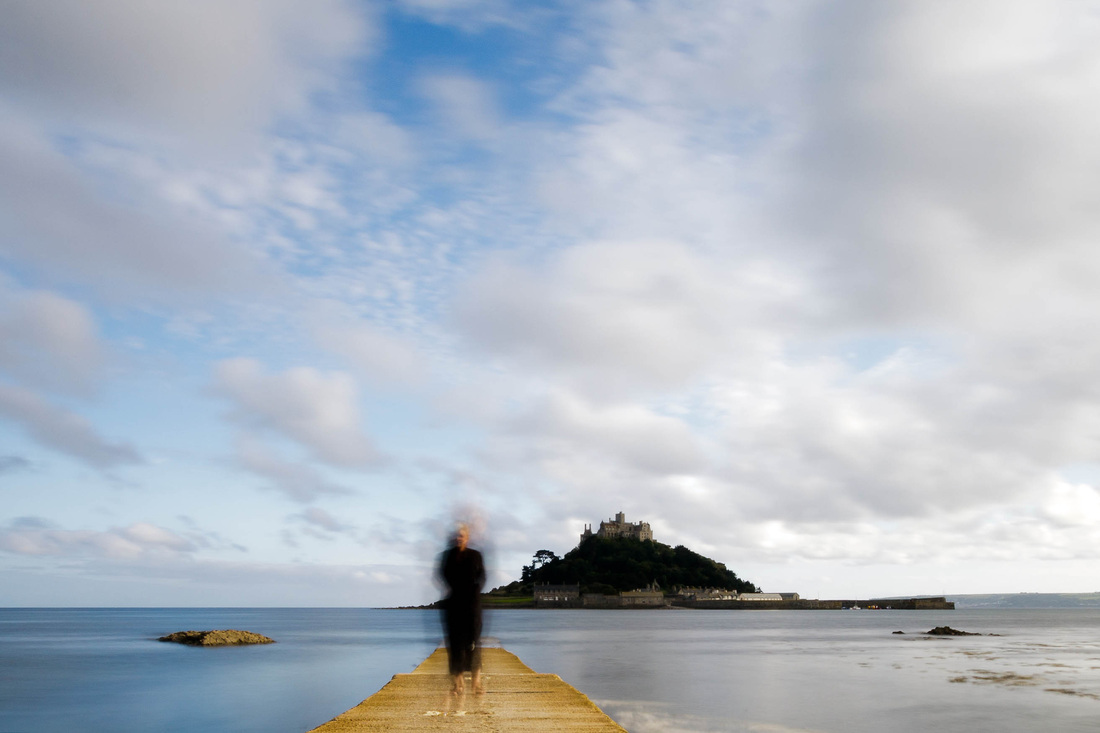
Original Image submitted---see below.
This image was number 1 in my first submission.
Russell felt the the figures were too far away to be of any impact and additionally considered that the concrete jetty dominated the frame and was out of proportion with the Mount behind. . The composition was less than satisfactory.
This image was number 1 in my first submission.
Russell felt the the figures were too far away to be of any impact and additionally considered that the concrete jetty dominated the frame and was out of proportion with the Mount behind. . The composition was less than satisfactory.
4. July: Late afternoon.
F18 10mm ISO 100 2.5 sec using 9-stop ND filter
Lightroom adjustments
Custom WB @ K7800
Tone Curve (- 7 Lights + 2 Darks) Clarity + 37
Cropped
Camera calibration landscape
Photoshop adjustments
Levels
Unsharp mask
The weather had been beautiful earlier in the day, blue sky and sun, but rapidly changed as the day progressed.
Russell mentioned that in all of my wide landscape shots I chose to place the horizon in the centre of the frame. This was not intentional; I just failed to really consider the composition as carefully as I should of. Hence I have cropped this in addition to a few other shots. Cropping slightly also eliminates the lens distortion I get using my wide angle lens at it's extreme setting. Shame I have lost some of the sky detail though.
Crop Overlay below
5: February. Early morning
F4.4 10mm ISO 400 1/80 sec
Lightroom adjustments
Cloudy WB
Tone curve (+15 lights - 2 darks)
Clarity + 63 Vibrance + 9
Cropped
Camera Calibration Landscape
Photoshop adjustments
Vibrance and Curves adjustments again
Unsharp mask
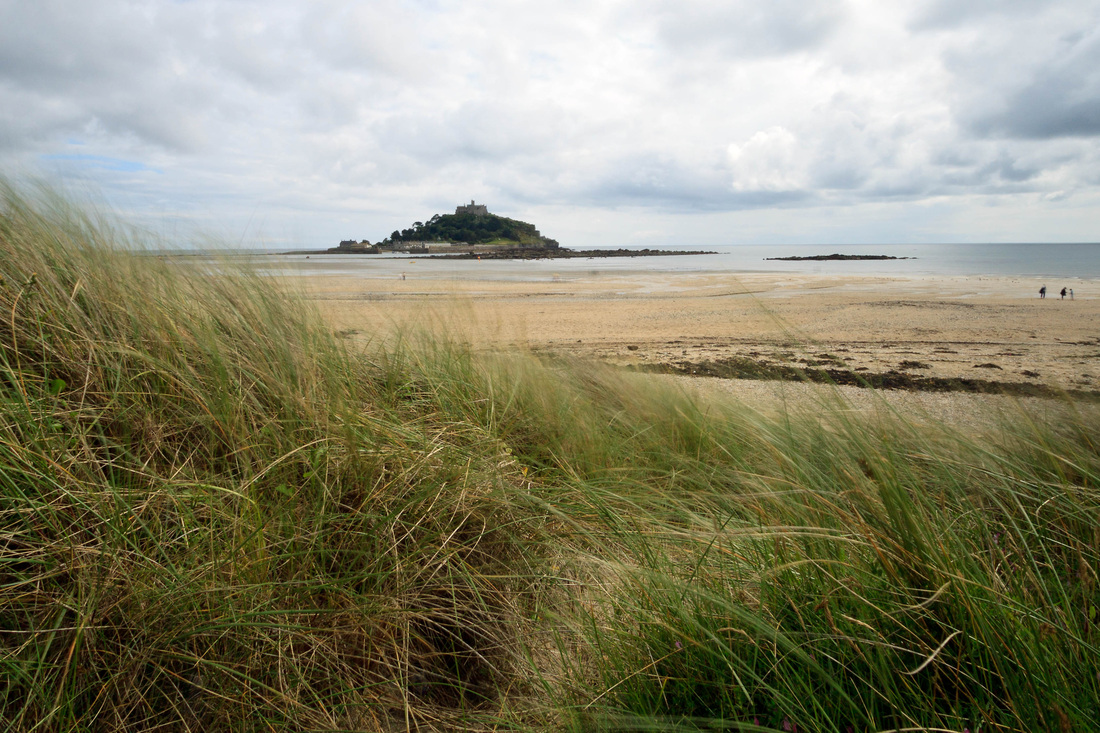
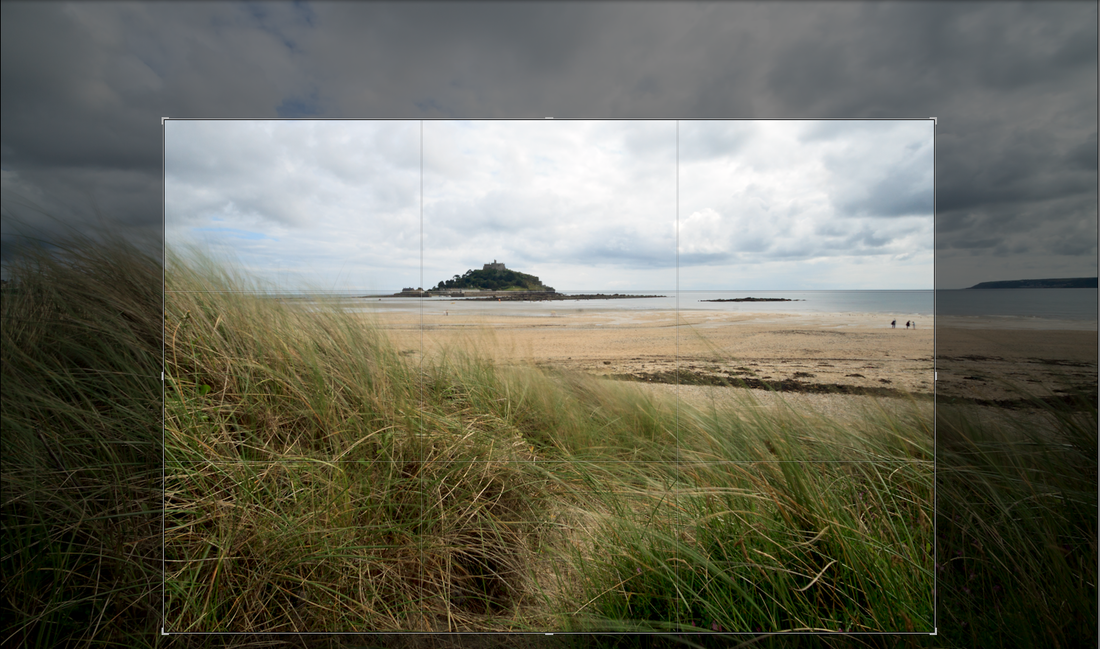
I walked over to the Mount on the final morning of a week’s stay here, something I always try to do-- tide allowing. It was even colder than it had been all week and there were fluttering’s of snow; something that hardly occurs here, the sky was flat and mainly grey. The small town looks quite desolate in the distance but I love the isolation and sense of being far from anywhere at times likes this. I have lost quite a lot of the skyline detail but did not want to underexpose the Causeway and foreground.
This was one occasion when I did not have my tripod with me, and when a graduated filter may have been of some use (I do not possess one). I did not feel confident enough to attempt using the Graduated filter available in Lightroom. Nor do I feel replacing the sky with the use of manipulation is necessary. This is how I want the day as I saw it to be depicted. Russell suggested cropping my original shot by a third, which I have done. I wanted the Causeway to lead the eye towards the small town of Marazion but must agree it dominates the frame and certainly the crop improves this.
F4.4 10mm ISO 400 1/80 sec
Lightroom adjustments
Cloudy WB
Tone curve (+15 lights - 2 darks)
Clarity + 63 Vibrance + 9
Cropped
Camera Calibration Landscape
Photoshop adjustments
Vibrance and Curves adjustments again
Unsharp mask
I walked over to the Mount on the final morning of a week’s stay here, something I always try to do-- tide allowing. It was even colder than it had been all week and there were fluttering’s of snow; something that hardly occurs here, the sky was flat and mainly grey. The small town looks quite desolate in the distance but I love the isolation and sense of being far from anywhere at times likes this. I have lost quite a lot of the skyline detail but did not want to underexpose the Causeway and foreground.
This was one occasion when I did not have my tripod with me, and when a graduated filter may have been of some use (I do not possess one). I did not feel confident enough to attempt using the Graduated filter available in Lightroom. Nor do I feel replacing the sky with the use of manipulation is necessary. This is how I want the day as I saw it to be depicted. Russell suggested cropping my original shot by a third, which I have done. I wanted the Causeway to lead the eye towards the small town of Marazion but must agree it dominates the frame and certainly the crop improves this.
Original image below
Crop overlay
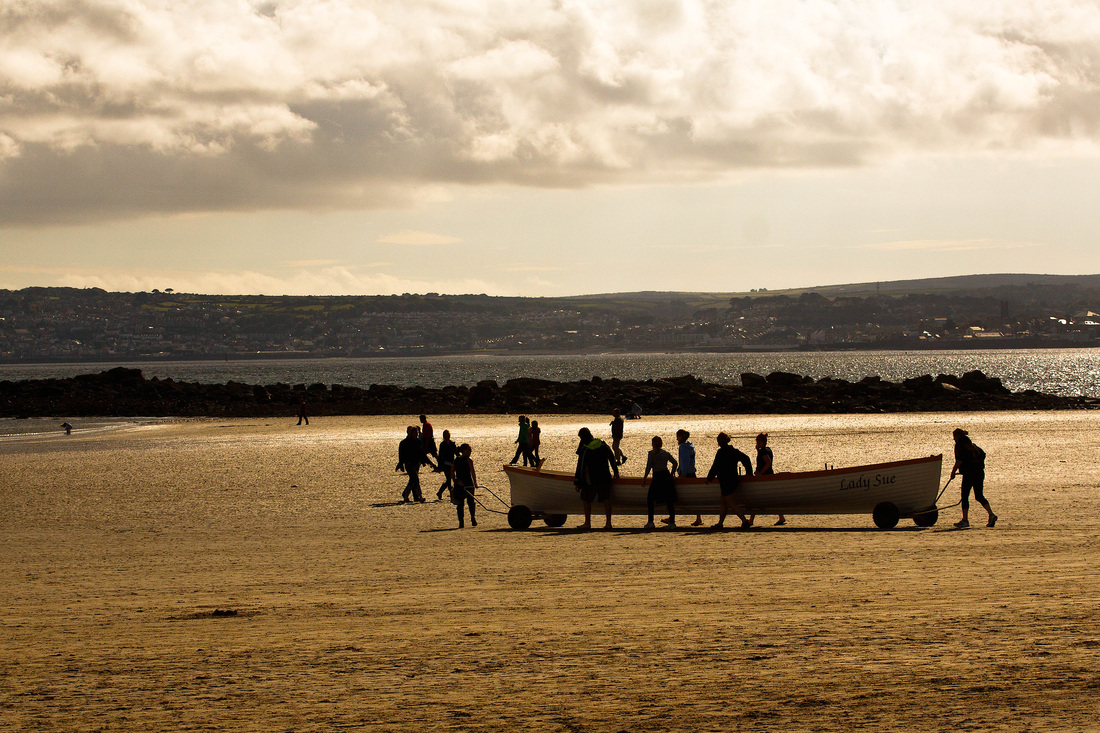
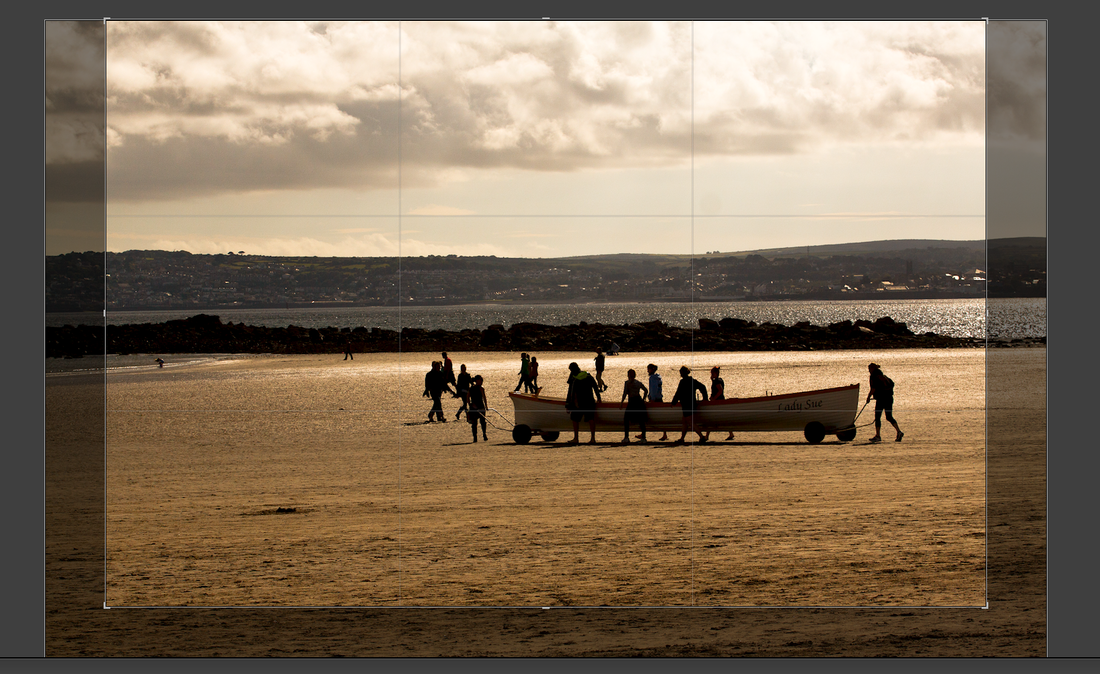
6. July. Early evening.
F8 70mm ISO 100 1/3200 Sec
Lightroom adjustments
+ 1 and ½ stops exposure Shade WB
Tone Curve (+ 32 lights - 13 Darks)
Cropped
Clarity + 12 Camera calibration Standard
Photoshop adjustments
Levels Vibrance + 13
Unsharp mask
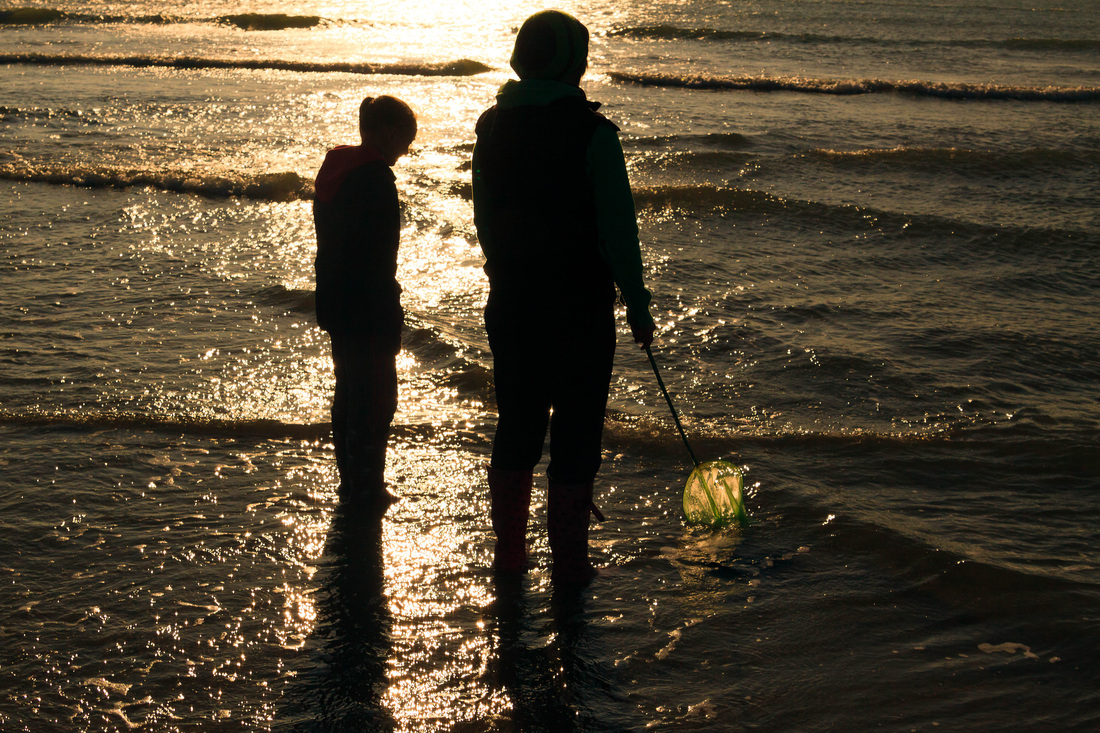
Strolling along the beach another evening I only managed to get 6 shots as the rowing team walked unhurriedly towards the sea. The pace of life here seems slower, more leisurely, and this image is intended to give an awareness of how the Bay is used, what it means, to a few of the people who live here. Shooting towards the sun I was aiming to get the rowers in silhouette. On occasions like this the advantage of shooting Raw becomes clear as I took what I thought were reasonably exposed shots but they were not as I expected or wanted (I did not have time to bracket). However post-shoot I was able to adjust the exposure by just over 1 and ½ stops. But does shooting Raw “invalidate the importance of getting the exposure exactly as you want it? The answer is, not at all. The perfect exposure ------will always give the best image quality “ nevertheless “the extra bit depth from a Raw file makes it a cushion for error-----that allows you to reconsider the nuances of exposure later, when you have more time and you might have changed your opinion about what works best.” Pg. 162 Michael Freeman “Perfect Exposure” The Ilex Press Limited, East Sussex, 2009.
I find it much easier to use the auto WB when shooting Raw; the WB is easily adjusted post- shoot and can be used creatively to alter the whole atmosphere of an image. This image was actually shot earlier in the evening than my 2nd image but by simply altering the WB the ambience is totally altered. Again Russell suggested cropping the foreground as well as attempting to lift the shadow detail slightly.
F8 70mm ISO 100 1/3200 Sec
Lightroom adjustments
+ 1 and ½ stops exposure Shade WB
Tone Curve (+ 32 lights - 13 Darks)
Cropped
Clarity + 12 Camera calibration Standard
Photoshop adjustments
Levels Vibrance + 13
Unsharp mask
Strolling along the beach another evening I only managed to get 6 shots as the rowing team walked unhurriedly towards the sea. The pace of life here seems slower, more leisurely, and this image is intended to give an awareness of how the Bay is used, what it means, to a few of the people who live here. Shooting towards the sun I was aiming to get the rowers in silhouette. On occasions like this the advantage of shooting Raw becomes clear as I took what I thought were reasonably exposed shots but they were not as I expected or wanted (I did not have time to bracket). However post-shoot I was able to adjust the exposure by just over 1 and ½ stops. But does shooting Raw “invalidate the importance of getting the exposure exactly as you want it? The answer is, not at all. The perfect exposure ------will always give the best image quality “ nevertheless “the extra bit depth from a Raw file makes it a cushion for error-----that allows you to reconsider the nuances of exposure later, when you have more time and you might have changed your opinion about what works best.” Pg. 162 Michael Freeman “Perfect Exposure” The Ilex Press Limited, East Sussex, 2009.
I find it much easier to use the auto WB when shooting Raw; the WB is easily adjusted post- shoot and can be used creatively to alter the whole atmosphere of an image. This image was actually shot earlier in the evening than my 2nd image but by simply altering the WB the ambience is totally altered. Again Russell suggested cropping the foreground as well as attempting to lift the shadow detail slightly.
Crop overlay
As shot below

Images 7 and 8: October. Early evening
Taken later in the year, both were underexposed. My only defence being that I failed to compensate for the rapidly dimming evening light as I was shooting, although I did increase my ISO from 100 to 200. I could have increased the ISO even more but dislike the resulting digital noise. Furthermore I left myself with too little time to take many photographs and should have got myself set up earlier in the evening. However once again being able to adjust the exposure meant I was able to adjust these post-shoot.
7
F14 10mm ISO 200 30sec
Lightroom adjustments
+ 1.40 stops exposure Custom WB @ K 13813
Tone curve (+ 16 lights + 32 darks)
Clarity + 97 Camera calibration Landscape
Photoshop adjustments
Levels adjustment
Unsharp mask
Russell suggested the horizon might need straightening but any attempts I make result in a very slanted horizon so unfortunately this has been left alone.
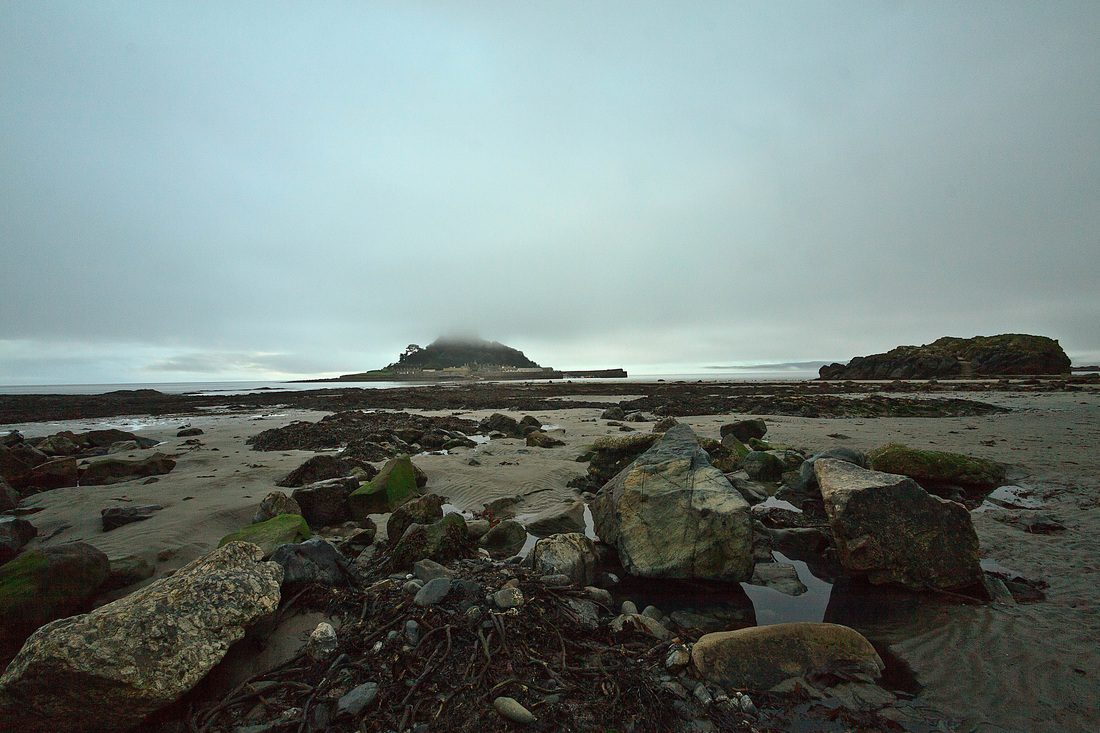
Image as shot
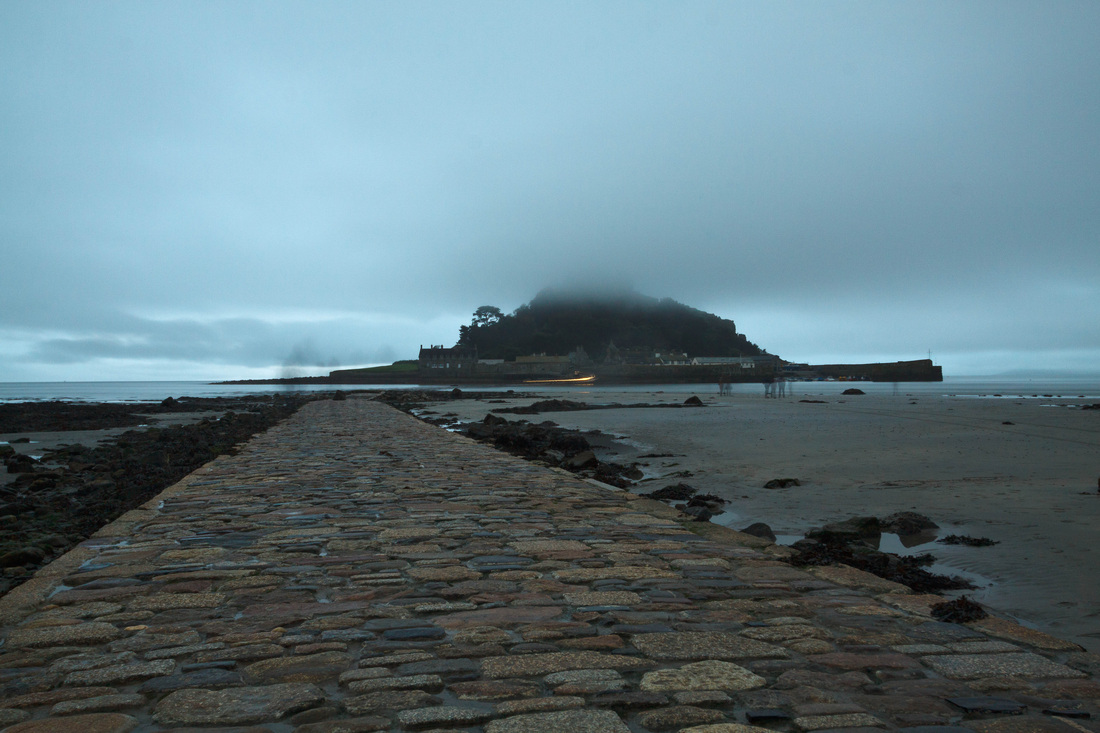
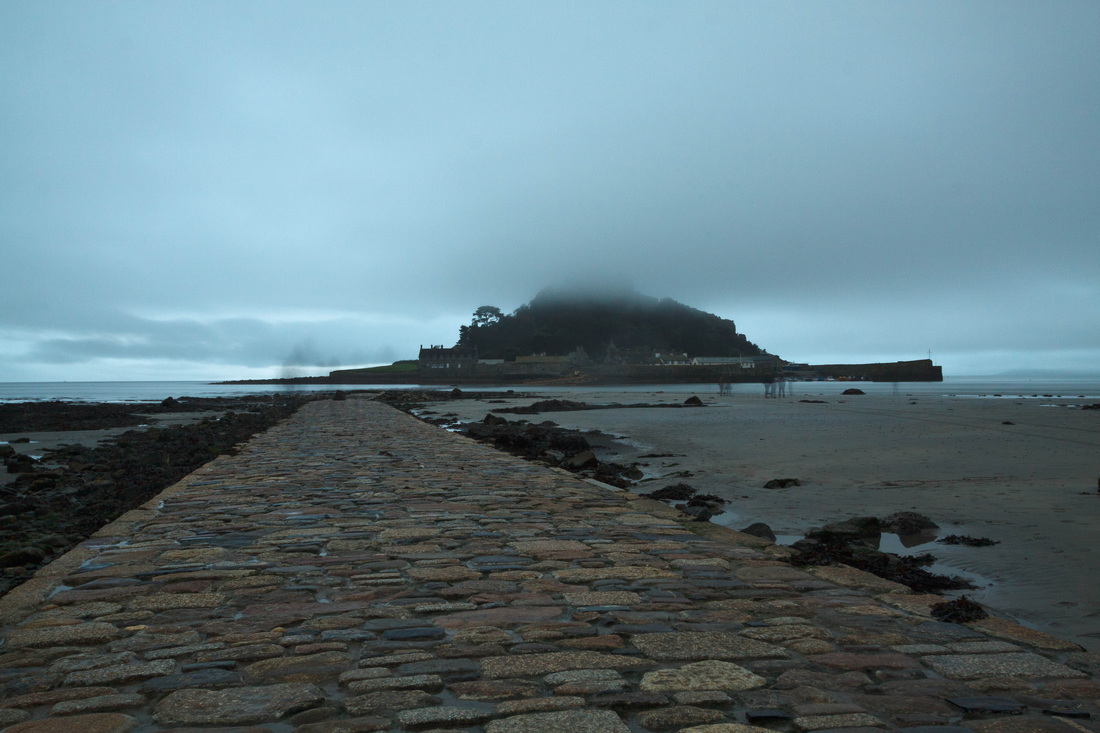
8
F14 21mm ISO 200 30sec
Lightroom adjustments
+ 1.20 stops exposure Custom WB @ K 9688
+ 29 Clarity
Tone curve (+ 18 lights – 16 darks)
Camera calibration Standard
Photoshop adjustments
Levels adjustment
Vibrance adjustment
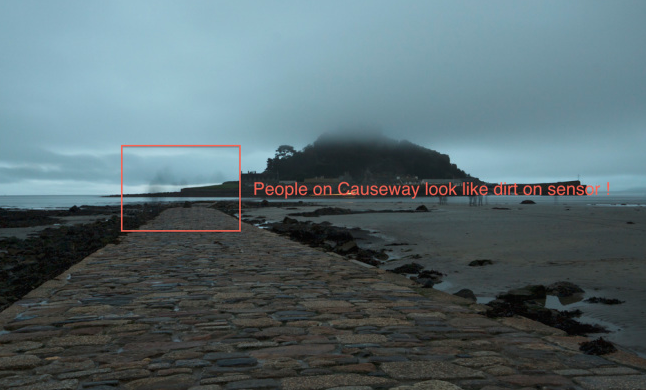
Clone stamp tool (in 2nd version)
Unsharp mask
Although I like the ghost-like figures that can just be seen on the beach area I initially tried to remove the barely visible figures on the actual causeway. They look like dirty grey blobs to me, I tried cloning them out but made such a hash of it I decided to simply leave them there. The streak of light is a vehicle leaving the Mount before the tide separates it from the mainland.
Russell suggested removing the gold streak, which I have done using the Clone stamp tool in Photoshop, but can honestly say I am not sure which version I prefer.
Version 1
F14 21mm ISO 200 30sec
Lightroom adjustments
+ 1.20 stops exposure Custom WB @ K 9688
+ 29 Clarity
Tone curve (+ 18 lights – 16 darks)
Camera calibration Standard
Photoshop adjustments
Levels adjustment
Vibrance adjustment
Clone stamp tool (in 2nd version)
Unsharp mask
Although I like the ghost-like figures that can just be seen on the beach area I initially tried to remove the barely visible figures on the actual causeway. They look like dirty grey blobs to me, I tried cloning them out but made such a hash of it I decided to simply leave them there. The streak of light is a vehicle leaving the Mount before the tide separates it from the mainland.
Russell suggested removing the gold streak, which I have done using the Clone stamp tool in Photoshop, but can honestly say I am not sure which version I prefer.
Version 1
Version 2
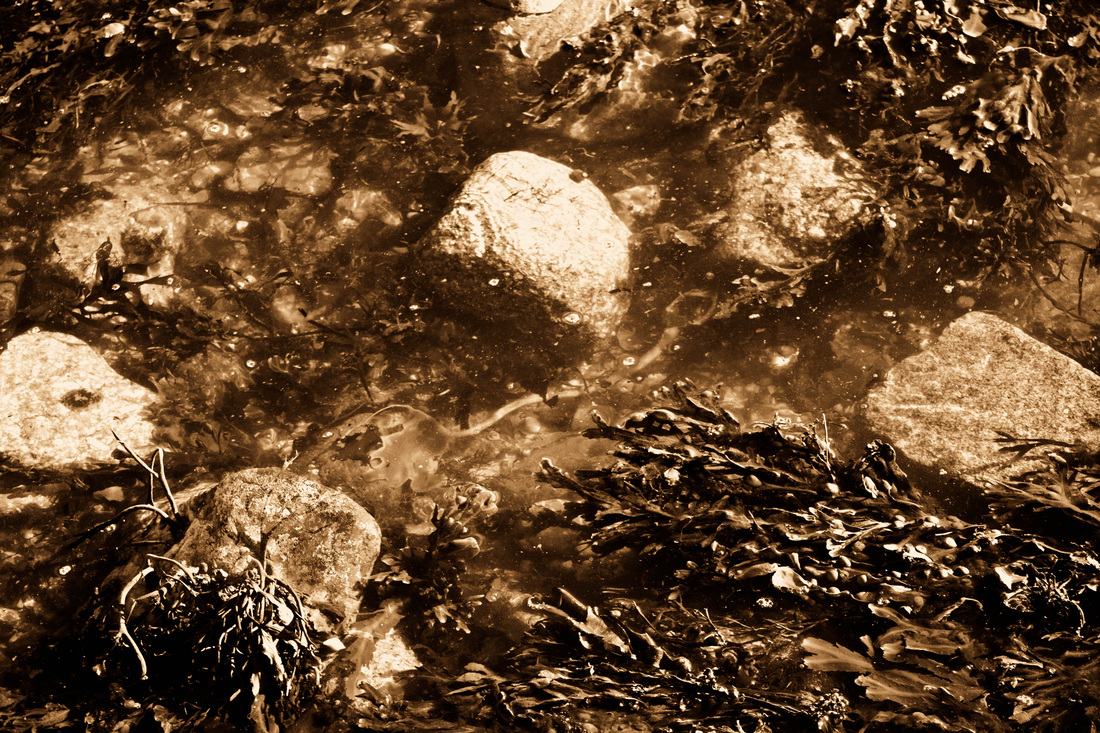
9: Two images combined
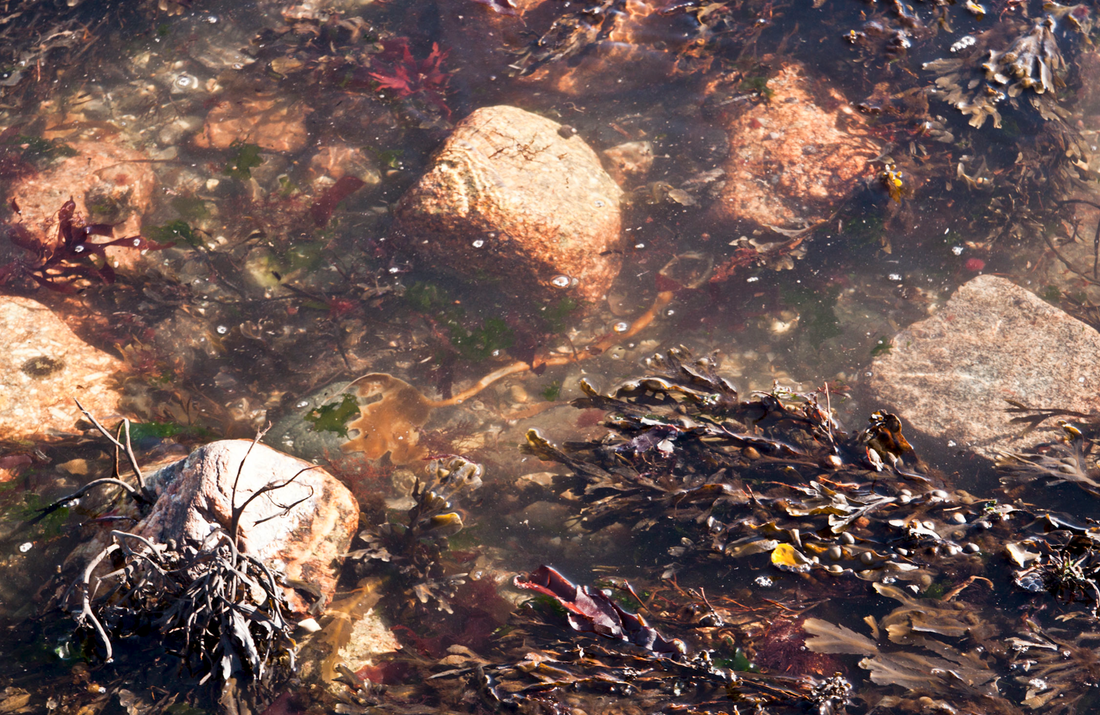
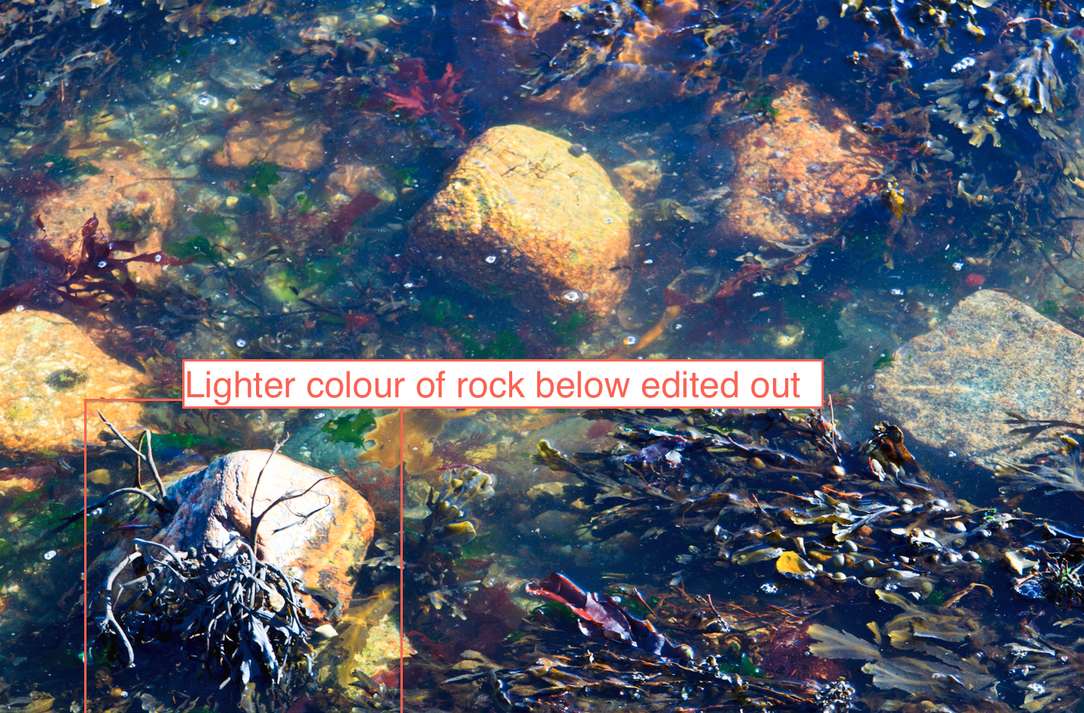
I initially took a few shots of the seaweed and rocks with the intention of converting them to black and white. But one rock was particularly distracting, it had a quite significant patch of a much lighter tone, not something I had noticed at the time of shooting, and I felt it spoiled the overall appearance of the image. My eye was constantly drawn towards this much paler area and it really irritated me. Chapel Rock, which sits besides the Causeway, is covered in lichen and I used a close up image of this lichen to create a texture file. I have altered reality, but by just a tiny bit, and quite honestly I do not feel this minor manipulation is unethical but justified aesthetically.
Russell felt the colour of my original submission (print and blog) looked rather odd. My husband agreed, and the more I looked at both the print and screen agreed also! I thought of re-processing both images but decided to try a sepia tint. Although I have not included any mono work in the assignment I like how the textures are enhanced by the varied shades of brown, and on dreary days the sea and surrounding area take on a dun hue.
Seaweed and rocks
F9 67mm ISO 200 1/80sec
Initial Lightroom adjustments
Custom WB @ K 4050
+26 Clarity
Tone curve (+13 lights + 3 Highlights - 3 darks)
+ 26 Vibrance + 21 Saturation
Camera calibration Landscape
Lichen / texture file
F6.3 23mm ISO 400 1/25sec
Initial Lightroom adjustments
F6.3 23mm ISO 400 1/25sec
Lightroom adjustments
+ 1 stop exposure Shade WB
Negative Clarity – 2
Tone curve (+ 37 – 28)
+ 29 Vibrance
Photoshop adjustments
The two images were blended using a layer mask
Unsharp mask
Tiff file processed again in Lightroom
Sepia tint added
Rocks and seaweed as shot
After processing but prior to the using texture file to edit out the paler rock . Russell commented on the rather strange colour, and comparing it to the original as shot I have to agree.
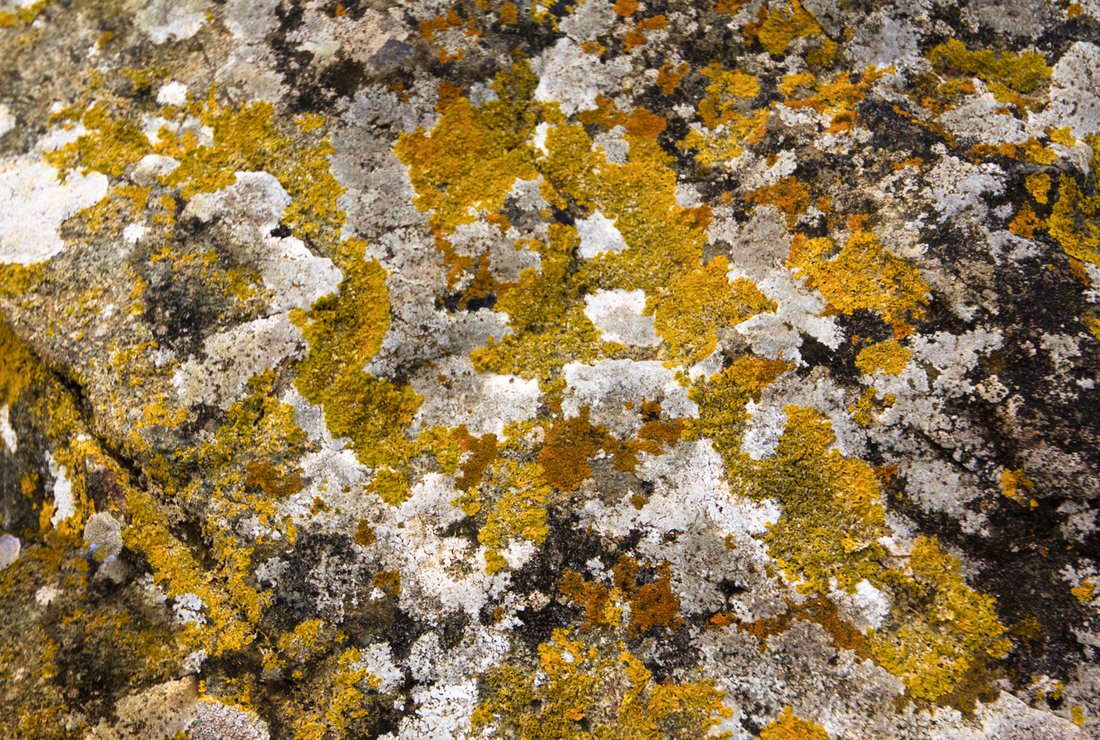 | Texture file |
10, 11 and 12: February. Evening.
On a much-needed break with my 2 daughters and eldest granddaughter I probably took more photographs during my week here in February than on any of my other visits. It was a bitterly cold week, one of the coldest of the winter, but the weather remained dry and some of the evening skies were glorious. I stated I love gloomy weather just as much as I love sun but what photographer can resist a beautiful sunset? I spent one freezing cold evening waiting a couple of hours for the sun to finally sink lower in the sky, I could barely move I was so stiff and cold. However it was worth the wait as I had the luxury of being able to really take my time setting up and exposing my shots.
10
F6.3 28mm ISO 100 1/6400
Lightroom adjustments
Shade WB
Tone curve (+ 39 lights - 4 darks)
Clarity – 16 Camera Calibration Landscape
Cropped
Photoshop adjustments
Levels adjustment
Vibrance adjustment
Unsharp mask
Shooting into the bright early evening light was tricky but I like the overall golden tone this has created which is so different from images 8 and 9. I cropped the image to exclude what I felt was a rather distracting horizon line but once printed felt I had cropped too tight so adjusted this again slightly. Russell suggested I try and bring out some of the shadow detail.
11
F11 24mm ISO 100 1/15 sec
Lightroom adjustments
Shade WB
Tone curve (+ 18 lights - 6 darks)
Clarity – 9 Camera Calibration Landscape
Photoshop adjustments
Levels adjustment
Unsharp mask
Russell suggested trying to lift some of the shadow detail at the bottom right of the frame.
F11 24mm ISO 100 1/15 sec
Lightroom adjustments
Shade WB
Tone curve (+ 18 lights - 6 darks)
Clarity – 9 Camera Calibration Landscape
Photoshop adjustments
Levels adjustment
Unsharp mask
Russell suggested trying to lift some of the shadow detail at the bottom right of the frame.
12
F16 16mm ISO 100 1/8 sec
Lightroom adjustments
+ 1 stop exposure
Custom WB @ K 6126
Tone curve (+ 17 lights – 3 darks)
Clarity + 9 Vibrance + 12 Saturation + 6
Camera calibration Standard
Photoshop adjustments
Curves adjustment again
Unsharp mask
I felt this image was too underexposed as shot; I had lost quite a bit of detail, and hence increased the exposure by 1 stop.
As shot below
 RSS Feed