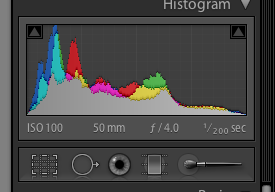
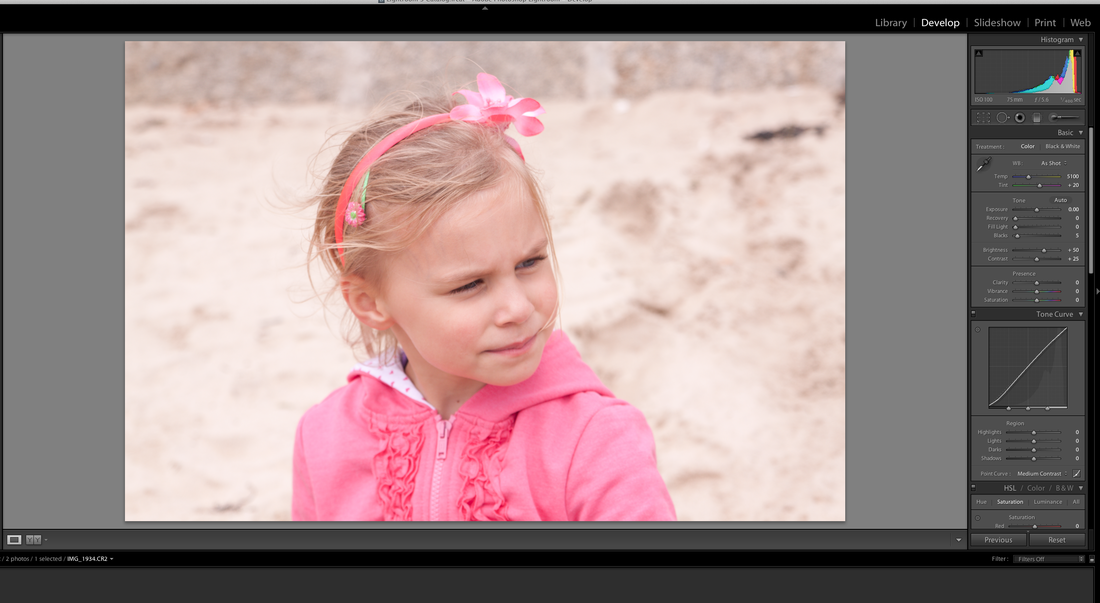
The images for this assignment need to be of high contrast scenes shot in Jpeg not RAW. The human eye, unlike the sensor, quickly adapts to differing levels of light, colour, brightness and shade so understanding how a digital sensor records these scenes and using this knowledge will help produce correctly exposed images requiring no post-processing.
How I have hated and struggled with this assignment! I completed the third assignment prior to finishing this one: I was unhappy with anything that I took and kept trying to improve. I have shot in RAW format for quite a few years so this in itself created a personal challenge even though I am reasonably competent with my equipment. RAW capture allows me to choose exactly how I want the final image to look post shoot; I like the flexibility and creativity it offers. I felt uninspired and unsure exactly how I was going to approach the assignment.
Furthermore needing 3 images for each situation I then had to decide if each set of 3 would work best as a themed set or perhaps just take unrelated individual images that fitted the criteria. I use photography as a means of expressing myself and although understanding technical issues and choosing the right camera settings are a very important part of this assignment I also hoped to create some thought-provoking images as well. I have included one black and white image, setting my camera to record in monochrome, not something I usually do, as I prefer to convert post – shoot.
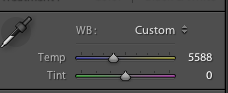
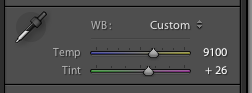
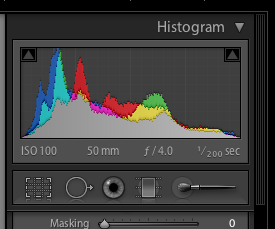
The WB and exposure settings, which can be altered later if shooting Raw, are extremely important considerations when shooting Jpeg to ensure the right mood is created in-camera. The sensor will record faithfully what it exactly sees. Seeing like your camera involves being able to use this knowledge not only to ensure the best colour balance and exposure but also inventively. I found my Sekonic Light meter extremely useful to take ambient light readings, a problem with the camera’s TTL meter is how it sees and measures light: using reflected meter readings it is easily fooled into over or underexposing images. Admittedly this can be overcome but the most important factor to successful photography is learning to use light effectively and in tricky situations I prefer, if time allows, using ambient meter readings.
I can honestly say that I feel some of the images taken for this assignment are not amongst my best work, something I always try to achieve. I felt despondent throughout the time I was working through the assignment and seriously wondered if I should even be doing a degree course. This is at the heart of why it has taken me so long to complete, I kept hoping I could improve on what I had taken but kept going around in ever decreasing circles achieving even less! However the best way to deal with failure is to learn from it and move on and although I will continue to shoot RAW in the future the assignment has taught me to slow down and consider prior to shooting how best to capture what I want in- camera and try to reduce time spent in front of a computer screen correcting basic mistakes.
Backlit scenes
When shooting a backlit image the camera will try and compensate for the bright light directly facing it underexposing any subject.
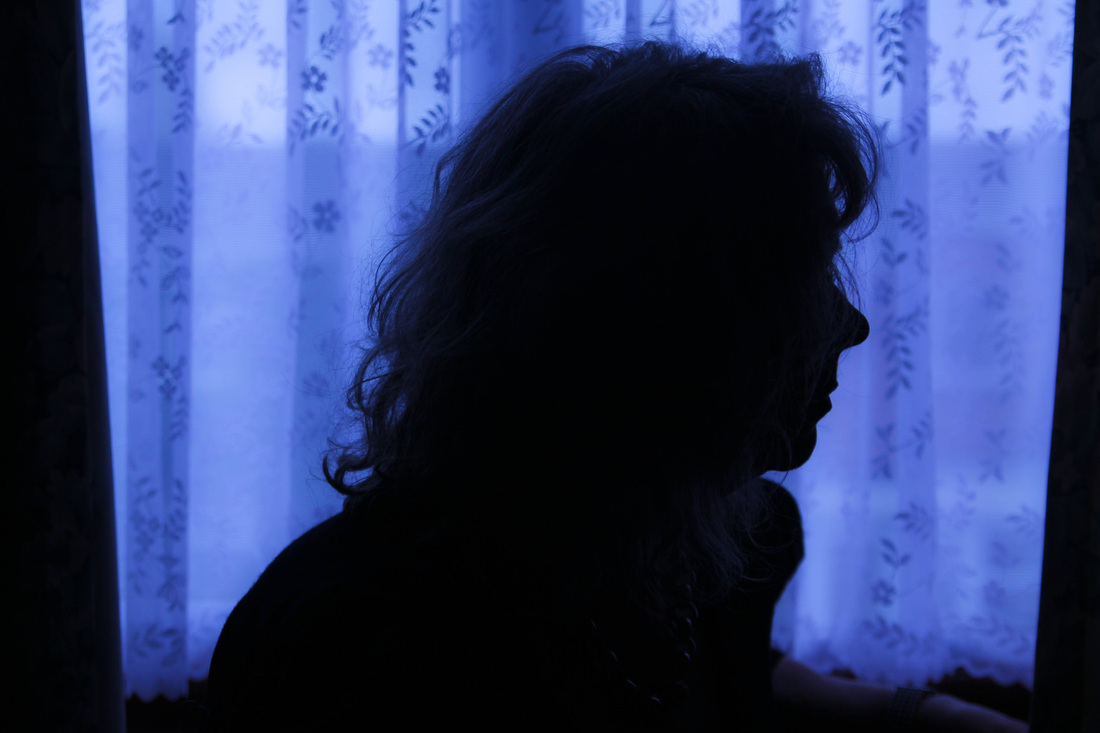
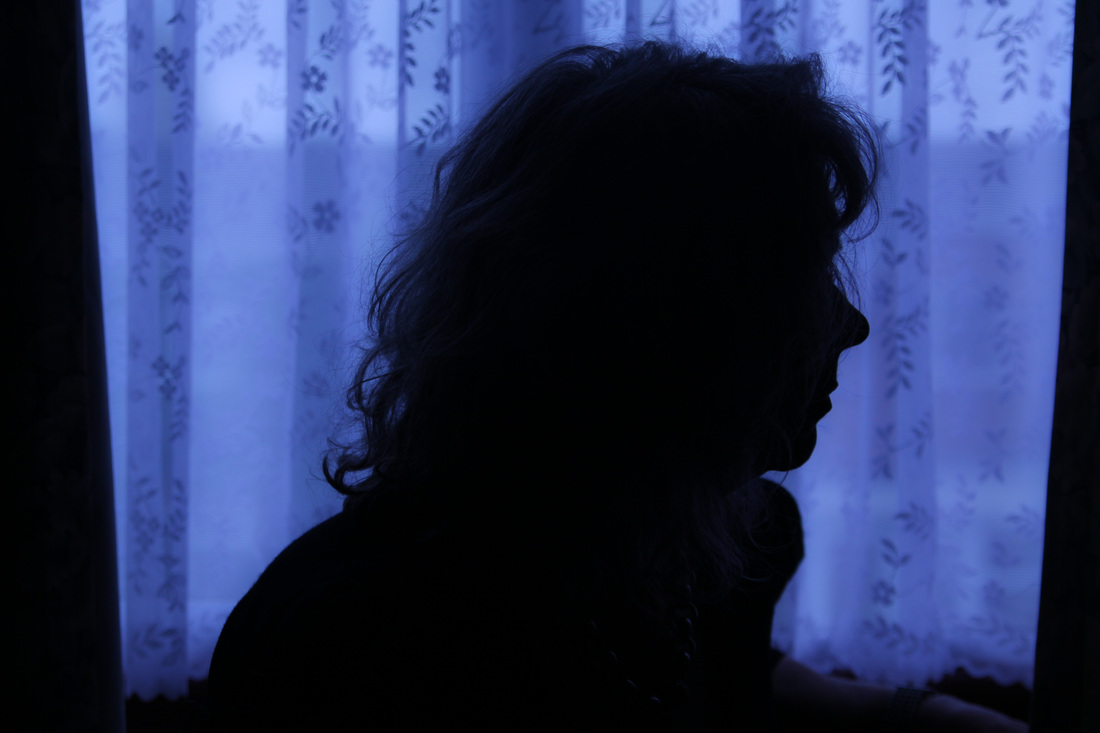
Moody Blue
F3.2 1/125 IS0 100 28-75mm lens @ 51mm Tungsten WB
Tripod Cable release
I used my hand held meter to expose and also bracketed. To create a silhouette I needed to be sure I underexposed the subject (myself) and took an ambient light meter reading from the window area behind where I was going to sit. Taken in the middle of the afternoon the light in the room appeared neutral with no visible colour cast.
This summer has been one of the wettest for a long time; whenever I had time off work it rained without fail. Feeling thoroughly fed up I took this self-portrait on a rainy but surprisingly bright afternoon using a bedroom window as my backlight. Shooting Jpeg meant it was important to choose the correct WB setting at the time of shooting to create the atmosphere I was aiming for. The symbolic meaning of colour varies between cultures and changes over time, but “the poets and artists of the Romantic era made blue the colour of melancholy” Pg. 323 “Celebrating Colour in Photography Chroma”. By choosing an incorrect WB setting, Tungsten in daylight, the camera has recorded a blue hue: perfect to represent my mood that day.
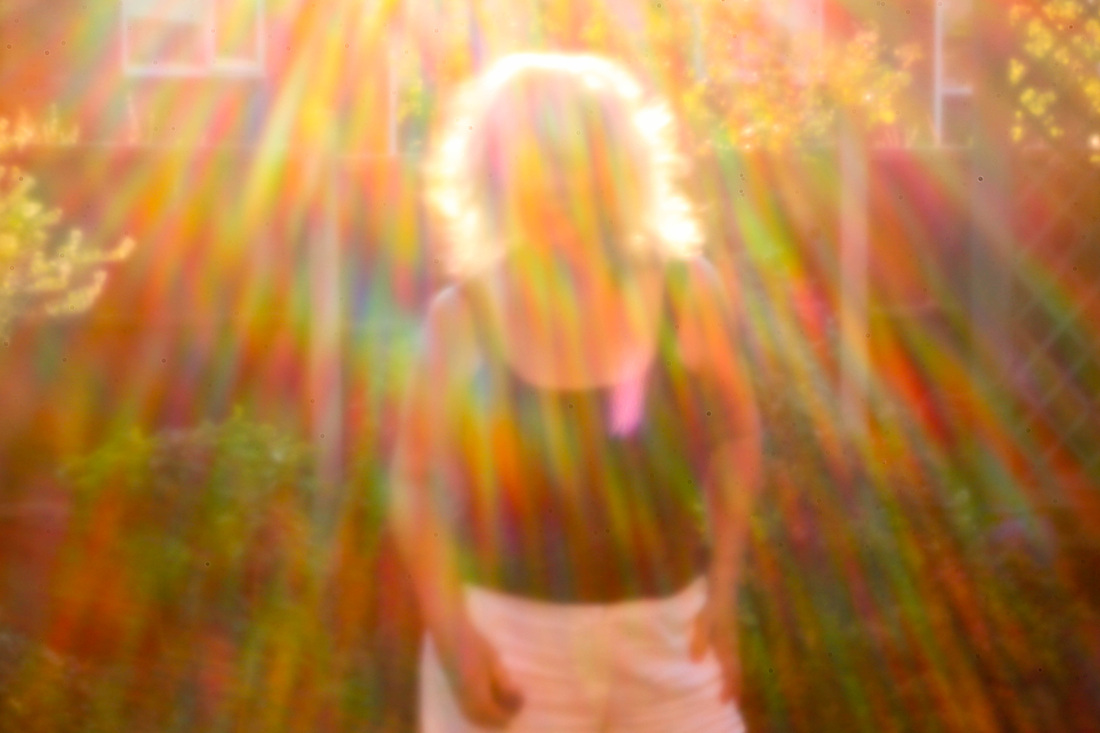
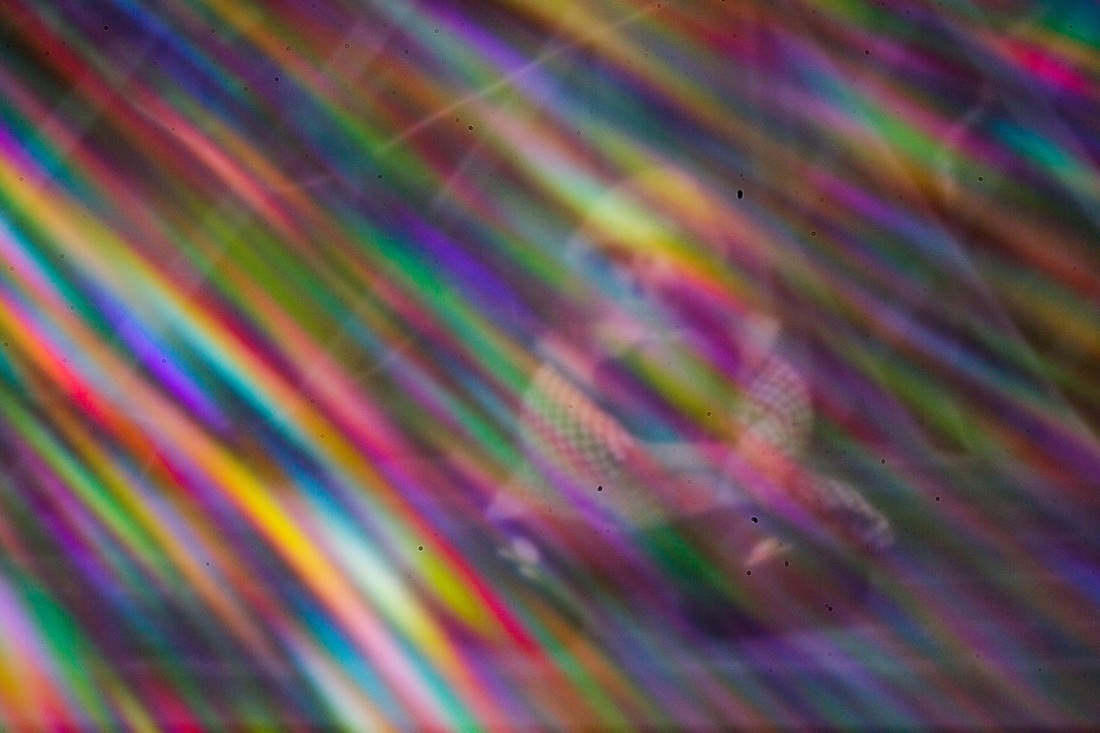
Pinhole Self-portrait
F176 (Very approx. using an adapted pinhole lens cap) 3.2 Sec ISO 100
Tripod Cable release
Taken with the low early summer sun directly behind me. I took a meter reading using my hand held meter and used a pinhole calculator to get an estimated exposure time then bracketed my shots.
What I expected and what the camera recorded really surprised me. The results using the pinhole lens cap are rather unpredictable, that’s one of the reasons I bought myself one as a bit of a challenge and to try something totally different photographically, but I was not expecting such a colourful result. The camera captured the rays of coloured light invisible to the human eye.
Technically the top of my hair is blown, and obviously the image itself is not as crisp and sharp as is usual from a digital camera but I personally think aesthetically it is visually pleasing.
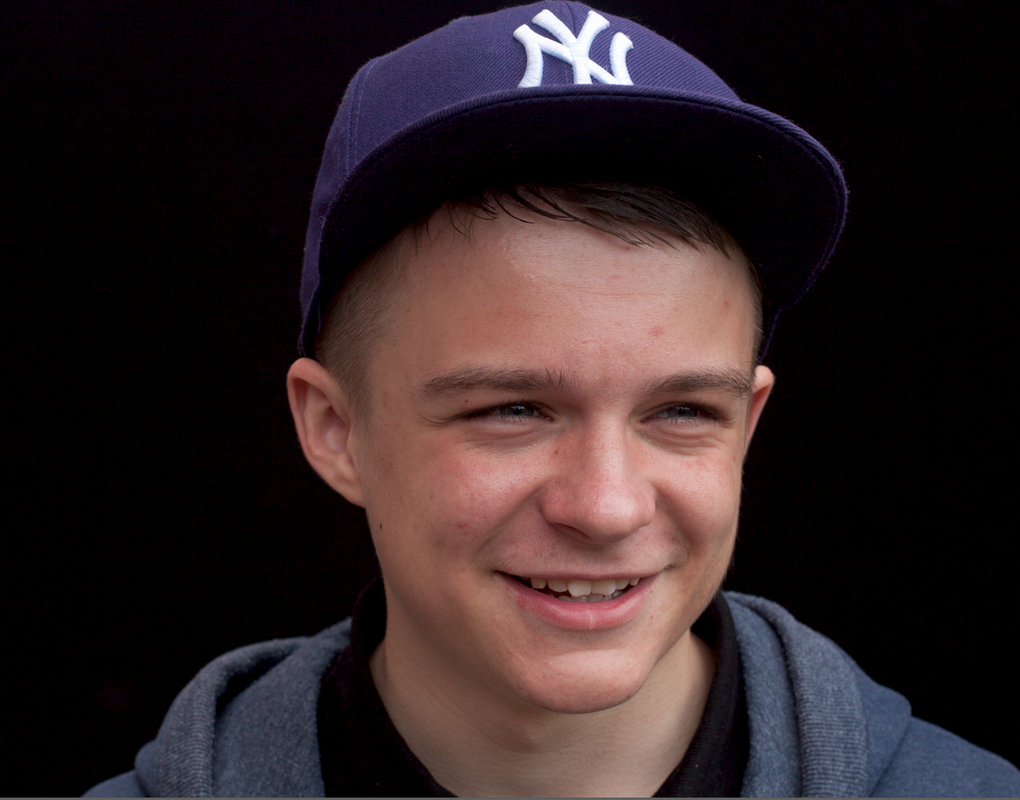
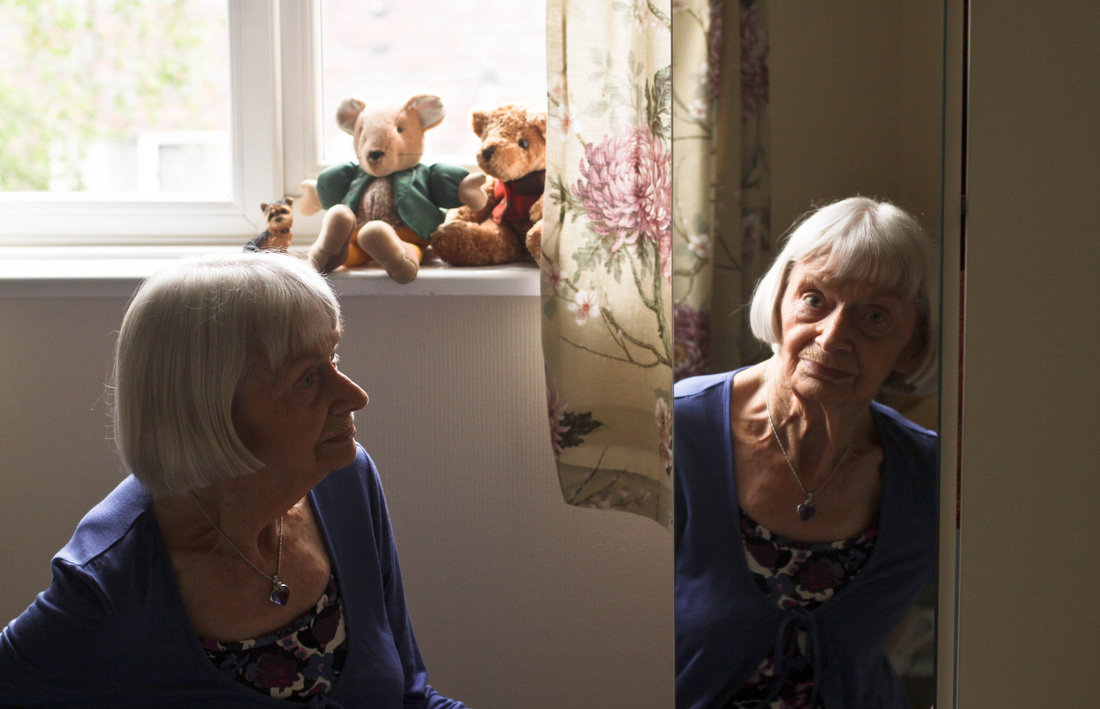
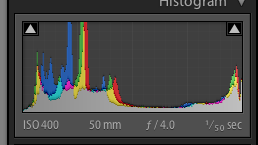
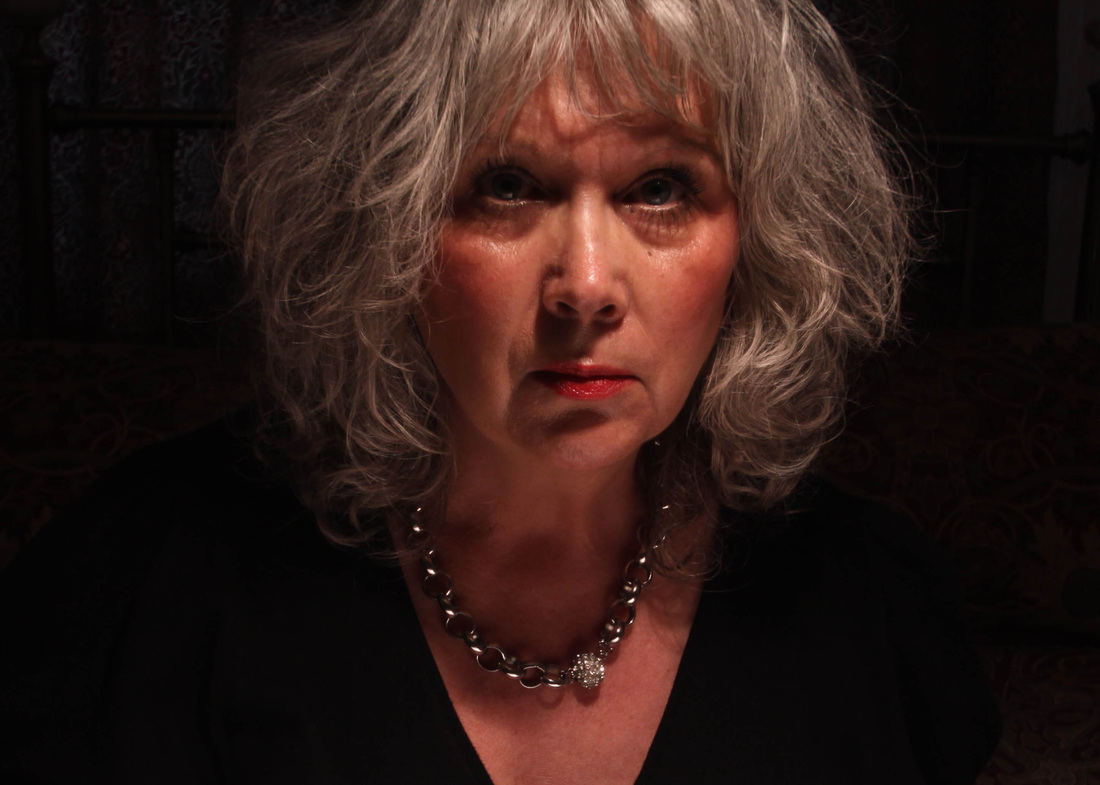
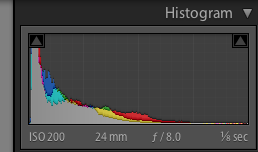
Mum in the mirror
F11 0.4 sec ISO 400 50mm prime lens Cloud WB
I am always fascinated by how a subject looking into a mirror sometimes appears to have a completely different expression in the reflection.
I knew the bright window light would fool the camera into underexposing my subject and planned to get Mum exposed correctly in the mirror using a hand held meter taking an incident light reading and also bracketing. However I do not think I have achieved the best in-camera exposure and perhaps should have also used a reflector to bounce some light towards her face.
Indoors using a single source of artificial light.
A hand held meter is indispensible when shooting in this type of light and I used it for all three shots to expose.
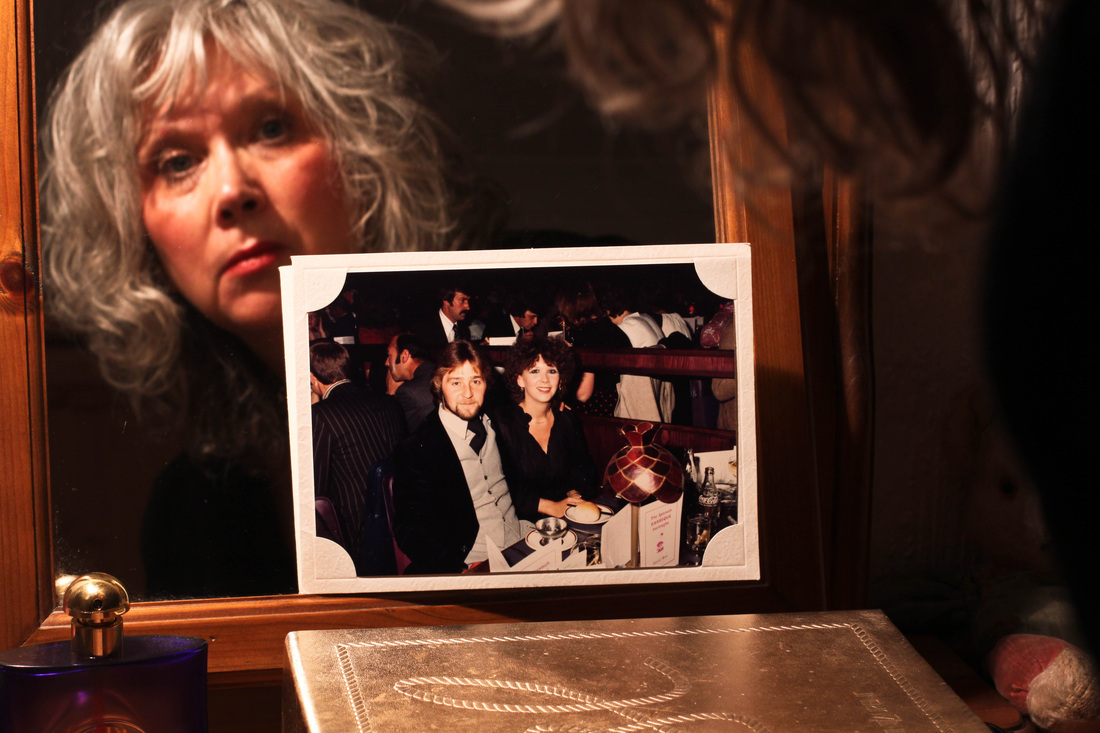
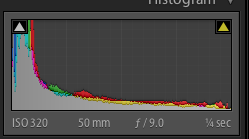
The way we were
F9 ¼ sec ISO 320 50mm prime lens Tungsten WB
I have been trying to think of ways to incorporate old photographs with portraiture as a way of showing a connection between past and present--a way of exploring thoughts and feelings. For this image I used a bedside lamp and took a series of self-portraits. I really wanted a wider view to show more of the dressing table and all of the bits and pieces kept there but found it very difficult to frame correctly and use myself as the model. Keeping the light source out of the frame proved awkward. Shooting at slow speeds made many of the images out of focus if I moved slightly and I wanted the mirror reflection to be reasonably sharp in order to clearly see the person I once was and have now become.
It is interesting to compare the hues of this image with my self-portrait Moody Blue, both taken using Tungsten WB setting but with very different results.
Self Portrait by lamplight
F8 ¼ sec ISO 200 10-24mm lens @ 24mm Tungsten WB
In my darkened bedroom I used an ordinary spotlight reading lamp as my single light source. I have cropped the image as I held a piece of white card in my hands to reflect some light back into my face and this was visible in the frame.
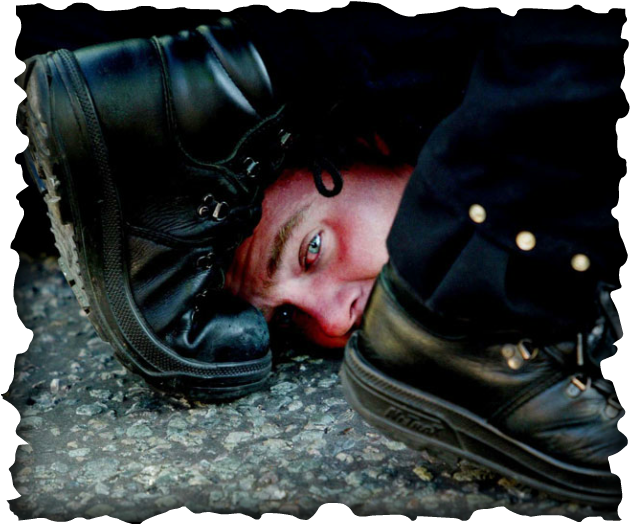
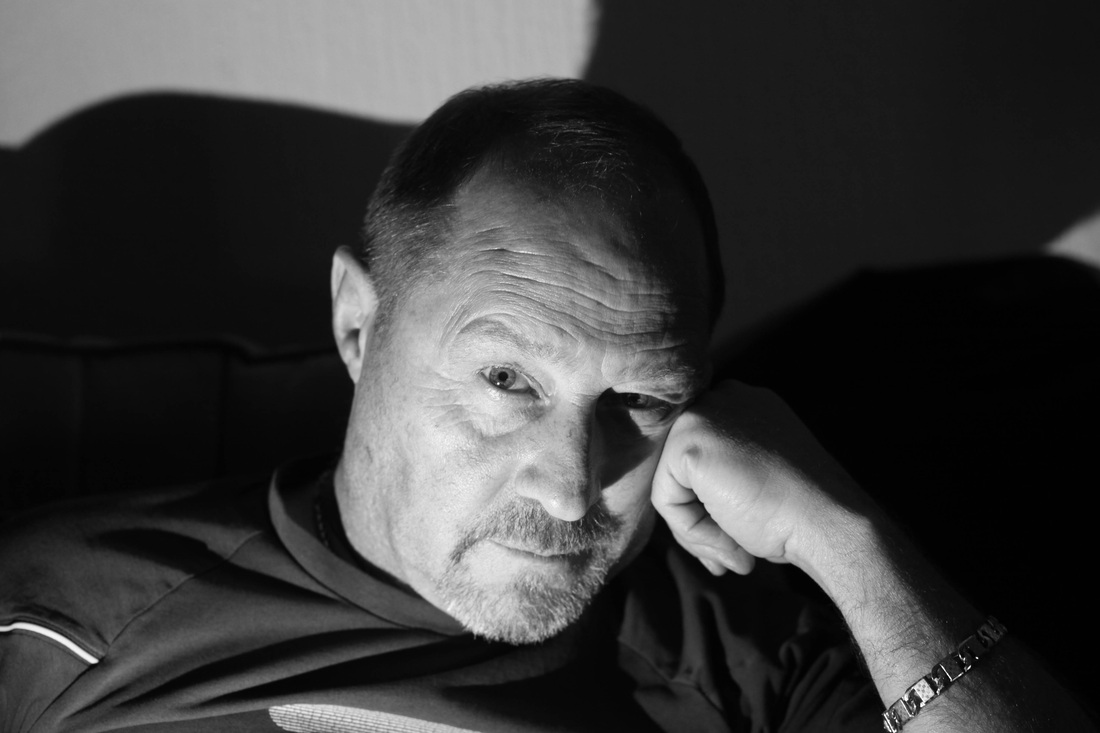
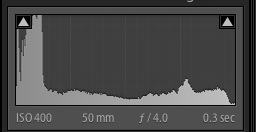
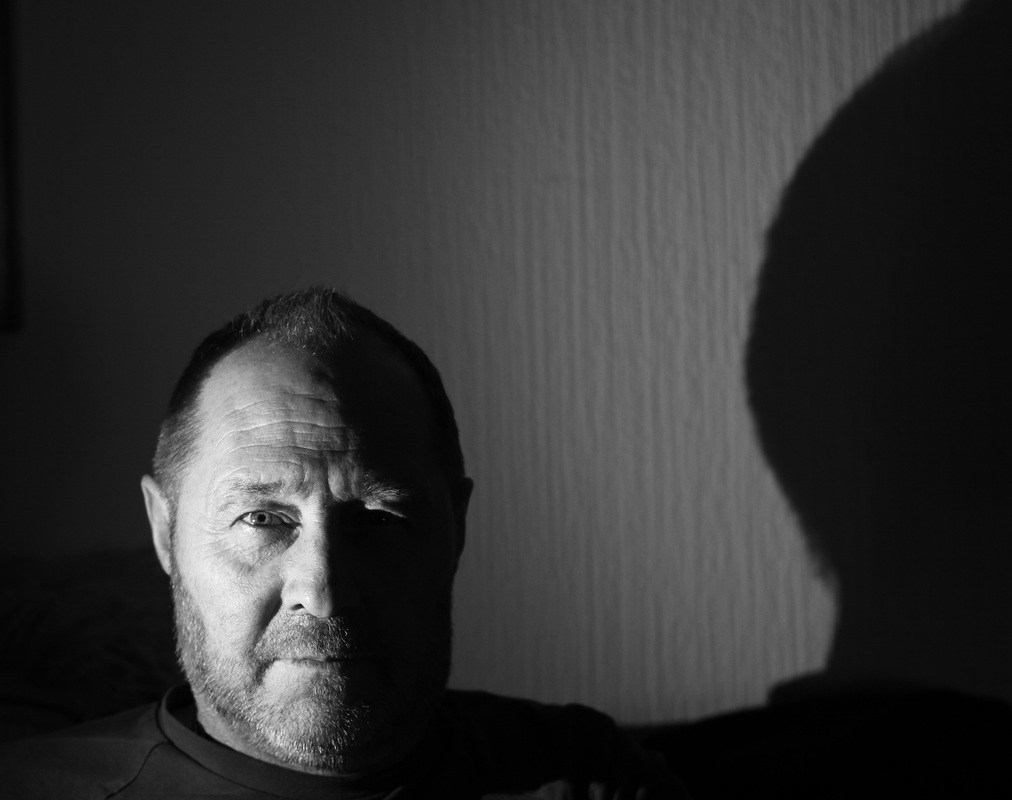
Bill by mobile light
F4 0.3 Sec ISO 400 50mm prime lens Auto WB
Tripod Cable release
Camera set to Black and White mode.
I considered using an Ipad or something similar having read about the work of Donald Weber in the May 2012 edition of the BJP. Working in the Artic Circle with the local Inuit people he used any available digital device to illuminate his subjects. He used the light from mobile phones and as my husband’s mobile has quite a strong light I had a go myself. What I did not do was shoot hand held as Donald Weber did but used a tripod as hubby held his mobile with the light directed towards one side of his face.
Initially I felt I should have tried to prevent the very dark shadows but the more I looked at it the more I liked how the lighting had created a rather menacing portrait. In actual fact nothing could be further from the truth as we were both laughing so much as I tried to direct him that I am astonished I caught this threatening facial expression. Light and colour alter how a photograph is read and therefore set my camera to record mono which I think has a more edgy appearance. I wanted a sinister appearance with dark shadows, though perhaps they are a little too dark. A lot of information is lost on the right hand side but it does add to the menacing tone of the image.
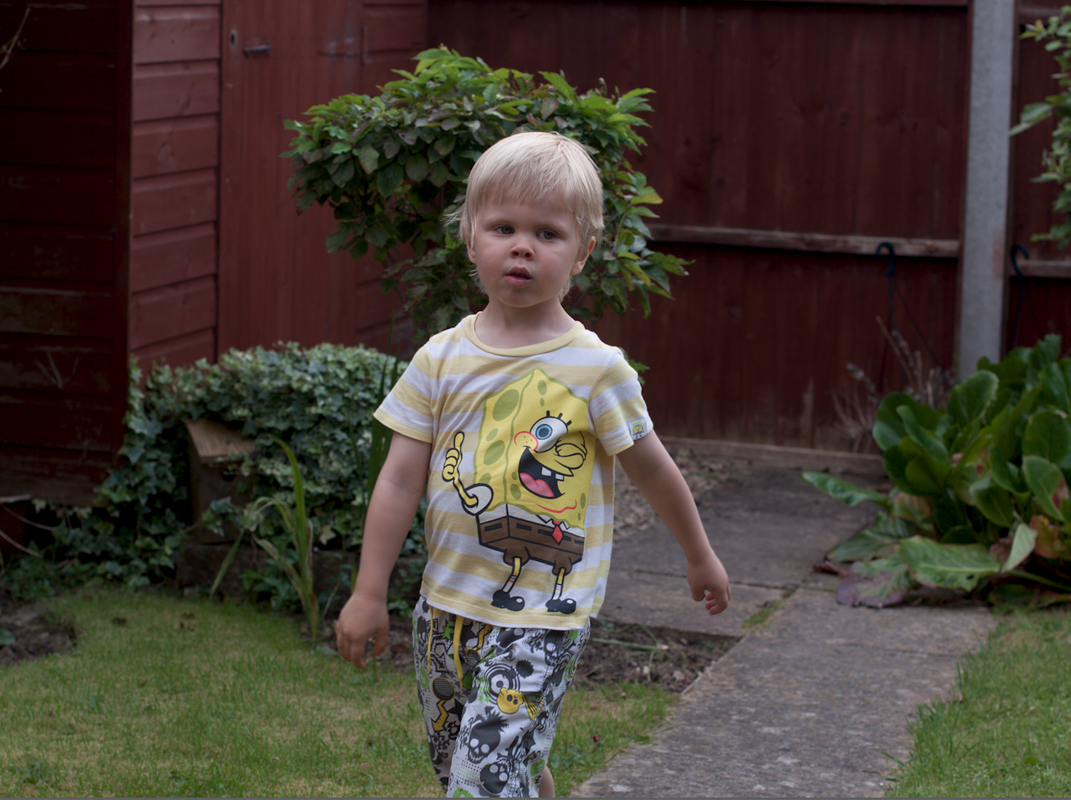
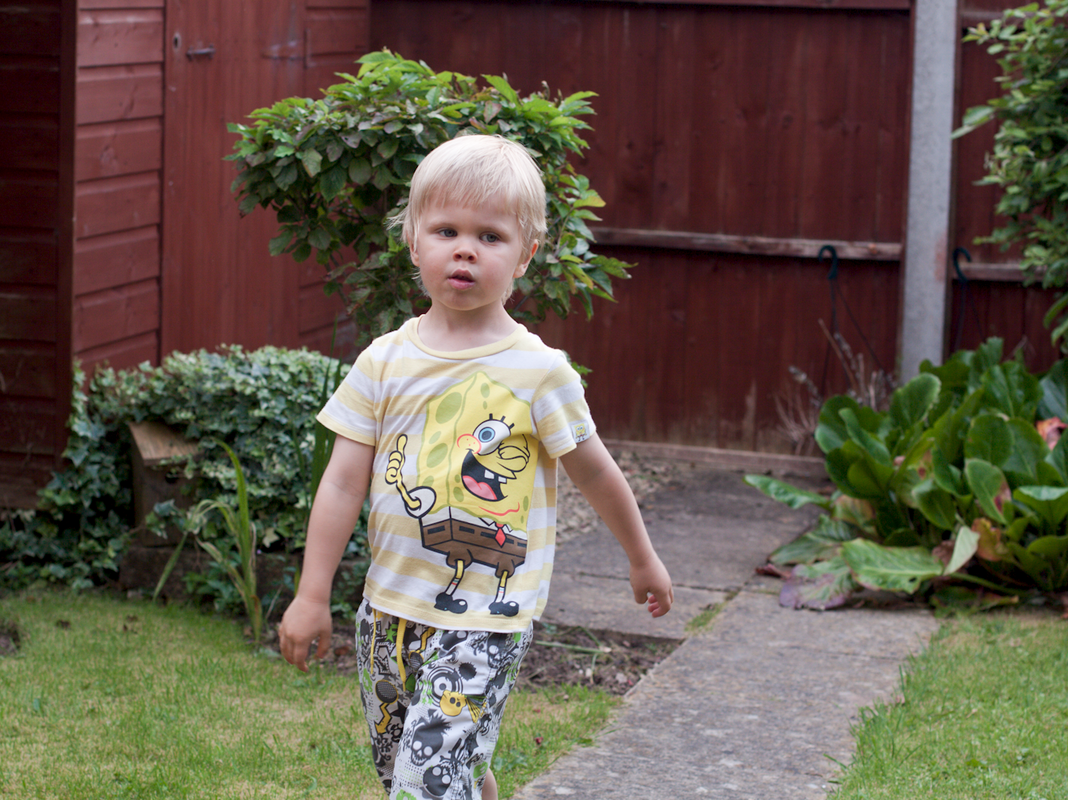
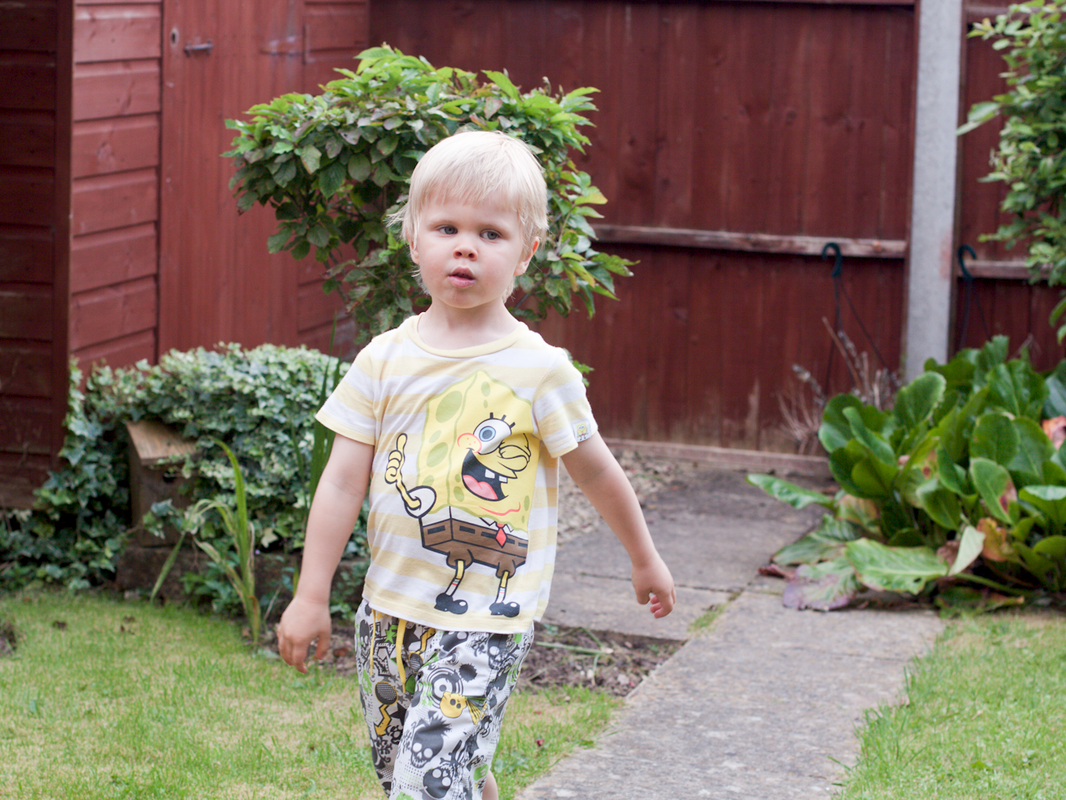
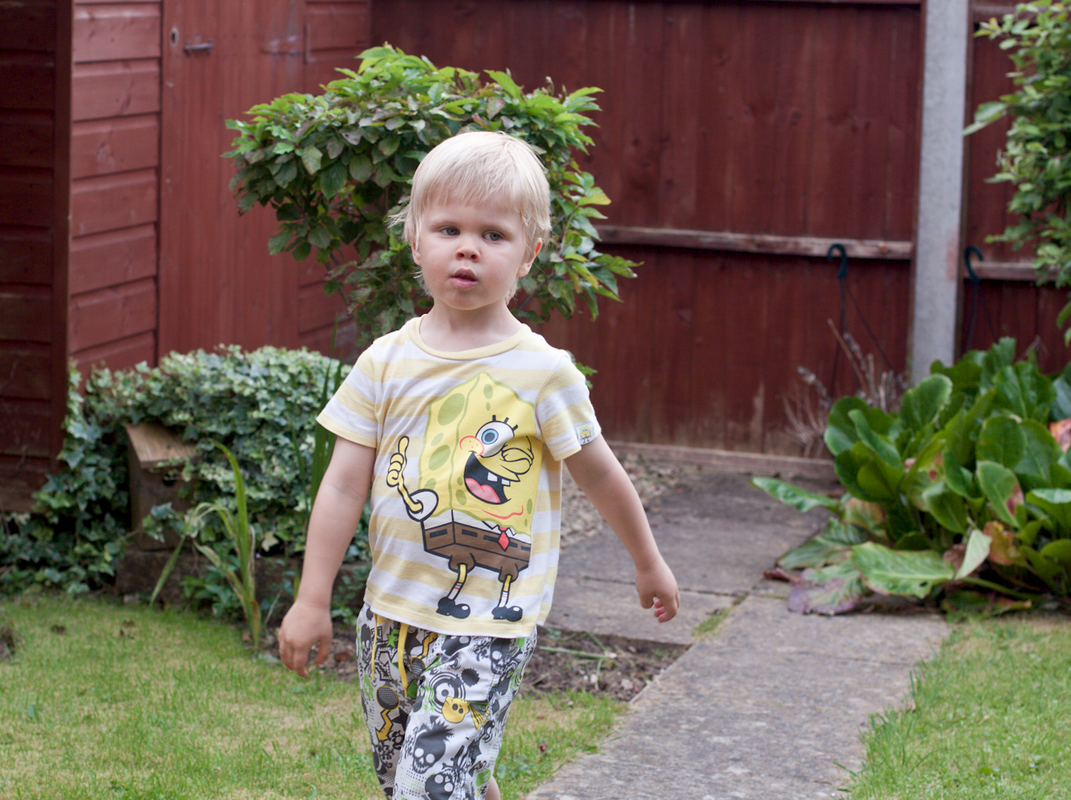
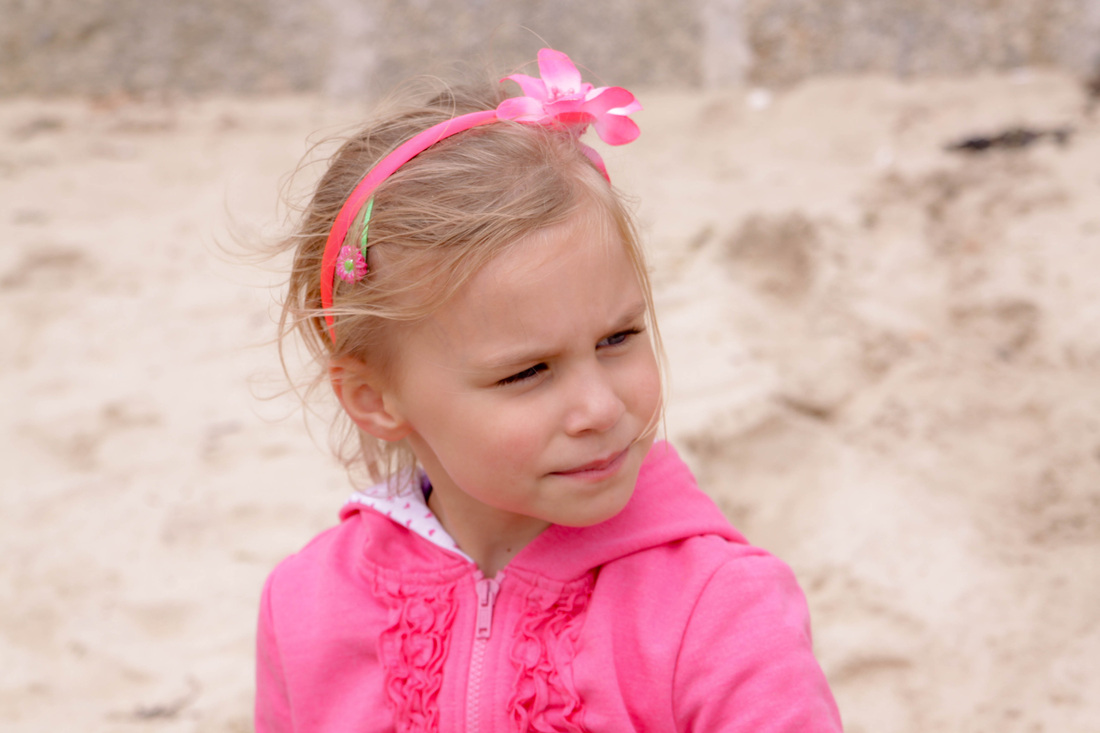
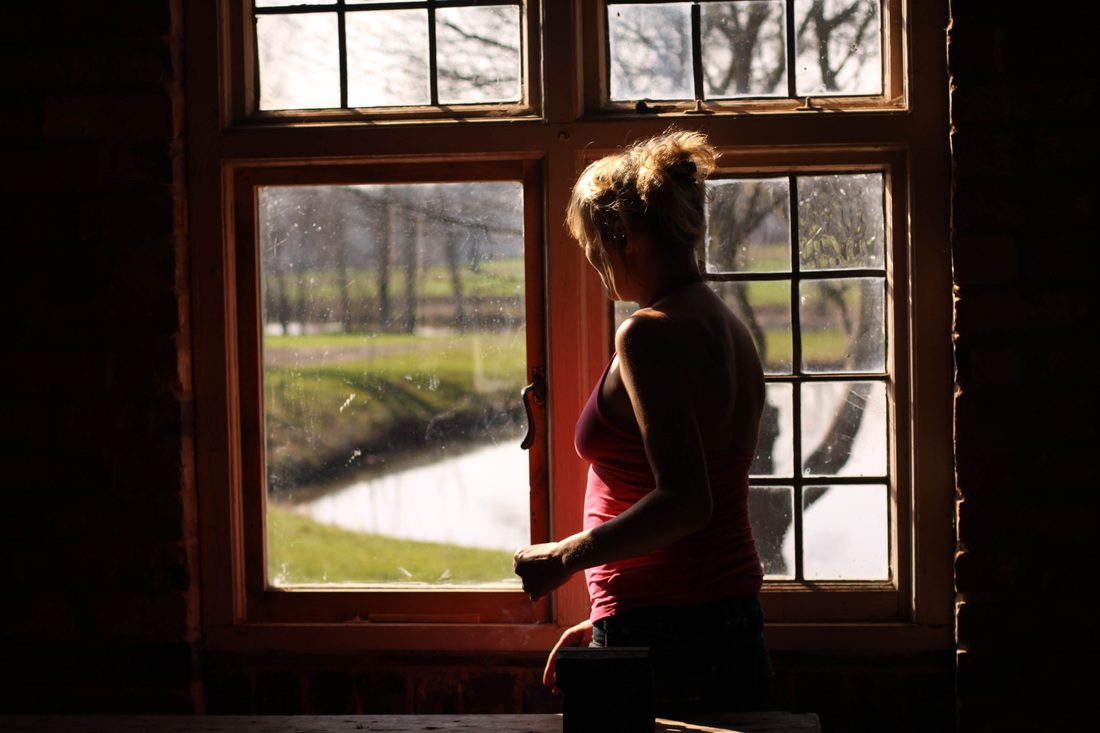
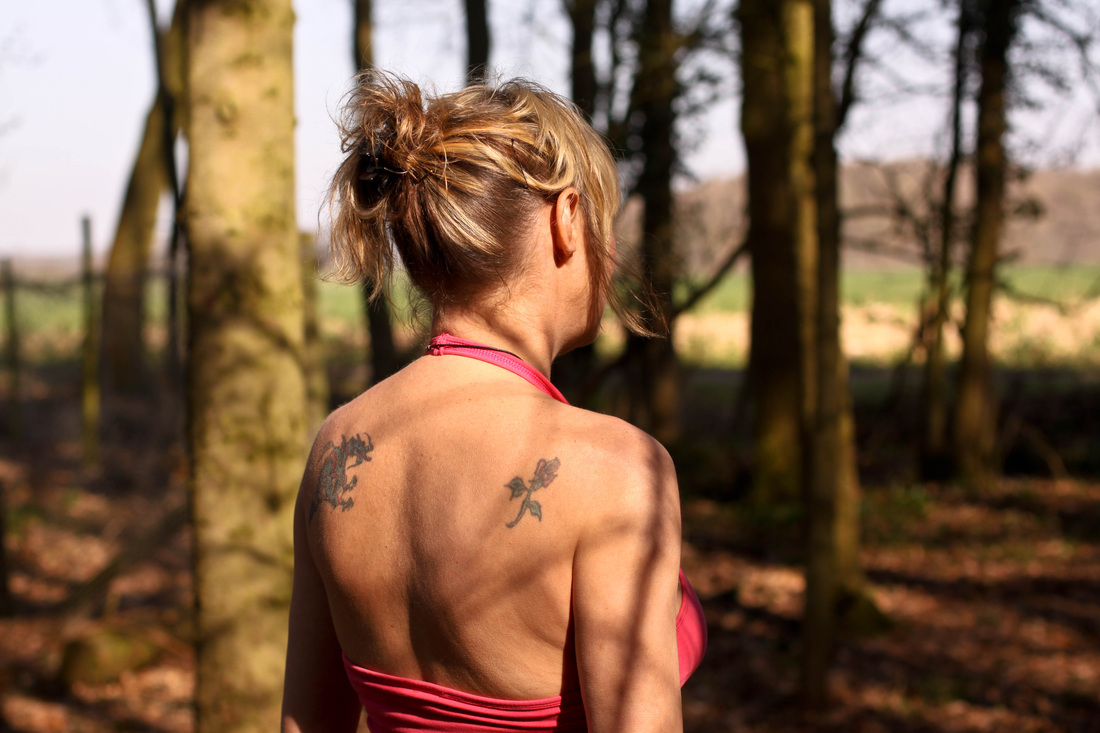
Dappled light.
All three images were taken hand held using a 50mm prime lens.
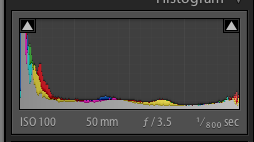
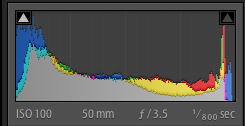
F3.5 ISO 100 Shade WB Spot metering
Image 1: @ 1/800
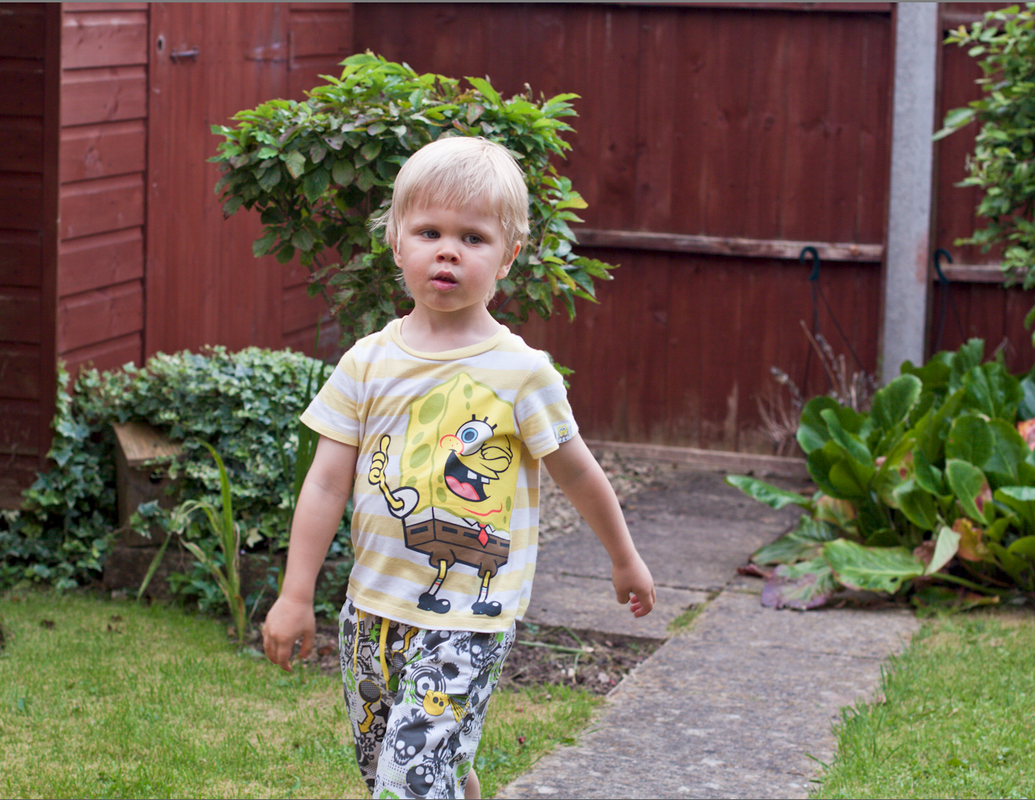
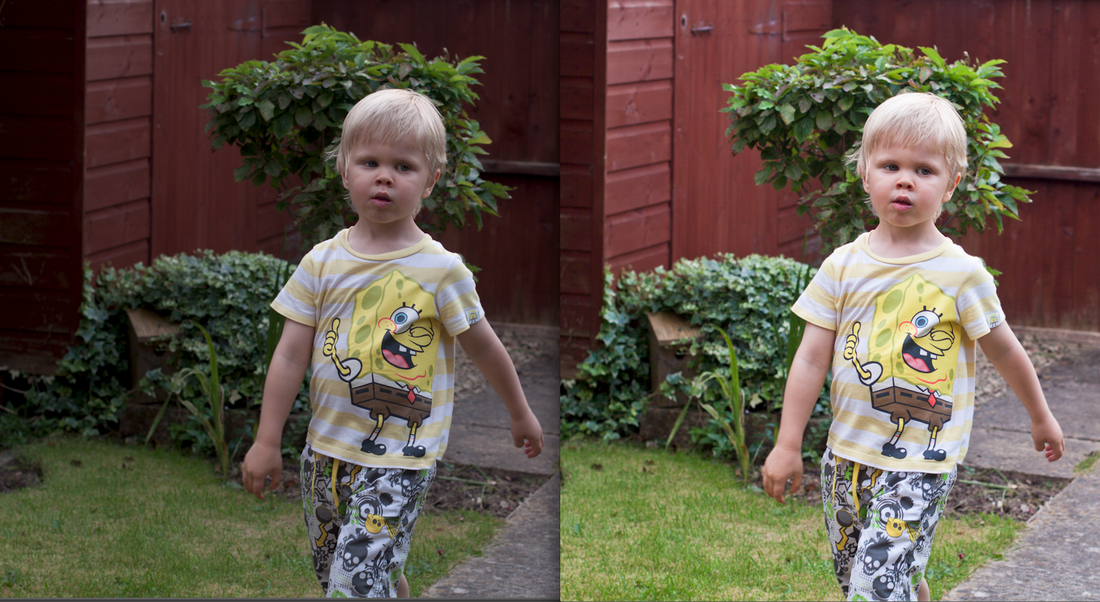
Watching
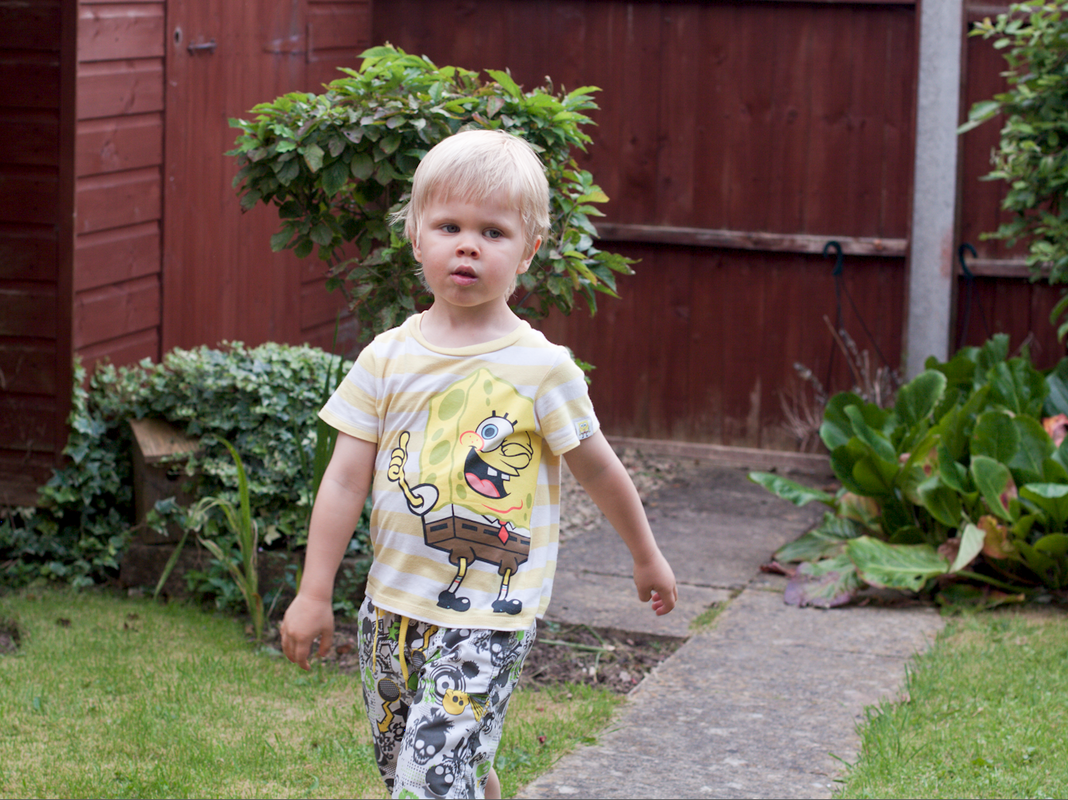
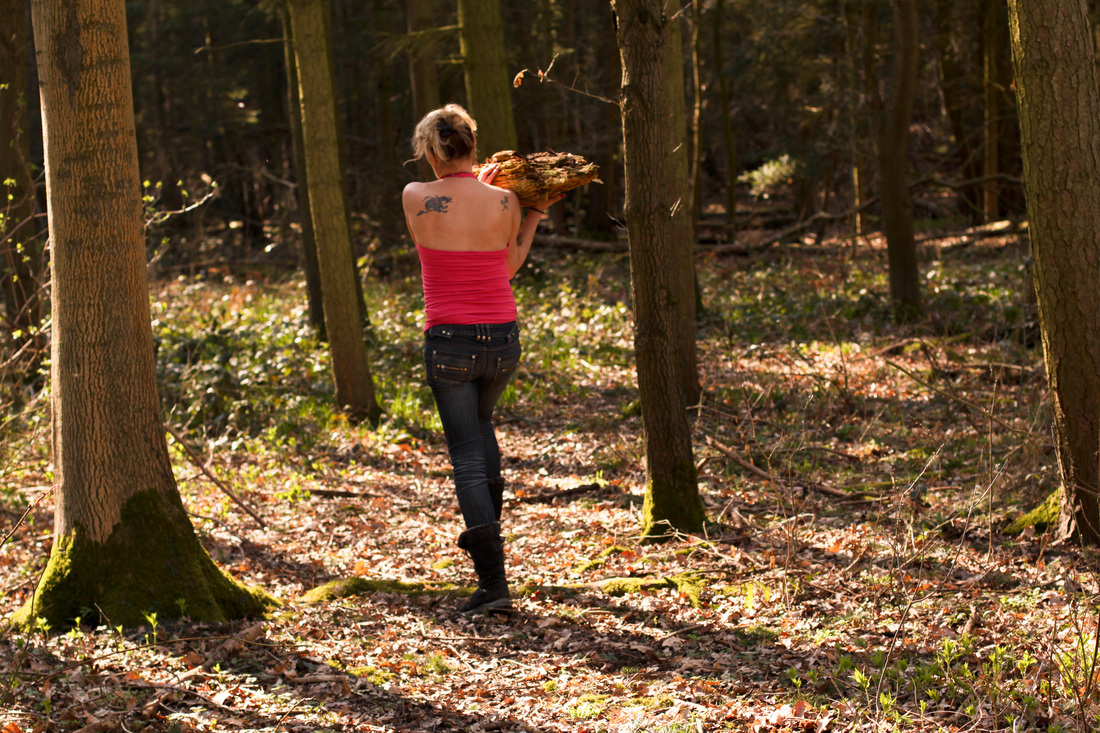
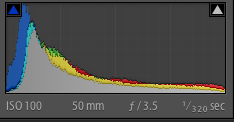
Image 2: @ 1/320
Walking in the Woods
Image 3: @ 1/ 800
Waiting
I did not want these three images to look planned or posed but to suggest private moments caught unawares. I hoped to capture more golden tones even though the photographs were taken around midday on an unusually (for this year!) very sunny day with a clear blue sky. I hope the images work as a narrative set and hope any viewer wonders where she is, what she thinking, where she is going. I have intentionally excluded her face “leaving it up to the viewer’s imagination to draw out potential explanations” pg. 60 “The photograph as contemporary art”.
Landscapes with low-angle incident light.
Mounts Bay, Marazion, Cornwall.
Images 1 , 3, 4 , 5 , 6
9 stop ND filter, which allowed me to shoot at much slower speeds.
All images
Tripod Cable release Bracketed shots Ambient light meter readings
I do not take many landscapes but when I return to Marazion, which I try to do several times a year, I can spend hours just in the small bay and beach area in front of St Michael’s Mount. My dad and his family originate from Marazion and although I have no living family there now, and I was brought up in the Midlands, when I go back I feel I am home. Hence I have a passion for the place and even if the images I take are not always what I really hope to achieve I get immense pleasure in just being there and enjoying my photography, I find it therapeutic. The bay seems timeless; when I return nothings changed. But is does change subtly throughout the year and it is this that I hope to show in my last set of images.
I also shot all these images simultaneously in Raw, for my personal work I much prefer to use this mode of shooting hence some will appear on my Website Gallery but obviously with post-processing.
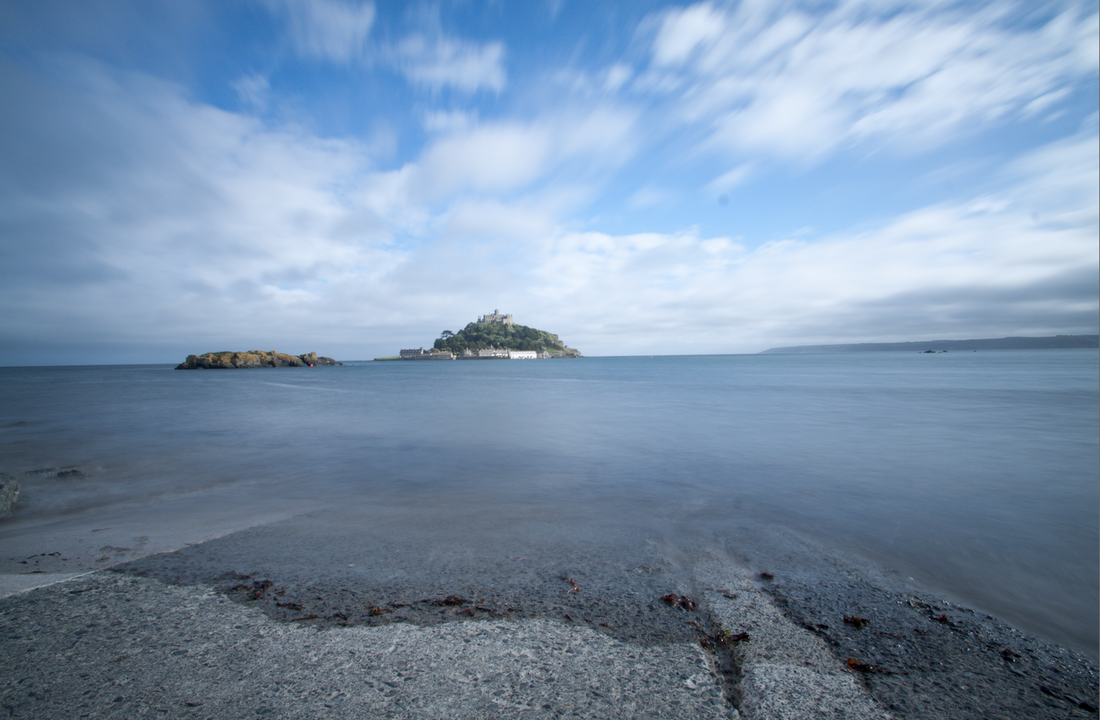
Mounts Bay
Image 1
F18 2 sec ISO 100 10-24mm lens @ 10mm Shade WB
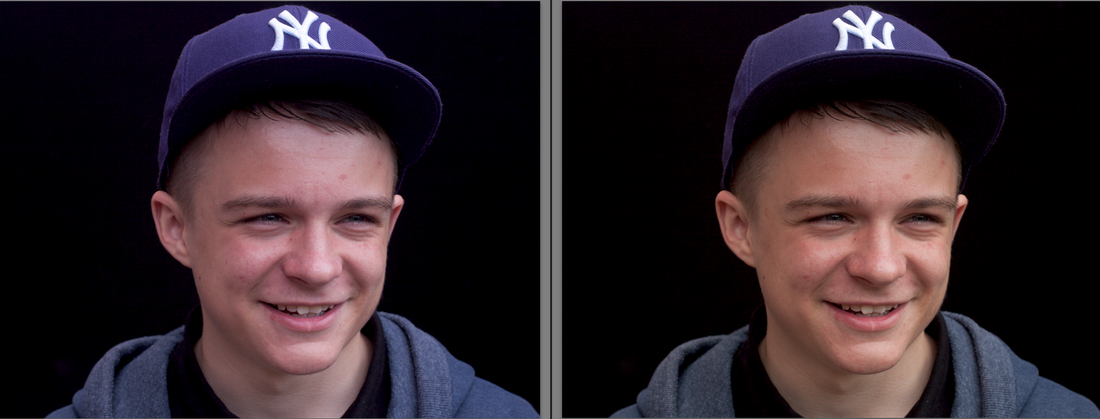
Taken on an initially bright July evening with rapid cloud movement that quickly changed to a stormy evening making the light change whilst taking my shots. I took a better-composed image than this but had left my WB setting on Daylight creating an overall blue cast I felt was unacceptable. Being able to choose the WB post-shoot is a major advantage of RAW as opposed to Jpeg.
Mounts Bay
Image 2
F8 1/80 sec ISO 100 10-24mm lens @ 12mm Shade WB
Circular polariser with a filter factor of 3
Taken early evening July this is the only image taken without the 9-stop filter.
Shooting at a slower shutter speed of 1/50 made the overall exposure brighter but lost the deeper blue tones of the sea and sky.
Mounts Bay
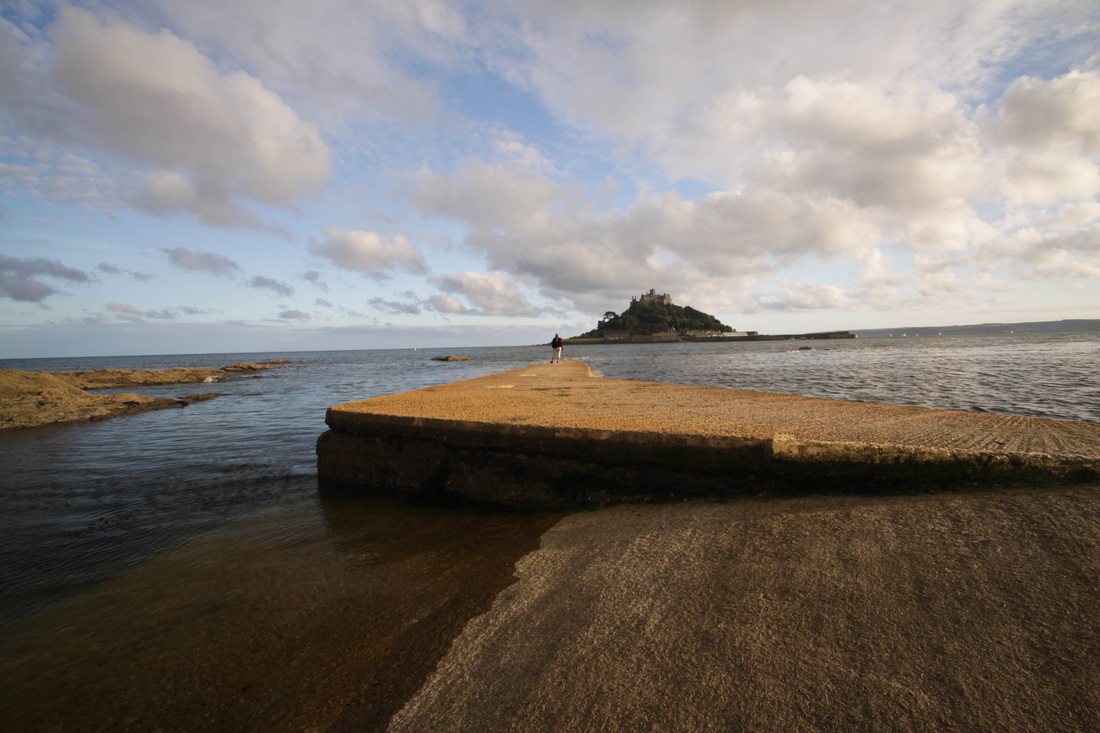
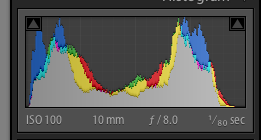
Image 3
F10 4 sec ISO I00 10-24mm lens @ 10mm Shade WB
Taken early October the bay has a golden glow across it typical of this time of year if you are lucky. The foreground is too dark but an increased exposure brightened the orange tones across the sky; even so I have lost some of the depth of colour I was expecting.
Part two
Reduced contrast images.
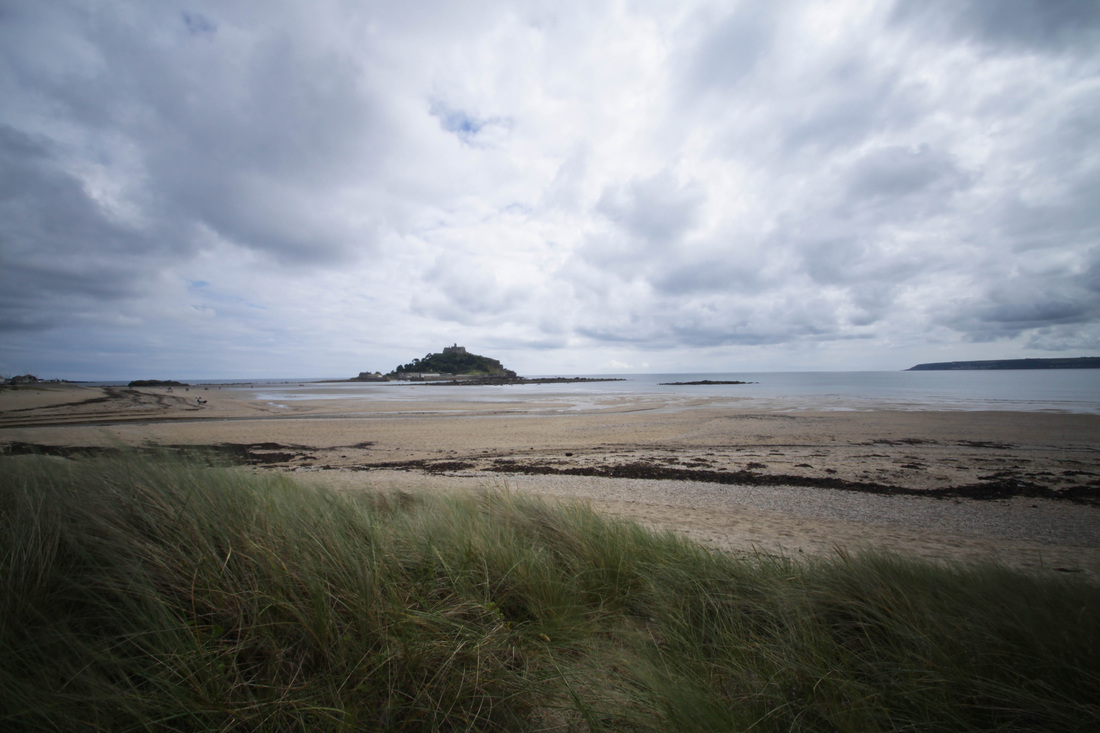
Mounts Bay
Image 4
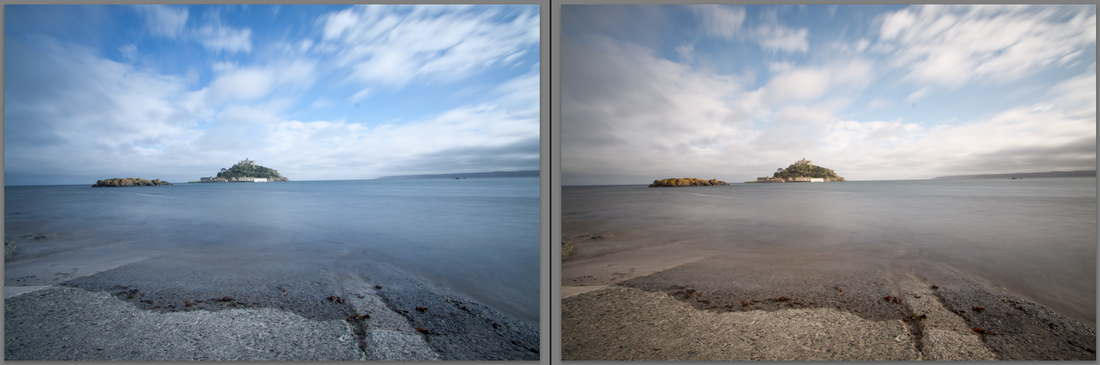
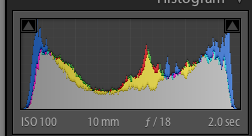
F18 8 sec ISO 100 10-24mm lens @ 10 mm Shade WB
Taken when the sky was dull and overcast but the contrast was not as reduced as I expected it to be.
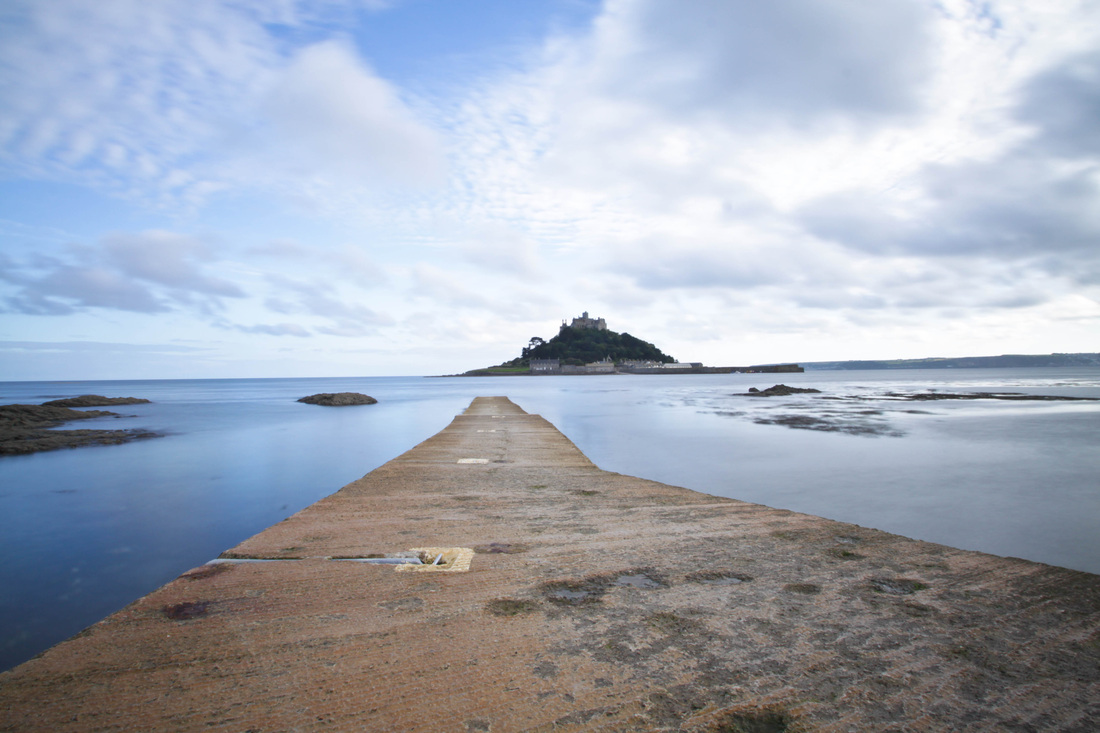
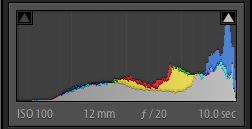
Mounts Bay
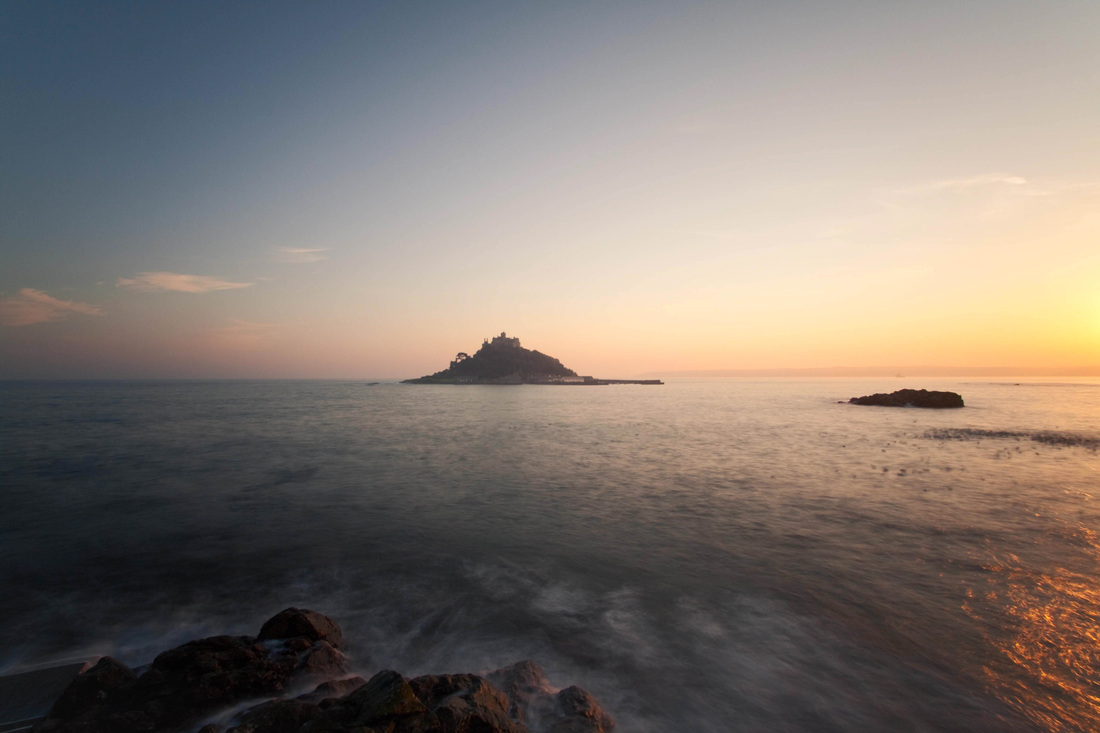
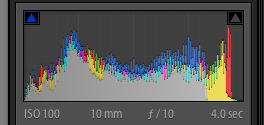
Image 5
F20 10.00 sec ISO 100 10-24mm lens @12mm Shade WB
Taken on a calm quiet summer evening, the light was beautifully soft and non-directional but I was expecting slightly less blue hues. However I am pleased with the outcome and the tranquility of the scene created by the gentle light.
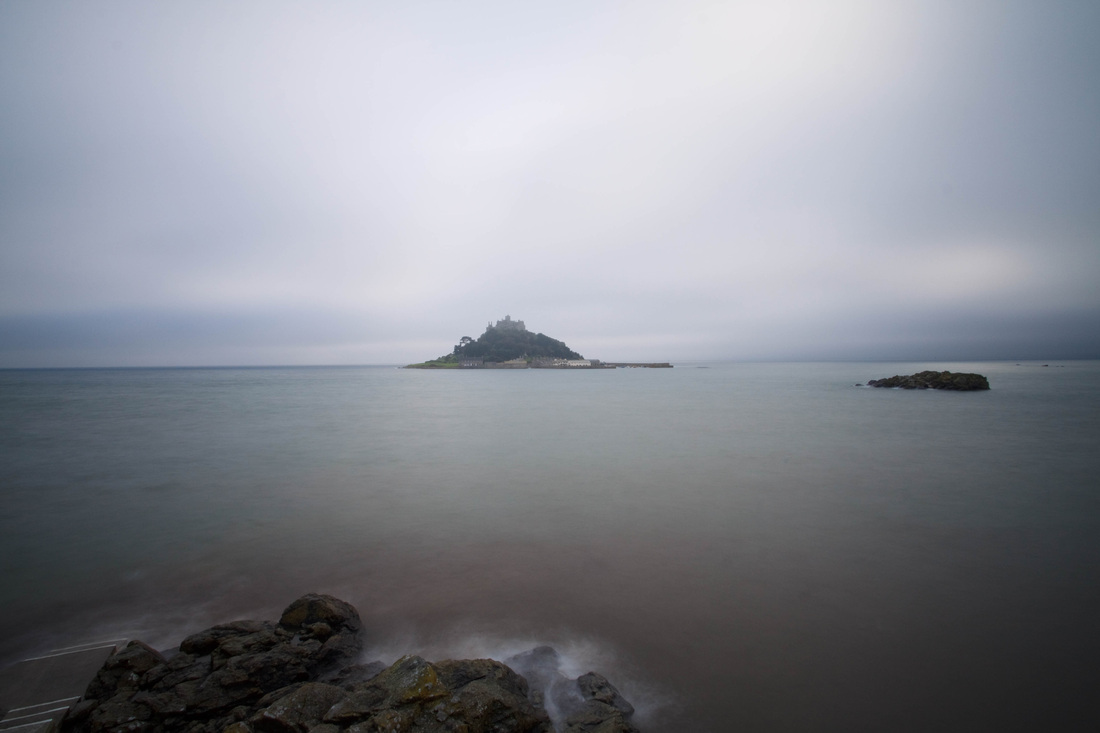
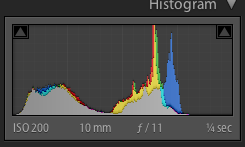
Mounts Bay
Image 6
F11 1/4sec ISO 200 10-24mm lens @ 10mm Shade WB
I love being here out of season, it may not look as beautiful but I like the moody solitary atmosphere. I waited for a dull evening when there was a mist shrouding the top of the Mount to reduce the contrast.
Bibliography
Roswell Angier “ Train your gaze” Ava publishing SA, 2007
Donald Weber “British Journal of Photography” May 2012
Charlotte Cotton “The Photograph as contemporary art” (new edition) Thames and Hudson, London, 2009
Michael Freeman “Perfect Exposure” The Ilex Press Limited, East Sussex, 2009
Photography 1: Digital photography practice Open College of the Arts
Michel Pastoureau “Celebrating Colour in Photography Chroma” Thames and Hudson, London, 2010


 RSS Feed